
Sailing and sail trim · Level R2 · 5 parts · about 18 min
Reefing and rigging checks
5 short parts: When to reef · Slab reefing · Furling, storm · Rig check · Going aloft. Each part explains the idea, then gives the points to remember, the common mistakes, a worked case and a practice question; the Academy unit adds all 28 check questions.
1 · When to reef
When to reef
Reefing makes the sails smaller. Reef early: before the wind arrives, before dark, and while it is still easy.

What reefing does
Reefing reduces sail area and heeling force. Lowering a slab-reefed mainsail also lowers its centre of effort, where its wind force acts. You sail more upright, with less leeway, or sideways drift, and a lighter helm. If you are overpowered, reefing often maintains or improves speed by reducing heel and rudder drag. Reefing also lowers the loads on the sails, rig and crew.
The signs
On a cruising monohull (one hull), regular heel beyond its comfortable angle, often about 20–25°, is a reefing warning. So is heavy weather helm, when you need strong rudder correction to stop the boat turning into the wind. Other signs are difficulty holding course in gusts or constantly easing the mainsheet, the line controlling the mainsail. Learn your yacht's limits and follow its sail-reduction guidance. On a multihull (two or more hulls), do not wait for substantial heel before reducing sail.
Plan ahead
Reef for the strongest wind you expect, not the wind you have. Look at the forecast gusts, not just the average wind. Reef before turning upwind, before nightfall, before a squall reaches you and before you enter a narrow harbour. Reefing is easier and safer in moderate conditions. A saying: "If you think about reefing, it is time to reef."
Which sail first
Reefing the mainsail usually eases weather helm. Reducing the headsail, the sail ahead of the mast, can make that helm heavier. With a large genoa, a headsail extending aft of the mast, you may reduce it first, then reef the main if steering stays heavy. A fractional rig has its forestay, the forward mast-support wire, attached below the masthead. If it has a large main, you usually reef that first. Add sail again only when the wind has clearly eased.
Safety
Wear a lifejacket and a properly fitted safety harness, separate or integrated. A tether is the safety line joining your harness to a jackstay, a strong line or webbing running along the deck. Clip to a suitable jackstay. Use an inboard attachment route and keep your tether short enough to prevent going over the side. Keep the boat as steady as you can while handling lines or working at the mast.
Key figures
- Reef signal (cruising monohull)
- Regular heel past about 20–25°, heavy weather helm
- Plan for
- The forecast gusts, not the average wind
- Reef before
- Turning upwind, dark, squalls, narrow entrances
- On deck
- Lifejacket, harness and short tether to an inboard jackstay
Remember
- Reefing reduces sail area and heeling force; an overpowered boat often goes as fast or faster.
- Reef when heel is regularly excessive or weather helm becomes heavy.
- Reef for the gusts you expect, and before dark, squalls or turning upwind.
- Reduce sail until steering is light and the boat feels balanced.
- Wear a lifejacket and harness; clip on with a tether short enough to prevent going over the side.
Common mistakes
Wrong: Wait and see if the wind really increases before reefing.
Right: Reefing in rising wind and sea is harder and riskier. Reef early; shaking a reef out is easy.
Wrong: Reefing always makes you slower.
Right: An overpowered boat heels, slips sideways and brakes with the rudder. Reefed, she is often faster.
Worked case
The forecast is 14 knots gusting 24 this afternoon. You leave at noon in 12 knots with full sail for a 6-hour passage, mostly upwind, arriving at dusk.
Show the answer
Choose reef depth for your yacht and the forecast 24-knot gusts. Set it before departure or before turning upwind, while conditions are manageable. Reduce the headsail as needed to keep steering balanced. Brief the crew and use lifejackets, harnesses and short tethers on suitable inboard jackstays.
Practice question
Which pair of signs best tells you it is time to reef?
- Light helm and a luffing headsail
- Excessive heel and heavy weather helm
- Slow boat speed and very calm water
- Wind backing and a falling barometer reading
Show the answer
Answer: B. Heel beyond the boat's comfortable angle, or needing strong rudder correction to stop the boat turning into the wind, warns that you are overpowered.
2 · Slab reefing
Slab reefing the mainsail
Slab reefing makes the main smaller. With separate controls: ease the halyard, the line that hoists the main; secure the tack, tension the halyard, then the clew.
The parts
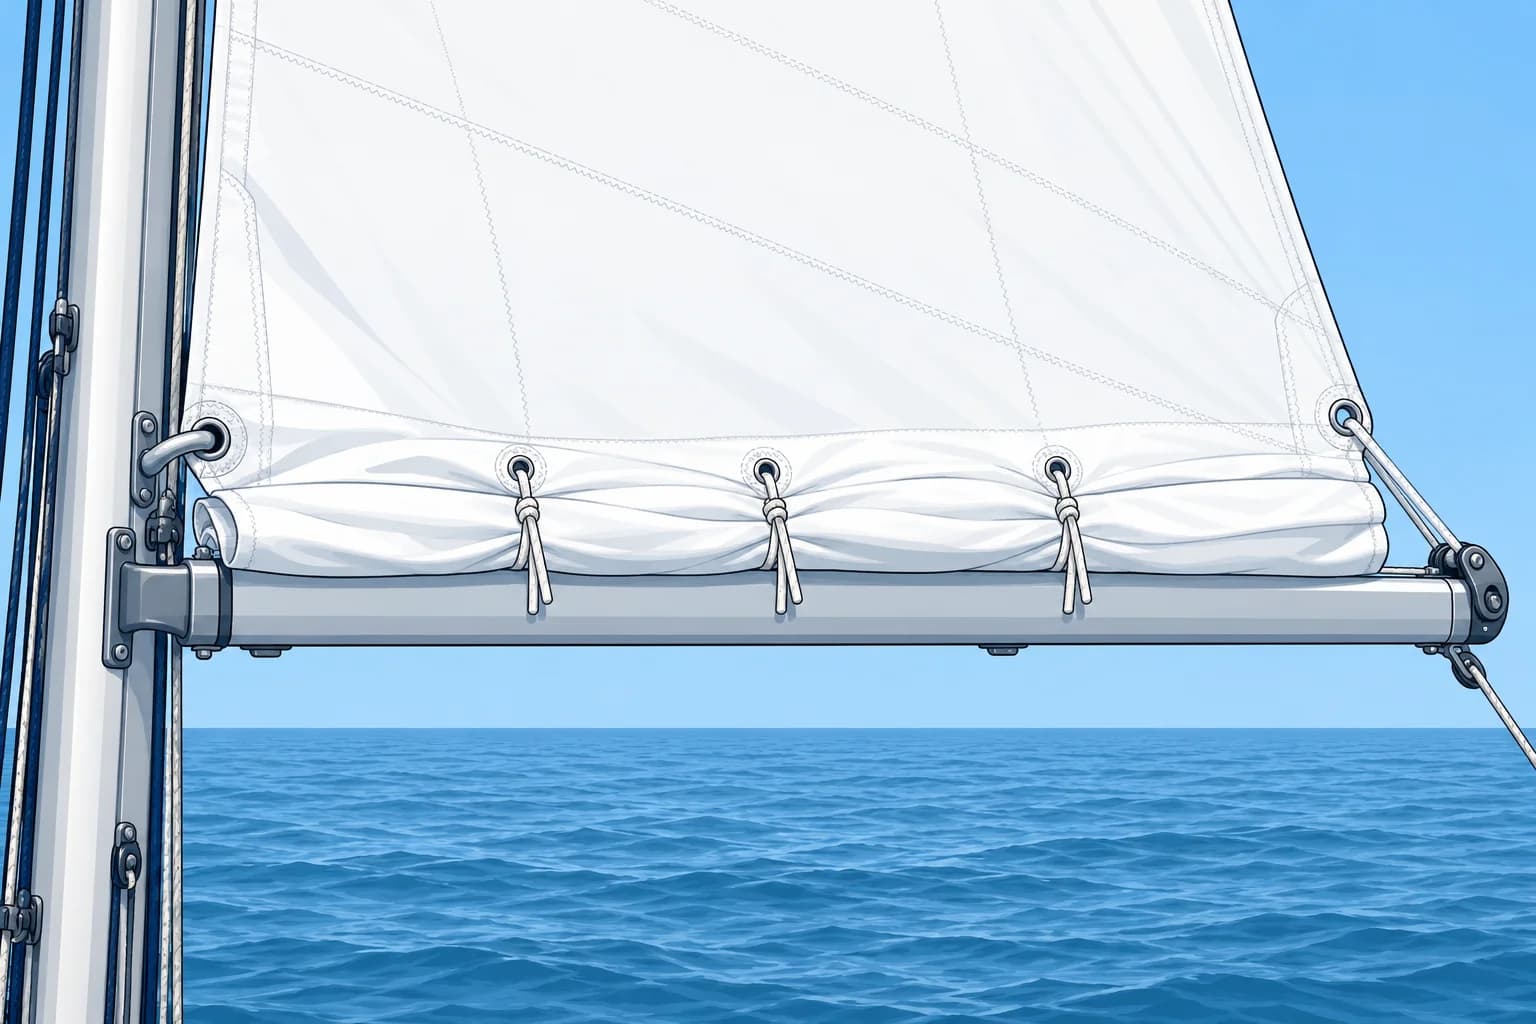
The luff is the front edge; the leech is the aft edge. Reinforced reefing eyes are cringles. The forward tack cringle hooks onto a reefing horn at the gooseneck, the mast–boom joint, or is secured by a tack line. The reef line pulls the aft clew cringle down and aft to its designed reefed position. Small reef points gather the loose sail.
Before you start
Check the reef line runs clear through the right cringle. Sail close-hauled, as near the wind as the boat sails, with the mainsail eased; or heave to, holding a controlled near-stop. Depower the main before lowering it. Support the boom with the topping lift, a line holding up its outer end, or another support approved for your boat. Ease the kicker (vang), the tackle pulling the boom down, as the maker directs.
Single-line and two-line
Many yachts lead reefing lines to the cockpit. Single-line reefing uses a common line for tack and clew, with more friction. Two-line reefing has separate tack and clew lines. The steps below describe a reefing horn or separate lines: secure the tack, tension the halyard, then tension the clew. With single-line reefing, lower to the maker's halyard mark and use the common line to position both cringles as instructed.
Tidying up
Tie reef points loosely round the loose sail with a reef knot, not round the boom. They gather sail; they do not carry reefing loads. Reset the kicker, reset the boom support as instructed and trim. To shake out a reef means to remove it and increase sail area. First depower the main, support the boom and untie all reef points. Then follow your system's sequence for releasing the reef tack and clew and hoisting. Never hoist against a secured reef tack or a tight reef line.
Key figures
- Horn or separate-line order
- Ease → tack down → halyard up → clew down → tie points
- Reef points
- Round the loose sail only, with a reef knot
- Shaking out
- Depower; support boom; untie points before raising sail
- Boom
- Support boom while reefing; reset support as instructed
Slab reefing with a horn or separate tack and clew lines
- Depower the main: sail close-hauled with the sheet eased, or heave to. Support the boom with its fitted system; ease the kicker as the maker directs. — A depowered sail comes down easily, and the boom will not drop on the crew.
- Lower the halyard to its reef mark until the tack cringle reaches the horn or its designed tack position. — A mark on the halyard saves guessing at the mast.
- Hook the tack cringle onto the reefing horn, or pull down the tack line. — The new tack must be secured before the luff is re-tensioned.
- Tension the halyard for a smooth luff; stop if sail slides, the fittings running in the mast track, bind. — Correct luff tension improves sail shape. Binding fittings need checking, not more force.
- Tension the reef line to pull the clew down and aft to its designed reefed position. Stop if it binds; do not force fittings against the boom. — The reef line carries the clew load; reef points only gather the loose sail.
- Tie reef points loosely round the sail only; re-set the kicker, reset the boom support as instructed, trim. — The loose sail is tidy, and the boom is supported as designed.
Remember
- Depower the main first: close-hauled with the sheet eased, or hove-to.
- With a horn or separate lines: ease halyard, tack down, halyard up, clew down.
- The reef line takes the load; reef points only tidy the loose sail.
- Tie reef points round the sail, not the boom.
- To shake out, untie the points first.
Common mistakes
Wrong: Tie the reef points tightly round the boom to hold the sail down.
Right: Tie them round the loose sail only. The reef line holds the clew; ties round the boom can tear the sail.
Wrong: Hoist the halyard to shake out a reef, then untie the points.
Right: Untie every point first. A forgotten tie will rip the sail as the halyard goes up.
Wrong: Reef running downwind, when the boat is calmer.
Right: Downwind, the main can press against the shrouds (mast-support wires) and spreaders (struts holding those wires away from the mast), making lowering difficult. For this procedure, depower it close-hauled or hove-to before lowering.
Worked case
You put in a reef, but the reefed main has a deep bag along the foot and loose, flapping folds along the luff. The reef points are straining.
Show the answer
Depower the main and support the boom. Check the tack and reef-line lead. Slacken straining reef points before adjusting tension. Tension the halyard for a smooth luff; stop if the fittings carrying the sail in the mast track bind. Tension the reef line to draw the clew down and aft to its designed position; do not force fittings against the boom. Retie reef points loosely round the sail. Reset the kicker, reset the boom support as instructed and trim.
Practice question
In slab reefing, what pulls the clew cringle down and aft?
- The kicker line
- The reef line
- The topping lift
- The cunningham
Show the answer
Answer: B. The reef line, or reefing pennant, runs through the clew cringle and pulls it down and aft along the boom.
3 · Furling, storm
Furling headsails, in-mast mains and storm sails
Most cruising boats roll headsails away on a furler. Roll under control, move the sheet car, and for offshore work carry proper storm sails.

Roller furling headsail
A roller furler rolls the headsail round the forestay. Ease the sheet, the line trimming it, and pull the furling line, keeping light sheet tension. Secure the furling line, then trim. Move the car, the sliding sheet lead, forward as you reef. This increases downward pull on the clew, the aft corner, to control the upper leech, the aft edge. Unload pin-stop cars before moving them; follow the maker’s instructions for adjustable cars.
Limits of furling
A genoa, a headsail overlapping the mast, loses efficient upwind shape when deeply rolled. A foam pad along the luff, its front edge, can help it flatten. Stop if furling becomes stiff; never force it with a winch. Check for a riding turn, where one turn traps another on the drum, or a halyard wrapping round the foil, the grooved tube around the forestay.
In-mast furling
An in-mast furling mainsail rolls vertically inside the mast. Follow the maker's routine. Depower the main and ease the mainsheet and kicker as instructed. Set the specified boom angle. Keep light tension on the outhaul, the line pulling the clew along the boom, while furling steadily. A loose roll can crease and jam. Stop if resistance rises; never force a jam with a winch.
Storm sails
A storm jib is a small, strong headsail in a bright colour. A storm trysail sets on the mast in place of the mainsail and sheets independently of the boom. A heavy-weather jib is a strong headsail for strong winds. World Sailing’s Offshore Special Regulations (OSR) set storm and heavy-weather sail requirements for offshore racing.
Rig them before
Your storm jib needs attachment independent of a luff groove, the slot in the forestay foil that holds a sail's front edge. A suitable inner stay with hanks, clips that attach the sail, is one option. Arrange a suitable mast track for the trysail, with the mainsail secured and sheets independent of the boom. Check it can be set with an in-mast-furled main. Practise setting both in calm weather.
OSR sail inventory
For races using OSR 2026–2027: Category 0 needs a storm trysail. Categories 1–2 need a trysail or at least 50% mainsail-luff reduction; Category 3 needs a trysail or at least 40%. Categories 0–2 also need a storm jib. Categories 0–3 also need a heavy-weather jib. Category 4 needs at least 12.5% mainsail-luff reduction or a heavy-weather jib. Check the applicable edition and race requirements. Luff reduction means shortening the sail’s front edge, not reducing its area by that percentage.
Key figures
- Furling a genoa
- Light sheet tension; secure furling line; adjust car safely
- In-mast main
- Boom at maker's angle, light outhaul tension, never force
- OSR 2026–27, Cat 0–2
- Storm jib + heavy-weather jib; Cat 0 trysail; Cat 1–2 see below
- OSR 2026–27, mainsail alternatives
- Cat 1–2: trysail or ≥50% luff reduction; Cat 3: trysail or ≥40%
- OSR 2026–27, Cat 3–4
- Cat 3: heavy-weather jib; Cat 4: ≥12.5% luff reduction or same jib
Remember
- Roll under light sheet tension; secure the furling line, then trim.
- Move the sheet car forward as you reef; unload pin-stop cars and follow the maker's guidance.
- Never force a stiff furler or in-mast main with a winch; find the cause.
- Storm-jib attachment must work without a luff groove; an inner stay is one option.
- Practise setting storm sails in calm weather.
Common mistakes
Wrong: Let the sheet fly and wind in the furling line fast.
Right: Keep light sheet tension for a compact roll and less flogging. Secure the furling line at the chosen reef.
Wrong: A heavily rolled genoa works fine as a storm jib.
Right: A heavily rolled genoa has poor shape. Use a proper storm jib with suitable attachment independent of the luff groove.
Worked case
The wind rises to 25 knots. You roll the genoa to half size, but the top of the sail flaps while the foot is tight, and the boat heels a lot.
Show the answer
Ease the sheet before moving a pin-stop car; use an adjustable car as its maker directs. Move the lead forward a little, then re-trim and check the upper sail. If you remain overpowered, reduce sail further and recheck helm balance. A deeply furled genoa may still have a poor shape.
Practice question
Why keep some tension on the genoa sheet while rolling the sail in?
- So the sail rolls tightly on the foil
- So the furling line runs out faster
- So the boat bears away at the same time
- So the halyard is tensioned as it rolls
Show the answer
Answer: A. Sheet tension produces a compact roll and reduces flogging. The furling line must still be secured.
4 · Rig check
Checking standing and running rigging
The standing rigging holds the mast up; the running rigging moves the sails. Check both regularly for wear, cracks, missing pins and chafe.
Standing rigging
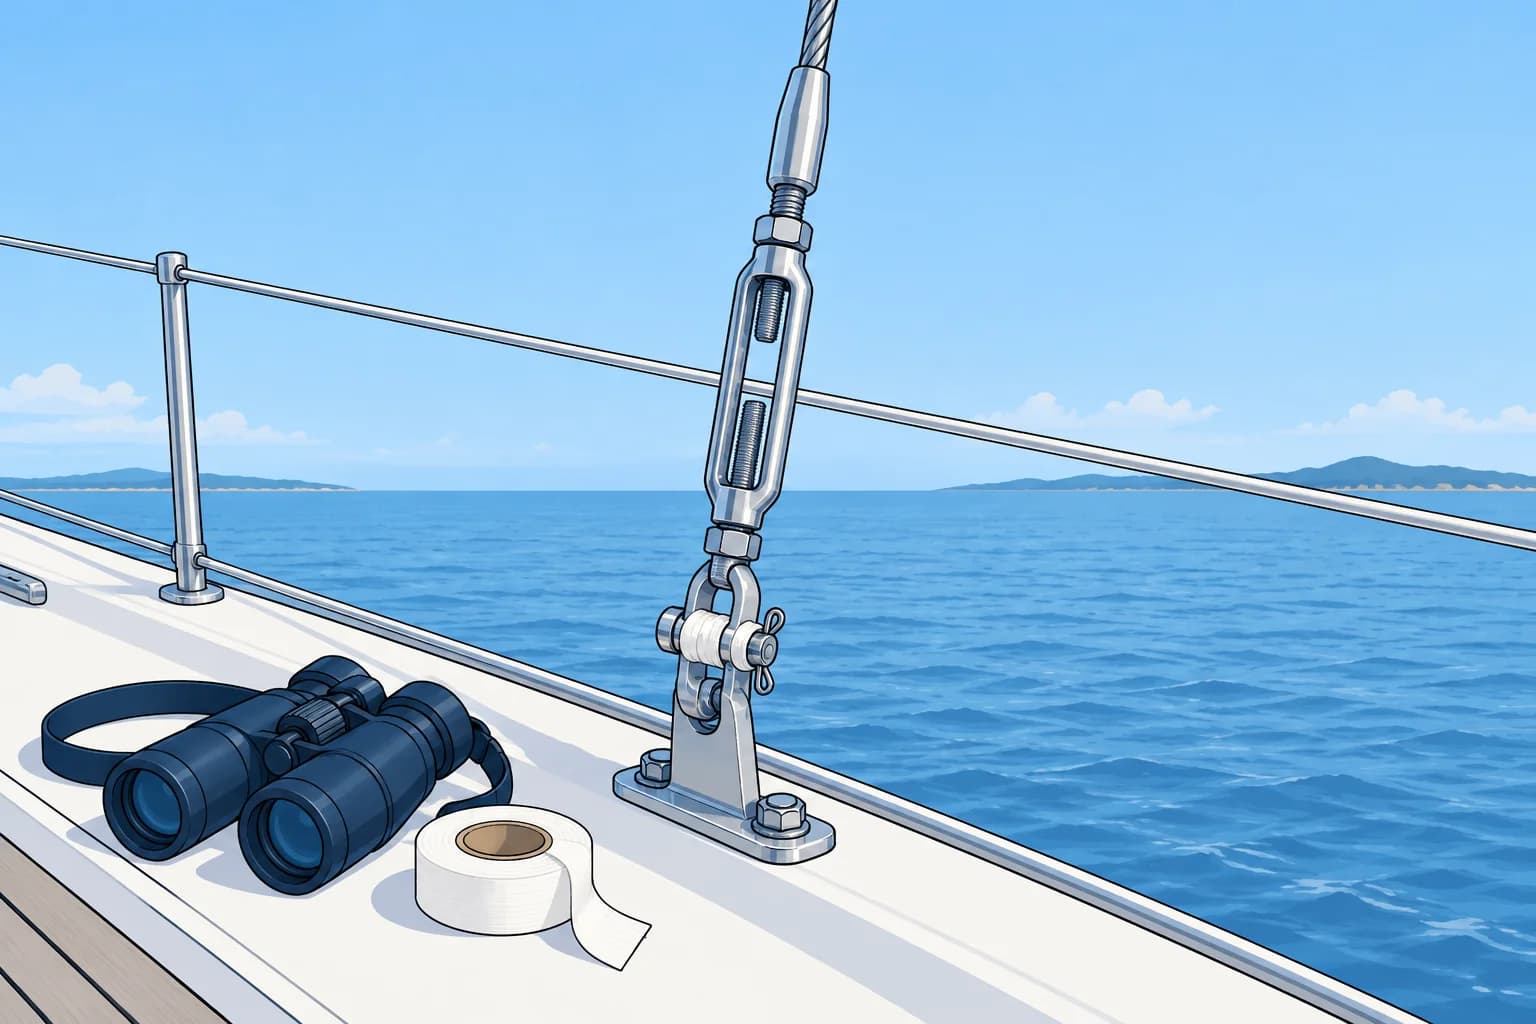
Standing rigging holds the mast up and stays fixed. Shrouds support the mast sideways; the forestay and backstay hold it fore and aft. They end in terminals, often swaged fittings pressed onto the wire, joined to bottlescrews (turnbuckles) and then to chainplates, strong fittings bolted to the hull. One failed part can bring the mast down.
What to look for
Look for broken strands, called meathooks because they snag skin, rust stains or cracks at swaged terminals, bent or worn pins, and movement or leaks around chainplates. Secure each clevis pin, the pin joining the fitting, with the correct retainer. Spread split-pin legs as the fitting maker specifies. Fully thread and seat retaining rings; do not bend them open. Tape sharp ends against snagging. Bottlescrews must be locked so they cannot unwind.
Running rigging
Running rigging is the lines you pull: halyards raise sails, sheets trim them, and control lines adjust shape. Check for chafe, wear from rubbing, at sheaves (pulley wheels), clutches (rope-holding devices), fairleads (line guides) and spreaders. Check screw-pin shackles are tight and moused: secure the pin's eye to the shackle body with suitable wire or a sound cable tie so it cannot unscrew.
When and how often
Look over the rig before each passage and after heavy weather. Walk the deck and look up. Arrange regular professional inspections. Follow the rigger's advice, the equipment maker's guidance and your insurer's requirements for inspection and replacement.
Key figures
- Standing rigging
- Shrouds, forestay, backstay: hold the mast up
- Running rigging
- Halyards, sheets, control lines: move the sails
- Pin retainers
- Split pins spread as specified; rings fully seated; tape sharp ends
- Shackles
- Tight and moused with wire or a cable tie
- Check
- Before each passage and after heavy weather
Deck-level rig check before a passage
- Check each chainplate and bottlescrew: pins, split pins or rings, locking, no cracks. — These carry all the rig loads; a missing pin can drop the mast.
- Run your eye up each wire for broken strands, kinks and rust at the terminals. — Broken strands and rust at terminals warn of failure.
- Check the gooseneck, kicker and boom end fittings. — They take shock loads in gybes and in a seaway.
- Check halyards, sheets and reef lines for chafe at sheaves, clutches and fairleads. — Chafe can weaken a line until it parts.
- Check shackles are tight and moused, each block's sheave turns freely, and the furler turns freely. — Undone shackles and seized blocks fail at the worst moment.
- Look aloft with binoculars at the spreaders, mast fittings and masthead. — You can spot many problems from deck without climbing.
Remember
- Standing rigging holds the mast up; running rigging controls the sails.
- Look for broken strands, cracked or rusty terminals and missing split pins.
- Spread split pins as specified; fully seat retaining rings without bending them open. Tape sharp ends; lock bottlescrews.
- Check lines for chafe at sheaves, clutches and fairleads; mouse shackles.
- Check before every passage and after heavy weather; follow the rigger's replacement interval.
Common mistakes
Wrong: Tape alone will keep a clevis pin in place.
Right: Use the specified retainer. Spread split-pin legs as instructed or fully thread and seat a retaining ring. Tape only covers sharp ends; it does not replace the retainer.
Wrong: If the wire looks shiny, the rigging is fine.
Right: Stainless-steel wire can crack inside a terminal without visible warning. Check for visible cracks and rust stains, and follow professional inspection and replacement advice.
Worked case
Before a weekend passage, you find a rust stain and a fine crack at the bottom swaged terminal of a lower shroud. Everything else looks good.
Show the answer
Do not sail. A cracked swage can fail without warning and the mast could come down. Have a rigger replace the terminal, or the whole shroud, before going out. Ask them to check the other terminals of the same age, as they may be close behind.
Practice question
Which of these is standing rigging?
- The mainsheet
- The jib halyard
- The lower shroud
- The reef line
Show the answer
Answer: C. Shrouds and stays hold the mast up and stay fixed: standing rigging. Sheets, halyards and reef lines are running rigging.
5 · Going aloft
Going aloft safely: an introduction
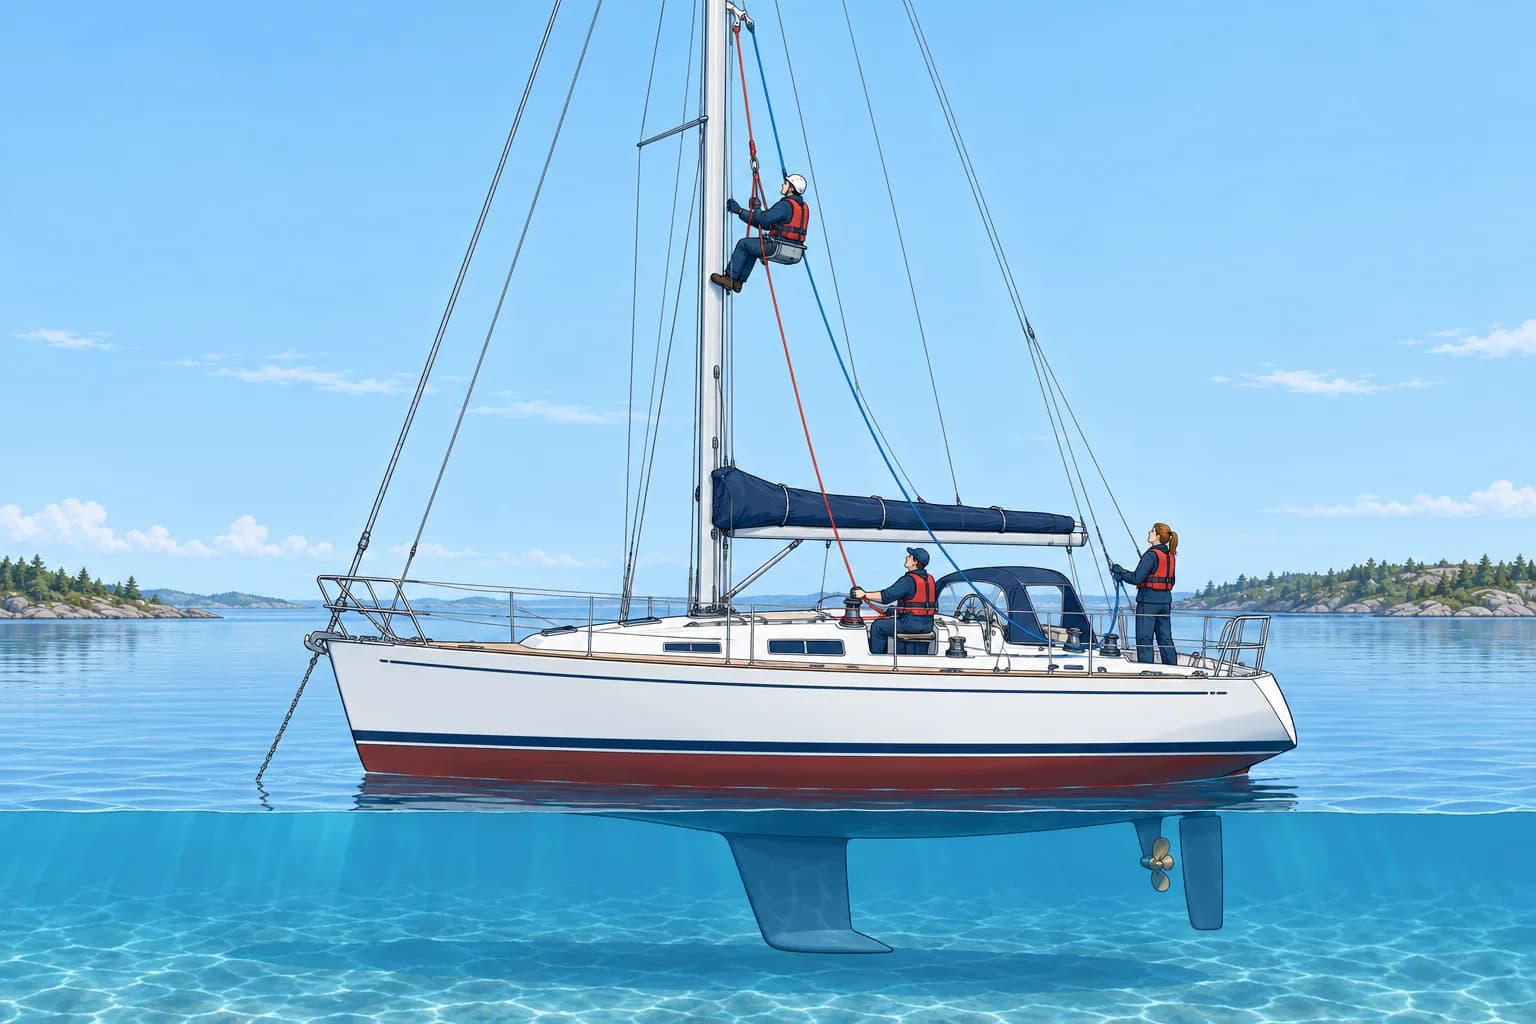
Going aloft needs a trained team, a fitted chair, a harness suitable for suspension, two independent halyards, controlled winches and nobody below.
Plan it
Use binoculars from deck first. If you lack specific aloft training or are not confident, use a professional rigger. Plan any ascent in harbour or at anchor in calm water. Brief the team and tie tools and spares on with lanyards, short securing cords. Enthusiasm and calm water do not make unchecked equipment safe.
Equipment
Use a fitted bosun's chair, a suspended working seat, and a separate full-body harness approved by its maker for suspension aloft. Tie the working halyard to the chair and the independent safety halyard to the harness's rated point, following equipment instructions. Use separate, checked masthead sheaves (pulley wheels). Never use suspect equipment. A trained person must tie, secure and check suitable bowlines (fixed-loop knots) with adequate tails. Do not rely on snap shackles. Wear a helmet and non-slip shoes.
The deck team
Keep the clutch, a rope-holding device, closed while hoisting or holding. Use the maker's specified winch turns. Continuously control the tail, the free rope end leaving the winch. Never rely on the self-tailer, the winch's rope-gripping jaws, alone. One person winches; a second controls the independently secured safety line and takes up slack as you hoist. Ideally, a third watches and relays messages. Never leave the winch while someone is aloft.
Below and coming down
Nobody stands under the mast: a dropped tool can kill. Before opening the clutch, take the load on adequate winch turns and control the tail. Lower slowly, with the safety-line handler paying out at the same rate and keeping slack minimal. Follow the winch and clutch instructions.
Key figures
- Lines
- Working halyard + independently secured safety; separate sheaves
- Attachment
- Working to chair; safety to separate suspension-rated harness
- Winch
- Clutch closed hoisting/holding; adequate turns; tail controlled
- Deck team
- Winch operator, safety-line handler and ideally a spotter
Hoisting a crew member aloft (in harbour)
- Check training, the fitted chair, separate full-body harness rated for suspension aloft, both halyards and their separate sheaves. Never load suspect equipment. — An unchecked lifting path or attachment can fail. Use a professional rigger if you lack specific aloft training.
- Tie the working halyard to the chair and the safety halyard to the suspension-rated harness's specified attachment point, following equipment instructions. Secure tools with lanyards. — A trained person must tie, secure and check suitable bowlines with adequate tails. Do not rely on snap shackles; lanyards secure tools.
- Lead the working line through the clutch to the winch. Keep the clutch closed while hoisting or holding, with adequate winch turns and the tail controlled. A dedicated safety-line handler controls the independently secured safety line. — Separate lifting paths and attachments provide backup; the safety must be independently secured, not merely held by hand.
- Hoist steadily while the safety-line handler takes up slack on the independently secured safety line. — A slack safety line lets the climber fall further before it holds.
- Keep everyone clear below. Before opening the clutch, take the load on adequate winch turns and control the tail. Lower slowly, with the safety-line handler paying out at the same rate and keeping slack minimal. — Control both lines throughout descent. A slack safety line allows a longer fall.
Remember
- Plan in calm water; check first with binoculars. Use a rigger if you lack specific aloft training.
- Use a fitted chair and separate full-body harness rated for suspension aloft; two checked halyards through separate sheaves.
- Working line to chair, safety to harness; trained person ties, secures and checks bowlines. Tools on lanyards.
- Clutch closed hoisting/holding; adequate winch turns and controlled tail; never trust a self-tailer alone.
- Nobody below; take load on winch before opening clutch; lower both lines together, with minimal safety slack.
Common mistakes
Wrong: One good halyard is enough for a short trip up the mast.
Right: Use an independent safety halyard attached to a separate full-body harness rated for suspension aloft. Check both lifting paths and attachments; never use suspect equipment.
Wrong: The self-tailer will hold the climber while the winch person helps.
Right: Never leave the winch. Keep the clutch closed while hoisting or holding, with adequate turns and the tail controlled; a dedicated safety-line handler controls the independently secured safety line.
Worked case
At anchor in calm water, a halyard sheave needs checking at the masthead. A keen crew member wants to go up on the spinnaker halyard alone, using a snap shackle.
Show the answer
First inspect from deck with binoculars. If the crew lack specific aloft training, use a professional rigger. Do not use a suspect halyard or sheave for either line. A trained team must check two independent lifting paths and secure attachments: working line to chair, safety line to separate suspension-rated harness. Calm water and enthusiasm do not make unchecked equipment safe.
Practice question
The working halyard is held by its clutch. Before opening it to lower, what must you do?
- Open the clutch and trust the self-tailer to hold
- Take the load on winch turns and control the tail
- Release the safety line so it cannot get tangled
- Ask the climber to grip the mast while you lower
Show the answer
Answer: B. Take the load on adequate winch turns and continuously control the tail before opening the clutch. Never rely on the self-tailer alone. Lower slowly while the safety-line handler pays out at the same rate, keeping slack minimal.