
Medical care on board · Level R3 · 6 parts · about 21 min
Wounds, burns and fractures
6 short parts: Severe bleeding · Wounds · Burns · Fractures · Head and spine · Crush and shock. Each part explains the idea, then gives the points to remember, the common mistakes, a worked case and a practice question; the Academy unit adds all 36 check questions.
1 · Severe bleeding
Life-threatening bleeding
Press hard on severe bleeding. Pack only deep limb, groin or armpit wounds. Use a tourniquet if pressure cannot stop limb bleeding.
Recognise it
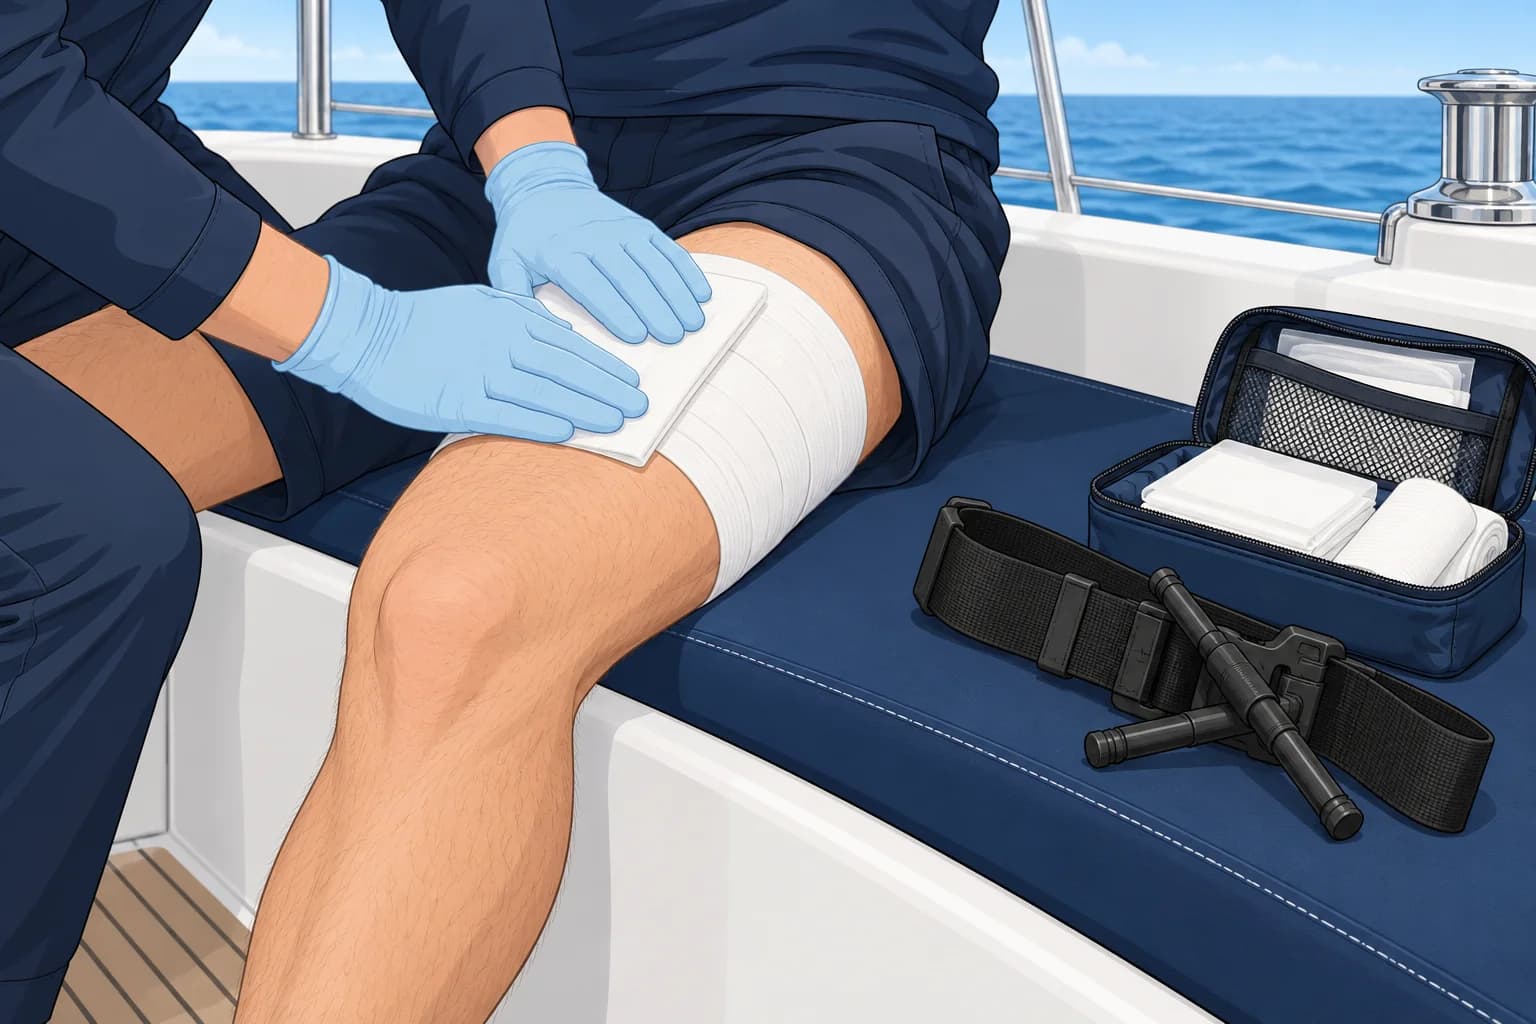
Life-threatening bleeding is blood that spurts, pours or soaks through clothing and dressings fast, or pools quickly on the deck. It can come from a deep cut on a sharp fitting, a knife slip in the galley or a propeller injury. Do not wait to see if it stops: act at once and send someone to call for help.
Direct pressure
Put on gloves if within reach, but do not delay. Press firmly and directly on the bleeding point with a dressing, clean cloth or your hand. For a deep limb, groin or armpit wound, push the dressing into it (packing) and keep pressing. Never pack the chest or abdomen. If blood soaks through, do not lift the dressing to look: add more on top and press harder.
Haemostatic dressing
A haemostatic dressing is gauze treated with a substance that helps blood clot. For a deep limb, groin or armpit wound, pack it in and press continuously for the time stated on the packet. Never pack the chest or abdomen. Once bleeding is controlled, wrap a pressure bandage firmly over the dressing to hold it.
Tourniquet
A tourniquet is a strap that squeezes a limb so hard that blood flow stops. Use one on an arm or leg when firm pressure does not stop the bleeding. Put it 5–7 cm above the wound, not over a joint, and tighten until the bleeding stops. It hurts; that is expected. Write the time on it or on the casualty, and never loosen it yourself.
Manufactured beats improvised
A purpose-made tourniquet works far better than a belt or a scarf, which often fail to stop the flow. If one tourniquet does not stop the bleeding, put a second one just above the first. Keep the casualty lying down and warm, watch for shock, and get radio medical advice early: a tourniquet means hospital.
Key figures
- First action
- Firm direct pressure
- Haemostatic dressing
- Pack limb/groin/armpit only; press as the packet directs
- Tourniquet position
- 5–7 cm above the wound, not over a joint
- Tourniquet time
- Write it down; never release it yourself
Controlling life-threatening bleeding
- Make it safe, then send a crew member to call for help. — Severe bleeding needs hospital care, and help at sea takes time.
- Press firmly and directly on the wound with a dressing or your hand. — Pressure squeezes the damaged vessels and lets a clot form.
- Pack only deep limb, groin or armpit wounds and keep pressing. Never pack the chest or abdomen. Once bleeding stops, secure the dressing with a firm pressure bandage. — Pressure must reach the bleeding point, not just the skin.
- If limb bleeding continues, apply a tourniquet 5–7 cm above the wound, not over a joint. — A tight tourniquet stops blood reaching the wound.
- Tighten until the bleeding stops; note the time and never release it. — Doctors need the time; loosening it can restart fatal bleeding.
- Lay the casualty down, keep them warm and watch for shock. — Blood loss leads to shock, and cold makes bleeding worse.
Remember
- Act at once: press firmly and directly on the wound.
- Pack only deep limb, groin or armpit wounds, never chest or abdomen; keep pressing and add dressings on top.
- Limb bleeding that pressure cannot stop: tourniquet, 5–7 cm above, not over a joint.
- Note the tourniquet time and never loosen it.
- Keep the casualty flat and warm, and call for help early.
Common mistakes
Wrong: Lift the dressing every minute to see whether the bleeding has stopped.
Right: Keep pressing. Add dressings on top; lifting tears away the clot.
Wrong: Loosen the tourniquet now and then to let blood reach the limb.
Right: Never release it. Only a doctor should remove a tourniquet.
Wrong: A belt makes a good tourniquet.
Right: Improvised tourniquets often fail. Carry a manufactured one if you sail offshore.
Worked case
Cleaning fish in the cockpit, a crew member slips and the knife cuts deep into his thigh. Bright red blood is soaking his shorts fast. You are two hours from port.
Show the answer
Shout for help and have a crew member call the coastguard. Press hard on the wound with a dressing or your hand at once, then pack it with the haemostatic dressing and keep pressing. If the bleeding does not stop, apply the tourniquet 5–7 cm above the wound, tighten until it stops and note the time. Lay him down, keep him warm and get radio medical advice.
Practice question
Blood is pouring from a deep cut on a crew member’s forearm. What is your first action?
- Raise the arm and wait for it to slow
- Press firmly and directly on the wound
- Clean the wound with fresh water first
- Look for the pressure point at the elbow
Show the answer
Answer: B. Firm direct pressure is the first and most important action.
2 · Wounds
Wounds and infection at sea
Clean small wounds with drinkable water. Cover them and keep the dressing dry. Watch for infection every day.
Clean it well
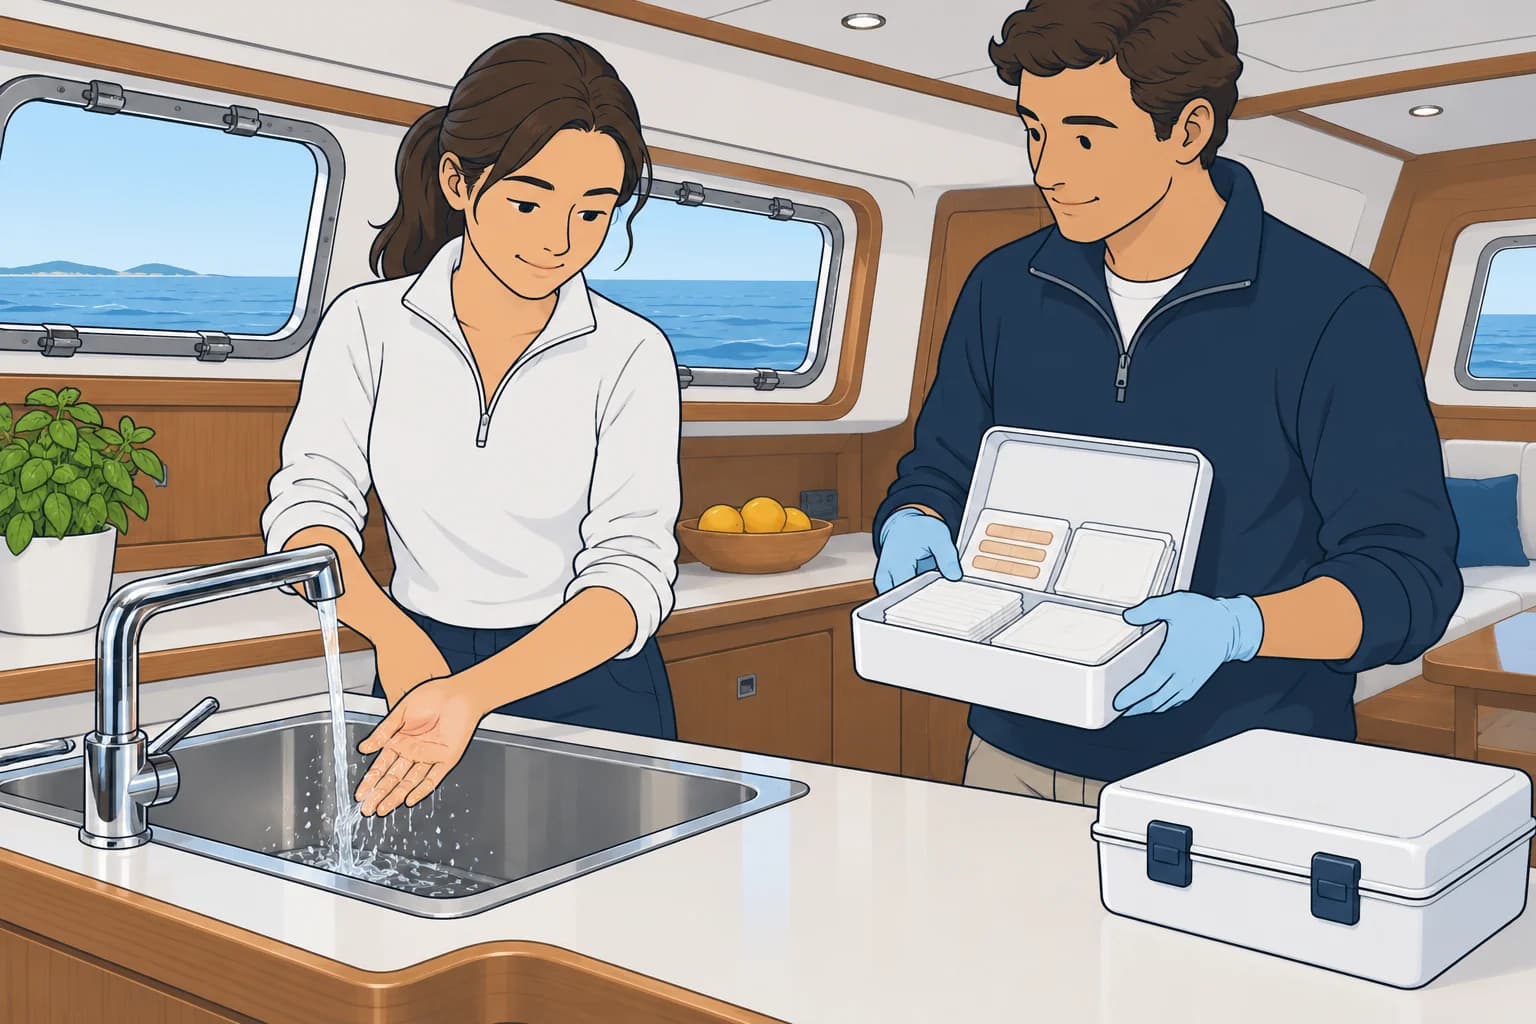
For a small cut or graze, wash your hands and put on gloves. Rinse the wound under plenty of drinkable running water until it looks clean; tap water from the tanks is fine if it is safe to drink. Remove loose dirt you can rinse away. Seawater is not clean enough for washing a wound. Pat the skin around it dry.
Close and cover
Bring the edges of a small, clean, straight cut together with wound-closure strips, then cover it with a non-stick dressing. Change the dressing if it gets wet or dirty. A wound needs a doctor if it is deep or gaping, will not stop bleeding, is on the face or a joint, has something stuck in it, or came from a bite.
Why infection matters at sea
On a boat, hands are wet, decks are dirty and wounds stay damp, so infections start easily. Cuts from fish spines, hooks, shells, coral and barnacles carry germs deep under the skin. A small infected cut can become serious days from port. Do not try to pull out a deeply embedded fish hook or object: support it and ask for advice.
Signs of infection
Check wounds every day. Warning signs are redness spreading from the wound, swelling, heat, worsening pain, pus, red streaks up the limb, swollen glands, fever or feeling unwell. If you see them, get radio medical advice early: the doctor may tell you to start a medicine from the kit.
Tetanus
Tetanus is a serious infection caused by germs from soil and dirt that enter through wounds. Vaccination protects you. Before a long passage, check that every crew member’s tetanus vaccination is up to date and arrange any needed vaccination before sailing.
Key figures
- Cleaning
- Plenty of drinkable running water
- Check wounds
- Every day
- Infection signs
- Spreading redness, heat, swelling, pus, red streaks, fever
- Before a passage
- Tetanus vaccination up to date
Remember
- Rinse wounds with plenty of drinkable running water, not seawater.
- Close small clean cuts with strips; cover and keep dry.
- Deep, gaping, bitten or contaminated wounds need medical advice.
- Check every wound daily for spreading redness, heat, pus or fever.
- Make sure tetanus vaccination is up to date before a passage.
Common mistakes
Wrong: Rinse a cut in the sea; salt water cleans it.
Right: Seawater carries germs. Use plenty of drinkable fresh water.
Wrong: Close a dirty, deep wound tightly with strips.
Right: Closing a dirty wound traps germs. Clean it, cover it and get medical advice.
Worked case
Three days into a passage, a crew member shows you a cut on her hand from a shell. It is red, swollen and hot, a red line is running up her forearm and she feels shivery.
Show the answer
These are signs of a spreading infection. Get radio medical advice now: the doctor may tell you to start an antibiotic from the kit and may advise a change of plan. Meanwhile, clean and dress the wound, rest and raise the hand, and keep her drinking. Check and record her temperature and the redness regularly.
Practice question
What should you use to clean a small cut on board?
- A saline wipe over visible grit
- Plenty of drinkable running water
- Seawater followed by antiseptic
- Closure strips before thorough cleaning
Show the answer
Answer: B. Drinkable water in plenty cleans well. Seawater is not clean enough.
3 · Burns
Burns and scalds
Cool heat burns with cool running water for 20 minutes; keep them warm. Loose cling film for heat burns only, never face or chemical burns; use non-stick dressings there.
Burns on boats
A burn is skin damage from heat, friction, chemicals or electricity. A scald is a heat burn from hot liquid or steam. On boats they come from the galley stove in a seaway, a kettle sliding off, hot engine parts, exhaust, a rope running fast through your hands, and fire.
Cool a heat burn
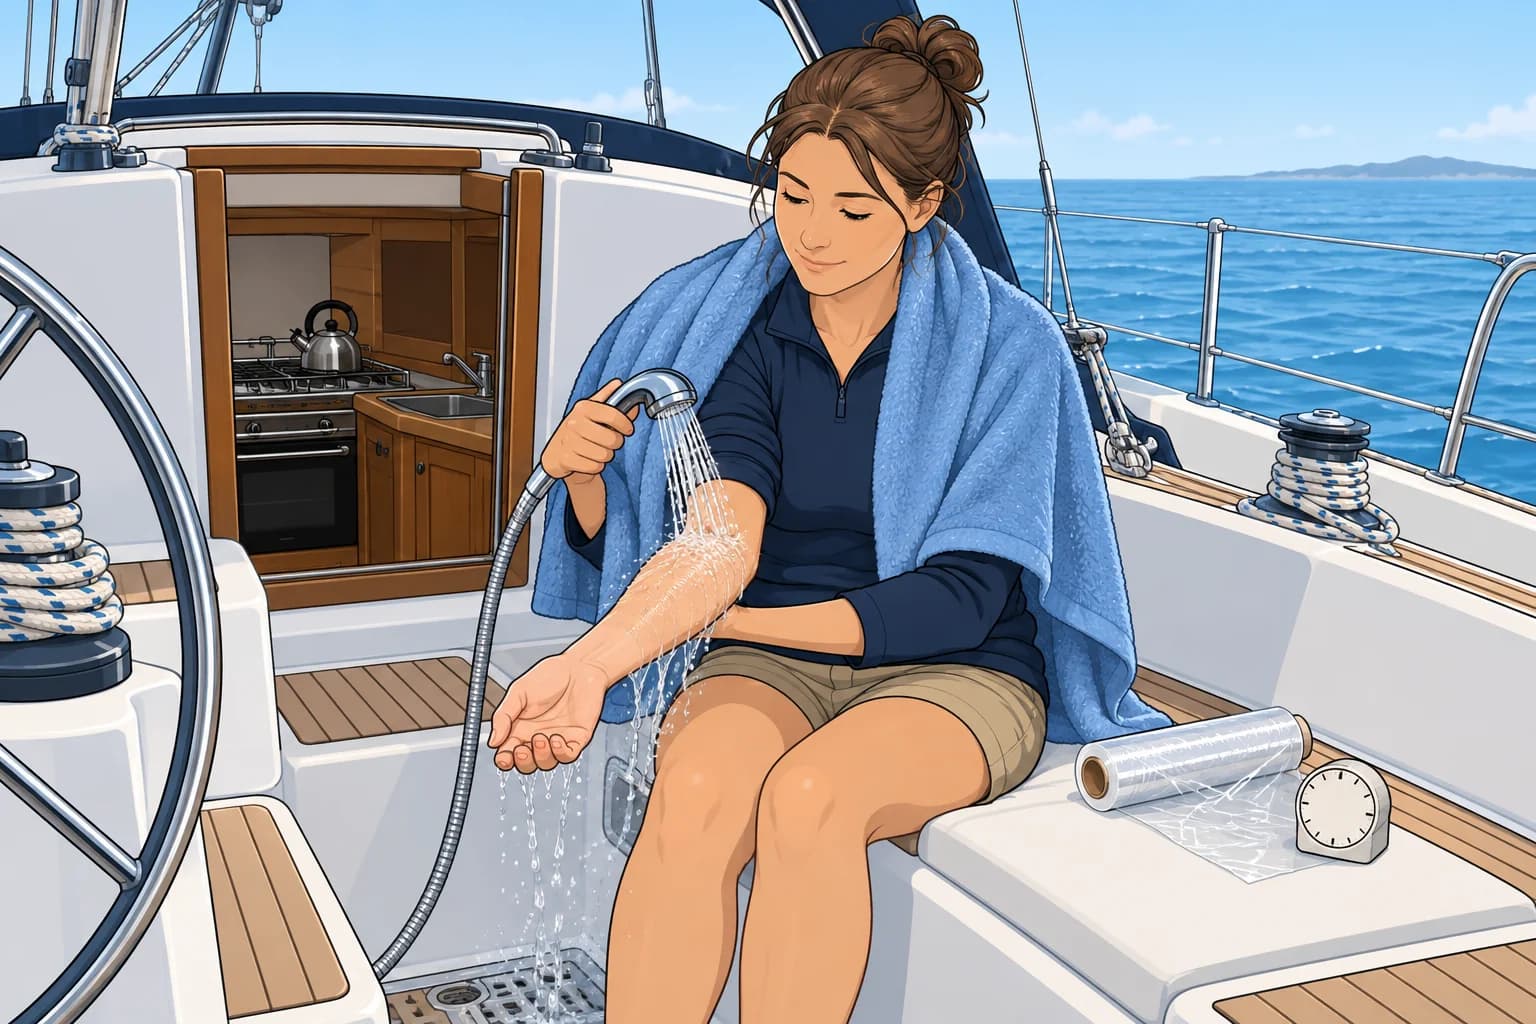
Cooling stops the burn going deeper and eases pain. Start as soon as possible and cool with cool running water for 20 minutes. Cooling still helps for up to 3 hours after the burn. Use fresh water from the tanks or a hose; if fresh water is short, clean cool seawater is better than no cooling. Never use ice or iced water.
Cool the burn, warm the casualty
Cooling a large area can make the casualty cold, especially a child or an older person. Cool only the burnt area and keep the rest of the body covered and out of the wind. For a large heat burn, pause cooling if shivering starts and warm the casualty.
Cover and protect
While cooling, remove rings, watches and loose clothing before swelling starts; leave anything stuck to the skin. After cooling, lay cling film loosely in strips over heat burns, never around a limb or over the face. Do not use it on chemical burns. Use a clean non-stick dressing where film is unsuitable; a clean plastic bag suits a burnt hand. No butter, oil, toothpaste or creams; do not burst blisters.
When to get advice
Get radio medical advice for burns larger than the casualty’s hand, on the face, hands, feet, joints or groin, deep, white or leathery burns, burns encircling a limb, and burns in children or older people. Smoke exposure with hoarseness or breathing trouble needs emergency help. Chemical/electrical burns need urgent advice: protect yourself, brush off dry chemicals, remove soaked clothes and rinse for at least 20 minutes; isolate electricity before touching.
Key figures
- Heat burn cooling
- Cool running water, 20 minutes
- Still worth cooling
- Up to 3 hours after the burn
- Never
- Ice, butter, creams or bursting blisters
- Dressing
- Loose film: heat burns, never face/chemical; non-stick elsewhere
First aid for a heat burn
- Stop the burning safely. — Heat can injure you as well as the casualty.
- Remove rings, watches and loose clothes; leave stuck clothing. — Burnt skin swells and tight items cut off blood flow.
- Cool the heat burn under cool running water for 20 minutes. — Cooling limits the depth of the burn and relieves pain.
- Keep the rest of the casualty warm and out of the wind. — Cooling a large area can cause hypothermia.
- Lay cling film loosely on heat burns, never the face or chemical burns. Use a non-stick dressing there; a clean bag suits a burnt hand. — It protects the burn from germs and air, which eases pain.
- Get advice for serious, chemical or electrical burns; emergency help for smoke with hoarseness or breathing trouble. — Large, deep or face burns need medical care.
Remember
- Cool heat burns with cool running water for 20 minutes, as soon as possible.
- Cool the burn, warm the casualty.
- Remove rings and loose clothing; leave anything stuck to the skin.
- Loose cling film for heat burns only, never the face or chemical burns; use a clean non-stick dressing there.
- Serious, chemical or electrical burns: advice. Smoke with hoarseness or breathing trouble: emergency help.
Common mistakes
Wrong: Put ice on a burn to cool it fast.
Right: Ice damages the skin further. Use cool running water.
Wrong: Cool a heat burn for a minute or two until it stops hurting.
Right: Cool for 20 minutes; pain relief comes before the cooling has done its work.
Wrong: Wrap cling film tightly round a burnt arm.
Right: Lay it loosely in strips. The arm will swell and a tight wrap becomes a tourniquet.
Worked case
Heeled over in a gust, a pan of boiling water slides off the galley stove onto the cook’s forearm. The skin is red and starting to blister over an area about twice the size of her hand. The sea temperature is 16 °C.
Show the answer
Make the galley safe. Cool her forearm with cool running water for 20 minutes in a sheltered place. Remove her watch and rings while cooling; leave stuck clothing. Keep the rest of her covered. Have another crew member seek radio medical advice while you cool: the burn is larger than her hand. Afterwards, lay cling film loosely over it.
Practice question
How long should you cool a heat burn with cool running water?
- 1 minute
- 5 minutes
- 20 minutes
- 60 minutes
Show the answer
Answer: C. 20 minutes of cool running water, started as soon as possible.
4 · Fractures
Fractures, sprains and improvised splints
Support a suspected fracture in the position you find it, splint it with what is on board, and check the blood supply beyond the injury.
Fracture or sprain?
A fracture is a broken bone; a sprain is damage to a ligament, the strong tissue joining bones at a joint. Both cause pain, swelling and bruising. Suspect a fracture if the limb is bent or misshapen, the casualty heard a crack, cannot bear weight or move it, or the pain is sharp over the bone. If in doubt, treat it as a fracture.
Support it as you find it
Do not try to straighten a broken limb. Help the casualty support it in the most comfortable position, usually the one they are holding. Pad it with clothing or towels. Stopping movement eases pain and prevents further damage to blood vessels and nerves.
Improvised splints
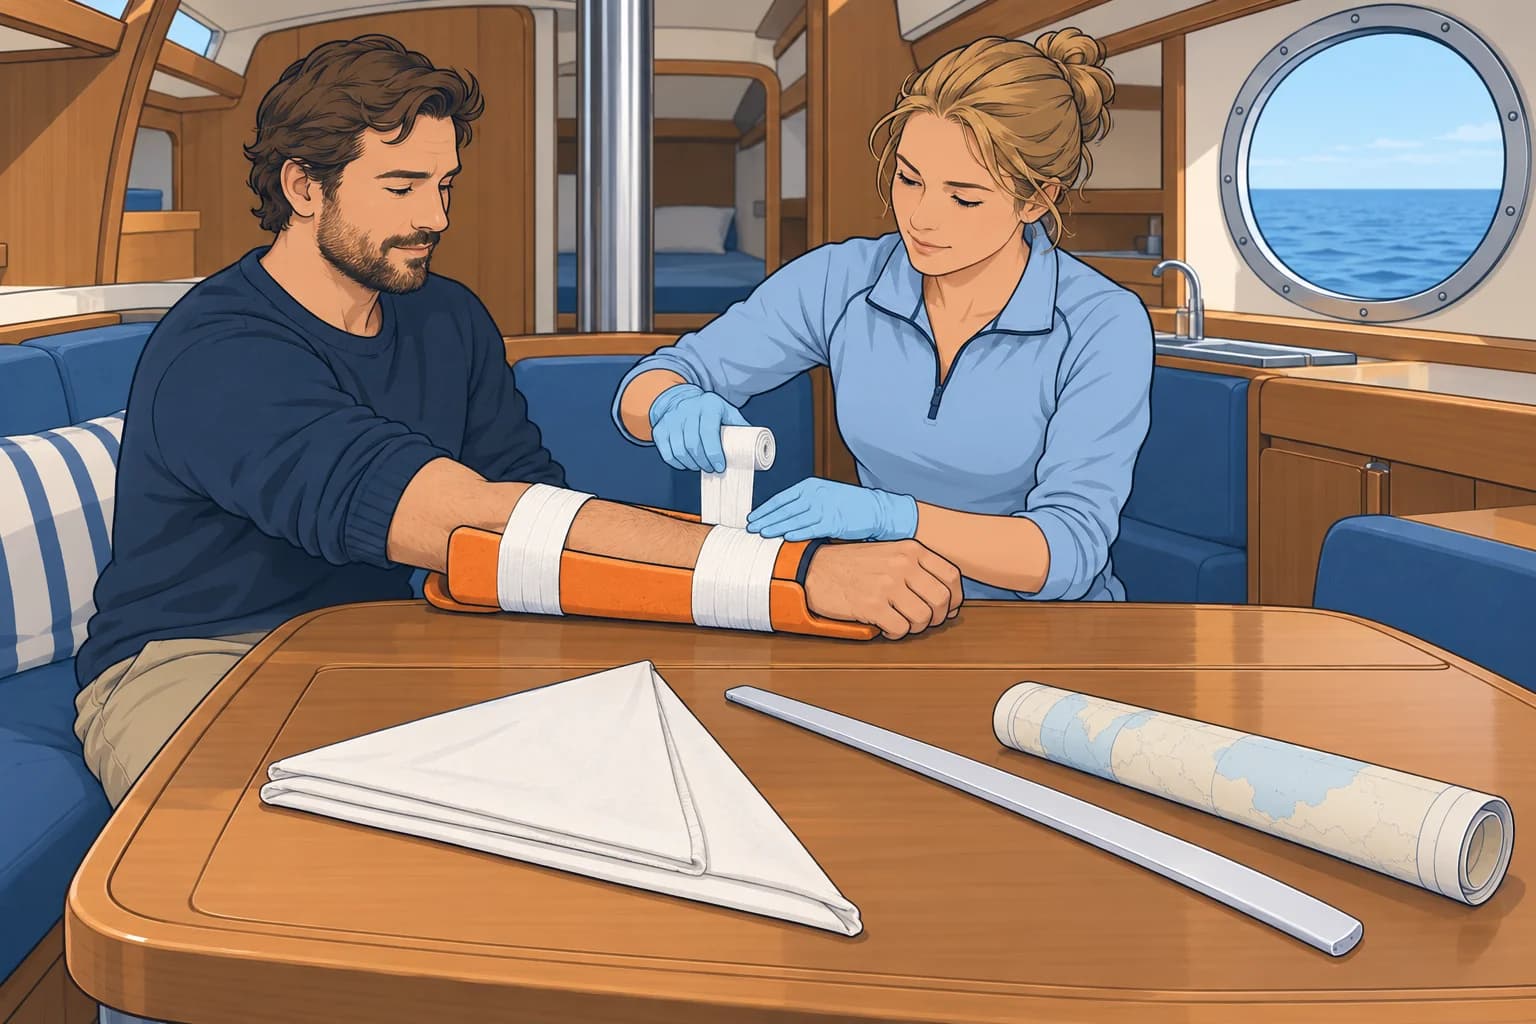
A splint is anything rigid that keeps a broken bone still. Use a sail batten (a stiff strip supporting a sail), a rolled chart or magazine, or a mouldable SAM splint from the kit. Make it long enough to immobilise the joints above and below the break. Pad it, and tie it above and below the injury, not over it. Support an arm in a sling; a leg can be tied to the good leg with padding between them.
Check the blood supply
Check fingers or toes before and after splinting, then every 15 minutes. Compare their colour, warmth and feeling with the uninjured side. If they become unusually pale, blue, cold or numb, loosen the ties and recheck immediately. If this persists, get urgent radio medical advice; do not straighten the limb yourself.
Open fractures
Treat a wound over a suspected break as an open fracture, even if no bone is visible. Cover it with a clean dressing, press around any protruding bone to control bleeding and never push bone back. Fractures need radio medical advice.
Sprains
For a sprain, rest it, apply a cloth-wrapped cold pack for up to 20 minutes, use gentle compression with an elastic bandage and raise it. Loosen the bandage if toes or fingers become cold, numb or change colour.
Key figures
- Position
- As found; do not straighten
- Splint support and ties
- Support joints above/below; tie above/below injury, never over it
- Circulation check
- Compare colour, warmth and feeling before/after; every 15 min
- Cold pack
- Wrapped in cloth, up to 20 minutes at a time
Remember
- If in doubt, treat as a fracture.
- Support the limb in the position found; do not straighten it.
- Use a padded rigid splint long enough to support both neighbouring joints; tie above and below the break, never over it.
- Check the fingers or toes after splinting and every 15 minutes.
- Open fracture: cover, press around the bone, never push it back.
Common mistakes
Wrong: Pull a bent broken arm straight so it fits the splint.
Right: Splint it as you find it. Straightening can damage vessels and nerves.
Wrong: Splint it tightly and leave it until port.
Right: Swelling makes ties tight. Check circulation every 15 minutes and loosen as needed.
Worked case
In a rough sea a crew member falls against the chart table. Her forearm is painful, swollen and slightly bent above the wrist, and she is holding it against her chest. You are five hours from harbour.
Show the answer
Treat it as a fracture. Support her arm as found and pad it with a towel. Use a padded rolled chart or SAM splint long enough to support the joints above and below the break; tie above and below it, never over it. Support the arm in a sling. Compare her fingers’ colour, warmth and feeling before and after splinting, then every 15 minutes, and get radio medical advice.
Practice question
A crew member’s lower leg is bent at an odd angle after a fall. What do you do?
- Pull it straight to ease the pain
- Ask her to stand and test the leg
- Rub it hard to reduce the swelling
- Support it as found and splint it
Show the answer
Answer: D. Support it in the position found and immobilise it. Do not straighten it.
5 · Head and spine
Head injuries and suspected spinal injury
After a blow to the head, watch for warning signs and get advice. If a neck or back injury is possible, keep the casualty still; airway always comes first.
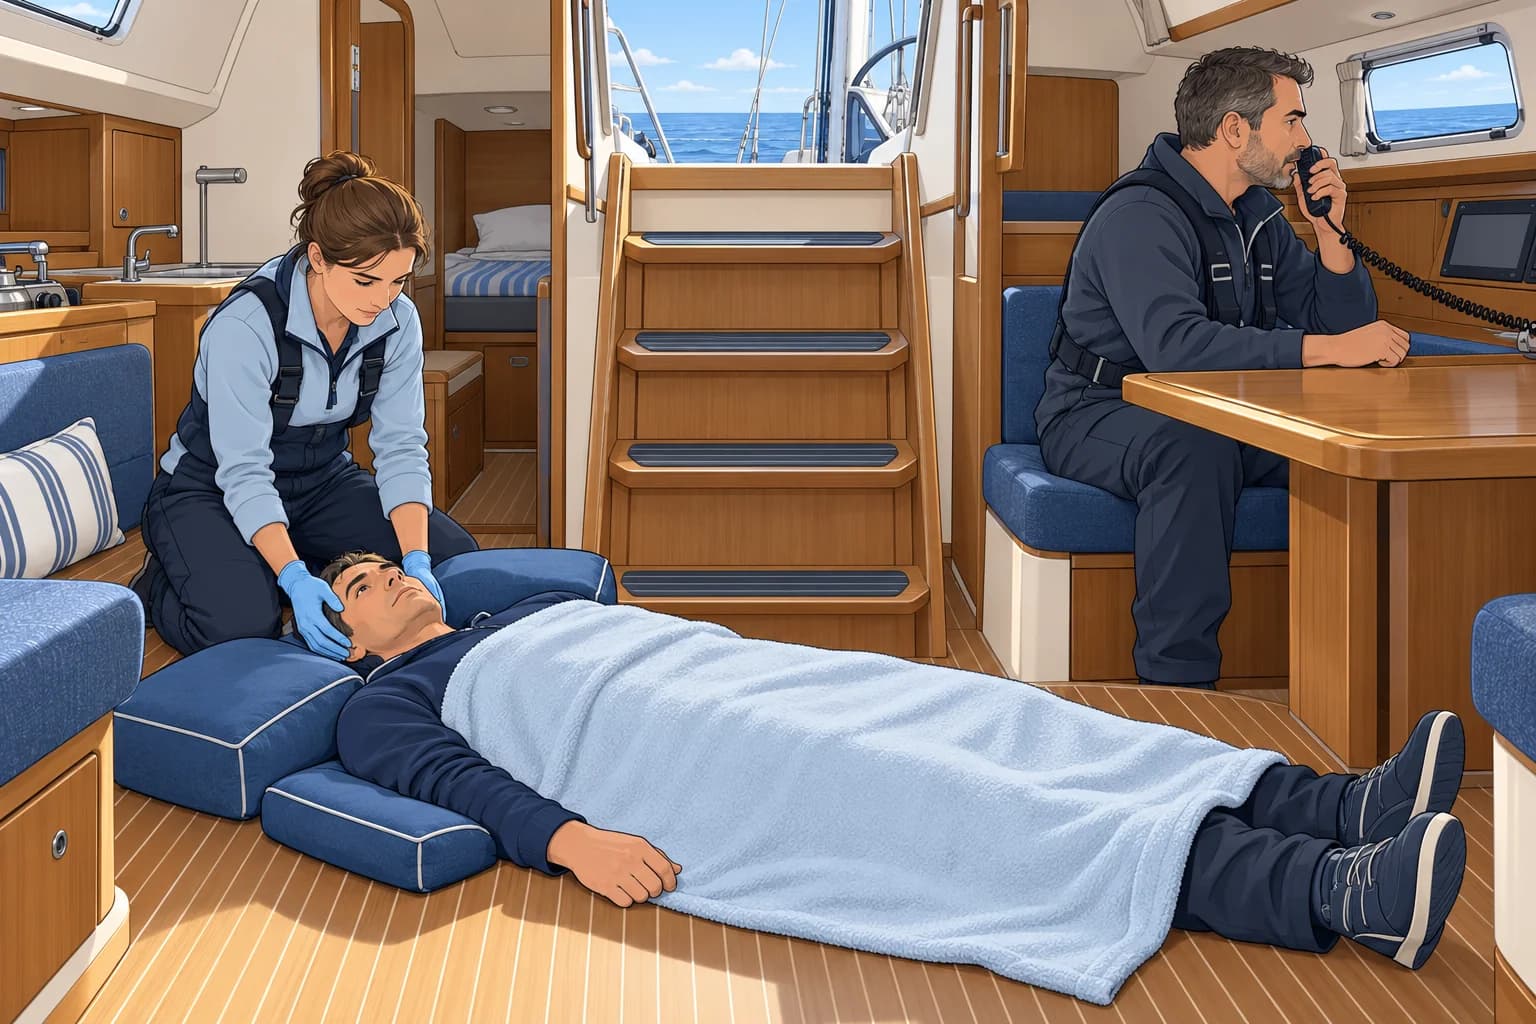
Head injuries on boats
A boom, hatch or fall on the steps into the cabin can cause head injuries. A concussion is a brain injury that can cause headache, dizziness, confusion, sickness or a blackout; symptoms may persist. Have a responsible adult stay with the casualty for at least 24 hours. Stop helming (steering), climbing and deck work; return to risky duties only after recovery and medical advice.
Warning signs
Get urgent radio medical advice after any loss of consciousness or a seizure (for example, uncontrolled jerking). Other warning signs include drowsiness, difficulty waking, worsening headache, repeated vomiting, confusion, unusual behaviour, weakness, numbness, unequal pupils, or blood or clear fluid from the nose or ears. These may signal bleeding inside the skull. Record the signs and times.
When to suspect a spinal injury
Suspect a neck or back injury after a fall into the cabin or from the mast, a heavy blow from the boom, a dive into shallow water, or a crush. Neck or back pain, tingling, numbness or weakness in the limbs make it more likely. An unconscious casualty after such a fall may also have one.
Keep them still
Ask an alert casualty to keep their head and neck still in a comfortable position, and help them do it. Never force them into a position. Lay first aiders do not fit cervical collars (rigid neck braces): they can do harm and are used only by trained rescuers under their own protocols. Kneel at the head and hold it still if needed, and pad the casualty against the boat’s motion.
Airway first
Opening the airway takes priority over neck movement. If trained, try a jaw thrust: place your fingers behind the corners of the lower jaw and lift it forward. If you cannot open the airway this way, gently tilt the head back and lift the chin (head tilt–chin lift). If vomit or blood blocks the airway, turn the casualty onto their side. With helpers, keep head, neck and body in line (log roll); if alone, turn them as carefully as you can rather than wait.
Key figures
- After a head injury
- Observe ≥24 h; risky duties only after recovery and medical advice
- Collars
- Not for first aiders (ERC 2025)
- Airway in suspected spinal injury
- Jaw thrust if trained; if ineffective, head tilt–chin lift
- Turning
- Turn for airway danger; align with helpers, do not wait if alone
Remember
- Have an adult stay for at least 24 hours. No helming, climbing or deck work until recovery and medical advice.
- Drowsiness, vomiting, worsening headache, confusion or a seizure: urgent advice.
- Suspected spinal injury: keep the casualty still; never force a position.
- First aiders do not fit cervical collars.
- Airway first: jaw thrust if trained; if ineffective, head tilt–chin lift. Turn for blood or vomit; do not wait for helpers.
Common mistakes
Wrong: He is talking normally now, so the head injury is fine.
Right: Bleeding inside the skull can show hours later. Have an adult stay for at least 24 hours; get medical advice.
Wrong: Fit a collar made from a rolled towel to protect the neck.
Right: Collars are not for first aiders. Ask the casualty to keep still, or hold the head steady.
Wrong: Never move a possible spinal casualty, whatever happens.
Right: Airway first: jaw thrust if trained; head tilt–chin lift if it fails. Turn onto their side for blood or vomit; do not wait for helpers.
Worked case
A crew member falls through an open hatch onto the cabin floor. She is awake, complaining of neck pain and tingling in her hands. The boat is rolling at anchor.
Show the answer
Suspect a spinal injury. Tell her to keep still and not to try to get up. Kneel at her head and help her keep her head and neck still in a comfortable position; use padding to reduce movement from the boat. Do not fit a collar. Call for radio medical advice and an evacuation, keep her warm, and watch her breathing.
Practice question
Two hours after a boom strike, a crew member who seemed well becomes hard to wake. What do you do?
- Get urgent help and monitor breathing
- Let them finish sleeping undisturbed
- Wait until the 24-hour watch is over
- Ask them to helm to test concentration
Show the answer
Answer: A. Head injuries can worsen hours later. Act on new warning signs immediately; do not wait for the observation period to end.
6 · Crush and shock
Rope, winch and crush injuries, and shock
Stop machinery and disconnect its power; have competent crew secure the load before release. Treat the injury and watch for shock.
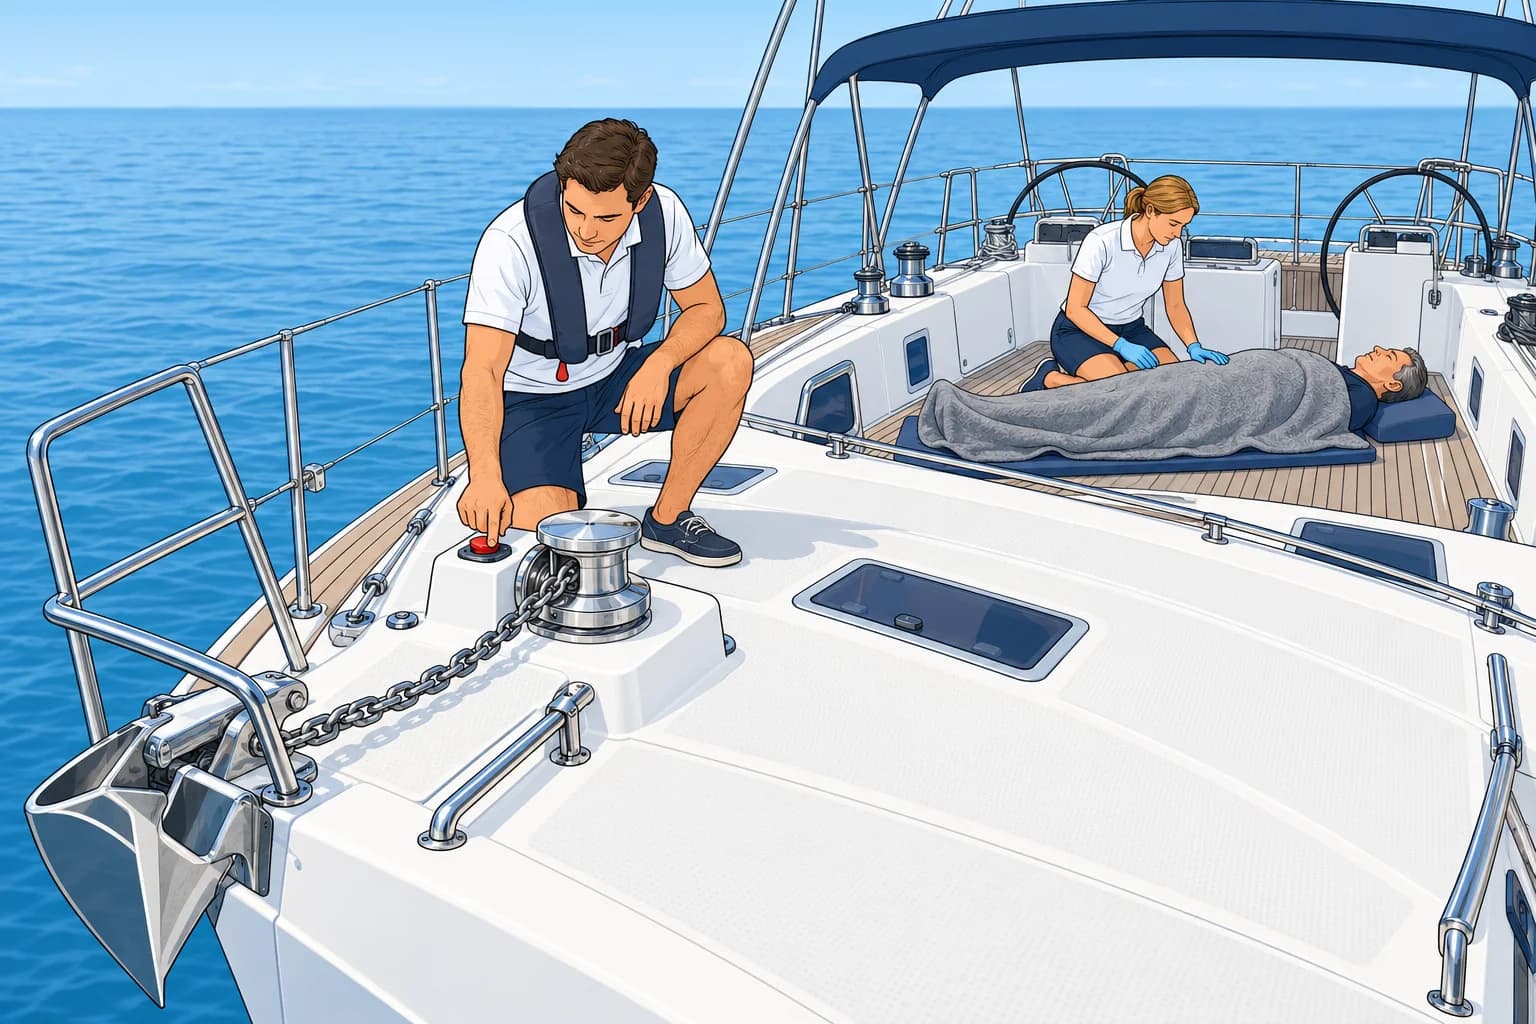
Ropes, winches and windlasses
Fingers caught in a winch (rope drum), block (pulley) or windlass (anchor hauler) can suffer crushing, cuts or amputation. A rope running through hands causes rope burns. Stop powered machinery and disconnect its power so it cannot restart. A stopped winch or windlass may still hold a heavy load. Have competent crew secure that load before attempting release; never pull the casualty against it. Call for urgent rescue help if release is unsafe.
Crushed fingers and limbs
Once free, control bleeding, remove rings early if they slide off easily, cool with a cold pack wrapped in cloth and raise the hand. A crush may hide a fracture: support the hand as found rather than forcing a bent finger against its neighbour. Get prompt radio medical advice for significant crush injuries. Large crush injuries or anyone trapped for more than a few minutes need urgent radio medical advice.
Amputated parts
If a fingertip or finger is cut off, control the bleeding first. Then wrap the part in a clean, damp dressing, put it in a sealed plastic bag and place the bag in water with ice. Never put the part directly on ice or in water. Label it with the time and keep it with the casualty.
Recognise shock
Shock means the circulation cannot supply the body’s organs with enough blood, often after heavy bleeding, burns or a crush injury. Signs are pale, cold and sweaty skin, a fast and weak pulse, fast breathing, thirst, anxiety, confusion and later drowsiness. Shock can kill: it needs medical help.
First aid for shock
Treat the cause, especially bleeding. Lay them flat if alert and breathing comfortably; otherwise prioritise the airway and a position that permits breathing. Keep them warm with blankets above and insulation below, and protect them from wind and spray. Do not give food or drink; moisten the lips if they are thirsty. Reassure them, monitor breathing and response, and get radio medical advice early.
Key figures
- First action
- Stop and isolate; competent crew secure load before release
- Rings
- Remove early, only if they slide off easily
- Amputated part
- Damp dressing, sealed bag, bag in iced water
- Shock signs
- Pale, cold, sweaty, fast weak pulse, confused
- Shock care
- Flat if alert, breathing easily; airway first; warm; no food/drink
Remember
- Stop and isolate machinery and have competent crew secure the load before release; never pull against it.
- Remove rings only if easy; cool, raise and support a crushed hand as found. Get prompt advice for significant crush injuries.
- Amputated part: damp dressing, sealed bag, bag in iced water, never direct ice.
- Shock: pale, cold, sweaty, fast pulse, confused; it can kill.
- Flat if alert and breathing comfortably; otherwise airway and breathing position first. Keep warm, no food or drink; get advice.
Common mistakes
Wrong: Pull the trapped hand out of the windlass while it is still running.
Right: Stop and isolate it. A load may remain: competent crew must secure it before release. Never pull against it.
Wrong: Put the cut-off fingertip straight onto ice.
Right: Direct ice damages the tissue. Wrap it, bag it and put the bag in iced water.
Wrong: Give a shocked casualty a hot drink to warm him up.
Right: Nothing by mouth: he may need surgery and may vomit. Keep him warm with blankets.
Worked case
A hand is caught in a windlass. You stop and isolate it, but the anchor chain is still loaded. The casualty is pale, cold and sweaty. She is alert, breathes comfortably and asks for water.
Show the answer
Keep clear until competent crew secure the load; never pull against it. Call for urgent rescue help if release is unsafe. After release, control bleeding and support the hand as found. Suspect shock: lay her flat, insulate underneath and cover her. Give no food or drink; moisten her lips. Have someone call for urgent radio medical advice while you treat her. Monitor breathing and response.
Practice question
A crew member’s fingers are caught in a running electric windlass. What is your first action?
- Pull the hand out as fast as you can
- Pour cold water over the trapped hand
- Call the coastguard before anything else
- Stop and isolate windlass power first
Show the answer
Answer: D. Stop and isolate first; the load may remain. Have competent crew secure it before release. Never pull the hand against the load.