
The ship: hull, engines and systems · Level P1 · 6 parts · about 22 min
Deck equipment and machinery: winches, cranes, hatches, watertight doors, pilot ladders and gangways
6 short parts: Winches · Cranes · Hatch covers · Watertight doors · Gangways · Lock-out. Each part explains the idea, then gives the points to remember, the common mistakes, a worked case and a practice question; the Academy unit adds all 38 check questions.
1 · Winches
Winches, windlasses and capstans: drives, clutches and brakes
Know how winches, windlasses and capstans work. Check their drives, clutches, brakes and controls before use.
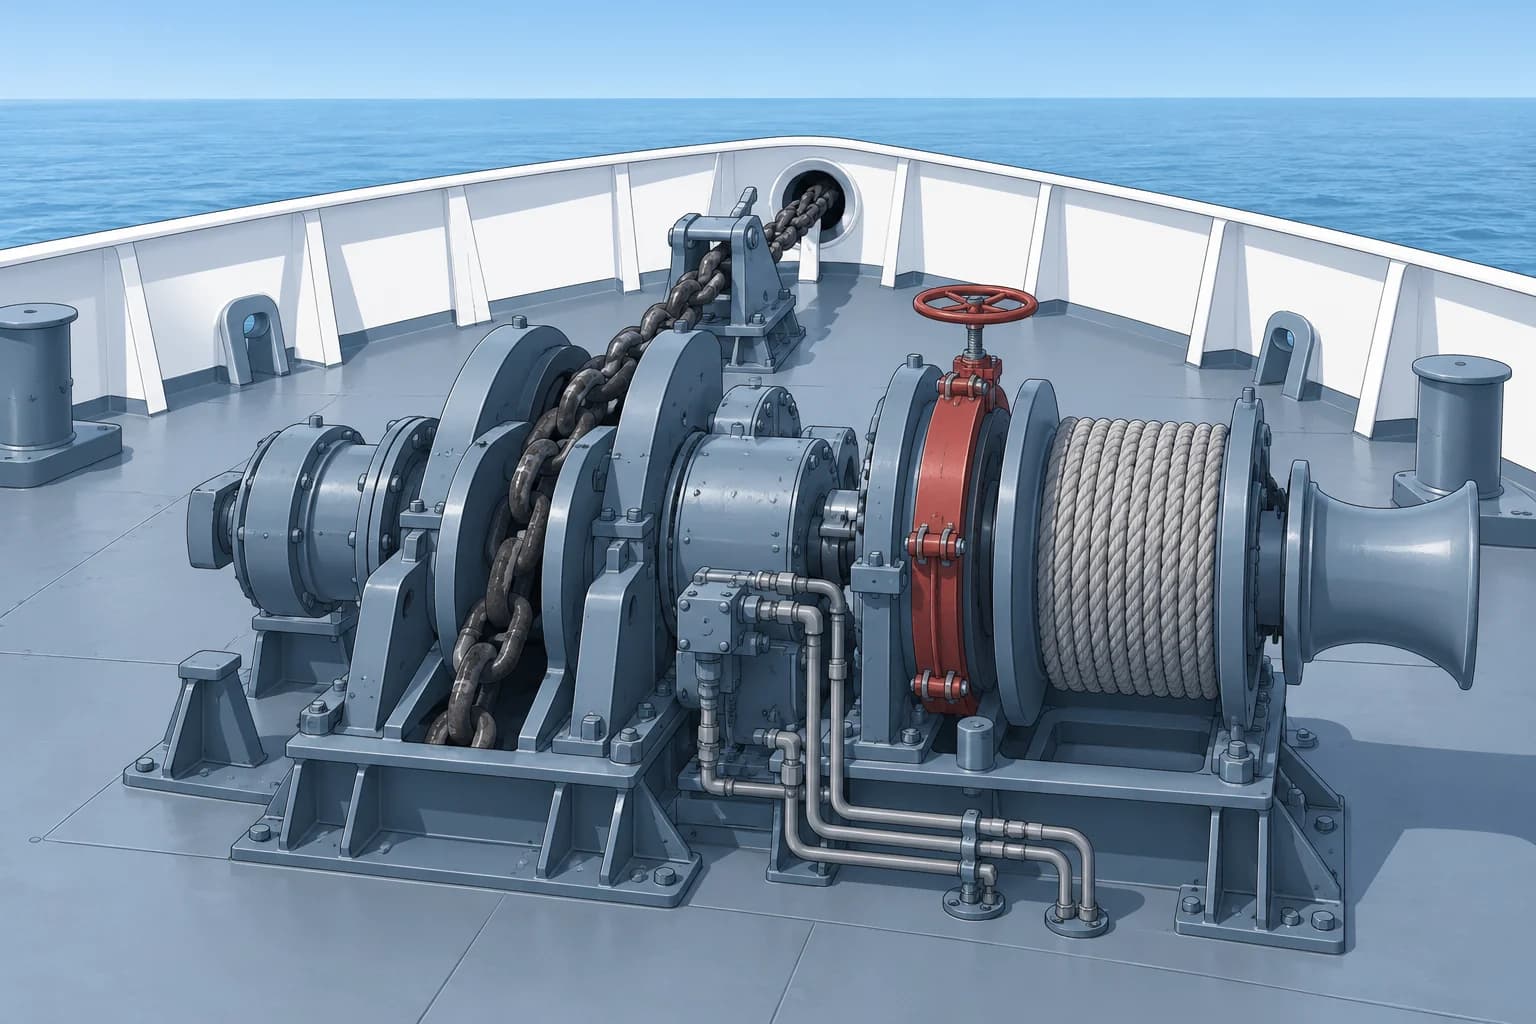
Machines on deck
A winch has a drum that hauls in or pays out rope or wire. A windlass lifts the anchor: its gypsy, or cable lifter, is a wheel with pockets that grip the chain links. A capstan is a drum on a vertical shaft. Warping ends are smooth, waisted drums on the end of a winch shaft. They provide a surface for hauling rope without storing it.
Drives
Electric drives use a motor and reduction gearing, which slows the drum and increases turning force. Speed control may be stepped or variable; braking arrangements depend on the machine. Hydraulic drives use a motor supplied by a pump and often give smooth speed control. Watch hoses for leaks and chafe. Warm the hydraulic oil as the maker instructs in cold weather before loading the machine.
Clutch and brake
A dog clutch uses interlocking teeth to connect the drum or gypsy to the drive. With the clutch out, the drum turns freely and is held only by its band brake: a steel band lined with friction material, tightened round a brake drum, usually by a screw handwheel. Engage or disengage the clutch only with the drum stopped and the brake on. A worn, oily or wet lining holds much less.
Pull and holding
Winch pull is the powered hauling force. Brake holding capacity is the load the brake can restrain with the drive disengaged; the ratings differ. Wear changes the brake’s travel and grip. Report worn or contaminated linings. Only authorised crew should adjust or test the brake, following the maker’s instructions and the ship’s specified setting. Never tighten it simply to prevent all slipping.
Hands and drums
Keep hands, gloves and clothing clear of drums, gypsies and nip points, where moving parts can trap or crush you. Mooring and anchor station work is in Ropes: ship mooring.
Before you run deck machinery
- Get the officer’s go-ahead and check the area is clear of people and loose gear. — Machines start in seconds; nobody should be near the drum or other moving parts.
- Check oil levels in the gearbox or hydraulic tank, and look for leaks and damaged hoses. — Low oil or a split hose can stop the machine under load.
- Check the brake band and lining, and that the brake is fully on. — The brake holds the load when the clutch is out or power fails.
- With the drum stopped and brake on, engage and secure the clutch for the unloaded trial as the maker instructs. — Engaging a turning drum breaks dogs and can release the load.
- With controls neutral and everyone clear, start power. Release the drum brake as instructed, then run slowly both ways unloaded. — This checks the drive and controls without forcing the machine against its brake.
- Test the emergency stop. Stop and return controls, brake and clutch to the maker’s specified safe position; report defects before use. — You must be able to stop the machine at once if something goes wrong.
Remember
- Gypsy grips the anchor chain; warping ends heave a rope by turns; a drum stores the line.
- Electric speed control may be stepped or variable; hydraulic drives need sound hoses and the correct oil temperature.
- Use the dog clutch only with the drum stopped and the band brake on.
- Winch pull is powered hauling force; brake holding restrains a load. Check the separate ratings.
- Check oil, brake, clutch, controls and emergency stop before each use.
Common mistakes
Wrong: Knock the clutch in while the drum is turning slowly; it saves time.
Right: Stop the drum and put the brake on first. Engaging a turning drum damages the dogs and can drop the load.
Wrong: The brake holds ten tonnes, so the winch can haul ten tonnes.
Right: Holding and hauling have different ratings. Check the winch’s rated pull; only authorised crew adjust brakes to the specified setting.
Worked case
On a cold morning you are sent forward to prepare the hydraulic mooring winches. One hose to the forward winch is wet with oil near a fitting, and the brake lining on the same winch looks dark and oily.
Show the answer
Do not run that winch. Report the leaking hose and oily brake lining to the officer. Keep people clear; never feel for leaks by hand. Do not start any winch on the same hydraulic supply until authorised crew have safely isolated the defective branch. Prepare independently supplied winches only as the officer and maker instruct, including cold-weather warm-up.
Practice question
What is the gypsy on a windlass?
- A smooth drum for heaving ropes by turns
- A wheel with pockets that grip the chain
- A band of friction lining round a drum
- A toothed coupling that connects the drive
Show the answer
Answer: B. The gypsy, or cable lifter, has pockets shaped to the chain links. A warping end is a smooth drum; a dog clutch connects the drum or gypsy to the drive.
2 · Cranes
Cranes and derricks: safe working load, signals, wires and SOLAS II-1/3-13
Never exceed the marked SWL, work to one signaller, check wires and limit switches, and never stand under a load. SOLAS II-1/3-13 applies from 2026.
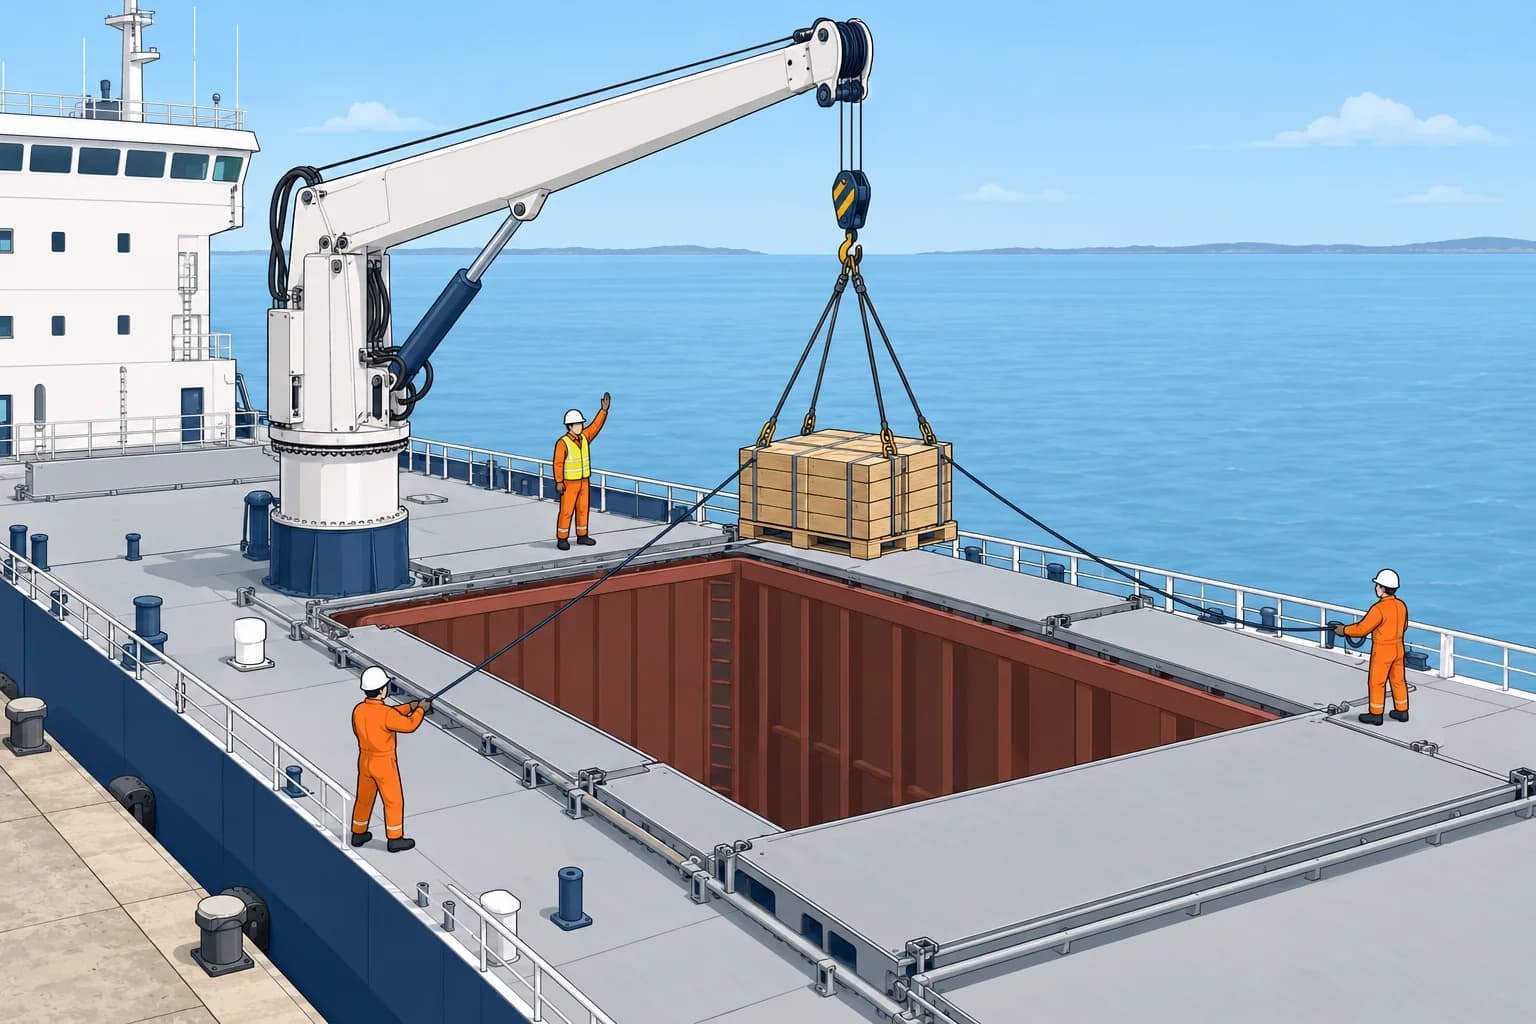
Cranes and derricks
Many cargo ships with their own lifting gear use electro-hydraulic deck cranes: a pedestal, a house that slews (turns), a jib that luffs (raises and lowers), and a hoist wire to the hook. Derricks are older: a boom worked by winches, sometimes paired so their cargo wires work one hook, called union purchase. Smaller service cranes have lower capacities, but the same rules apply.
Safe working load
The safe working load (SWL) is the most an appliance may lift in service. It is permanently marked on the crane or derrick. On many cranes it changes with the radius, the horizontal distance from the crane’s centre of rotation to the vertical line through the hook, so read the load chart or load indicator. Loose gear means removable lifting items such as slings, shackles and spreaders. Include their weight in the load. Each item needs an SWL mark and an ID linked to its certificate; reject unmarked gear.
One signaller
One person, the signaller, directs the driver using the ship’s standard hand signals or agreed radio calls. Stay where you can safely see the load’s path. For hand signals, the driver must see you; radio can be used when you cannot see each other. Learn the posted signal chart, including STOP. Anyone may give the emergency stop. Never go under a suspended load. Stop if signals are lost or unclear; resume only when clear contact returns.
Wires and limits
Before use, look along the hoist and luffing wires for broken wires, kinks, birdcaging (strands opening out like a cage), crushing, corrosion or thinning. Report them; the maker’s criteria decide discard. Limit switches stop hoisting before the hook block reaches the jib and stop the jib at its luffing limits. Test them before work and never bypass them. Keep the turns on the drum that the maker specifies at the lowest hook position.
SOLAS II-1/3-13
From 1 January 2026, SOLAS II-1/3-13 covers ships’ lifting appliances and anchor-handling winches. Lifting appliances are load tested and thoroughly examined before first use and after major repair, load tested at least every five years, and thoroughly examined every year. SWL is permanently marked, an operation and maintenance manual is kept, routine inspections are recorded, and operators are trained. Existing appliances must pass their initial load test and thorough examination by the first renewal survey on or after that date; routine upkeep still applies.
Key figures
- SOLAS II-1/3-13
- Existing gear: initial test/examination by first renewal from 2026
- Load test
- Before first use, after major repair, at least every 5 years
- Thorough examination
- After each load test and at least every year
- Marking
- SWL permanently marked; loose gear marked and certified
- UK guidance
- Code of Safe Working Practices (COSWP), 2026 edition
Remember
- Never exceed the marked SWL; on many cranes it falls as the radius grows.
- Work to one signaller; keep the load’s path visible and maintain clear contact with the driver.
- Never stand under a suspended load; stop if signals are lost or unclear.
- Check wires for broken wires, kinks and birdcaging; test limit switches; never bypass them.
- SOLAS II-1/3-13 (2026): five-yearly load test, yearly thorough examination, records and trained operators.
Common mistakes
Wrong: The SWL on the jib is the same at every radius, so any load under it is fine.
Right: On many cranes the SWL depends on radius. Check the load chart or indicator for the radius you will use, including the slings.
Wrong: When the hook block is close to the jib head, keep hoisting; the limit switch will stop it.
Right: The limit switch is a last safeguard. Stop by control, and report any switch that fails its test.
Wrong: Several people can signal to the driver so nobody misses a hazard.
Right: One signaller gives the signals. Anyone else may only give the emergency stop.
Worked case
The crane’s chart permits 2.5 tonnes at 6 m radius but only 1.8 tonnes at 10 m. The load, including loose gear, weighs 2.2 tonnes. The planned lift reaches 10 m, although the crane is marked 2.5 tonnes.
Show the answer
Do not start. The complete lift must stay within the chart limit at every radius. At 10 m, 2.2 tonnes exceeds 1.8 tonnes. Tell the officer and driver; they must revise the plan before lifting.
Practice question
What is the safe working load (SWL) of a crane?
- The load at which the hoist wire is expected to break
- The test load used at the five-yearly load test
- The most the crane may lift in normal service
- The weight of the hook block, slings and shackles
Show the answer
Answer: C. SWL is the maximum load allowed in service. The breaking load is much higher, and test loads are above SWL.
3 · Hatch covers
Hatch covers: types, seals, cleats and the dangers of moving panels
Hatch covers keep the sea out of the holds. Look after seals, cleats and drains, and treat moving panels and open holds as deadly.
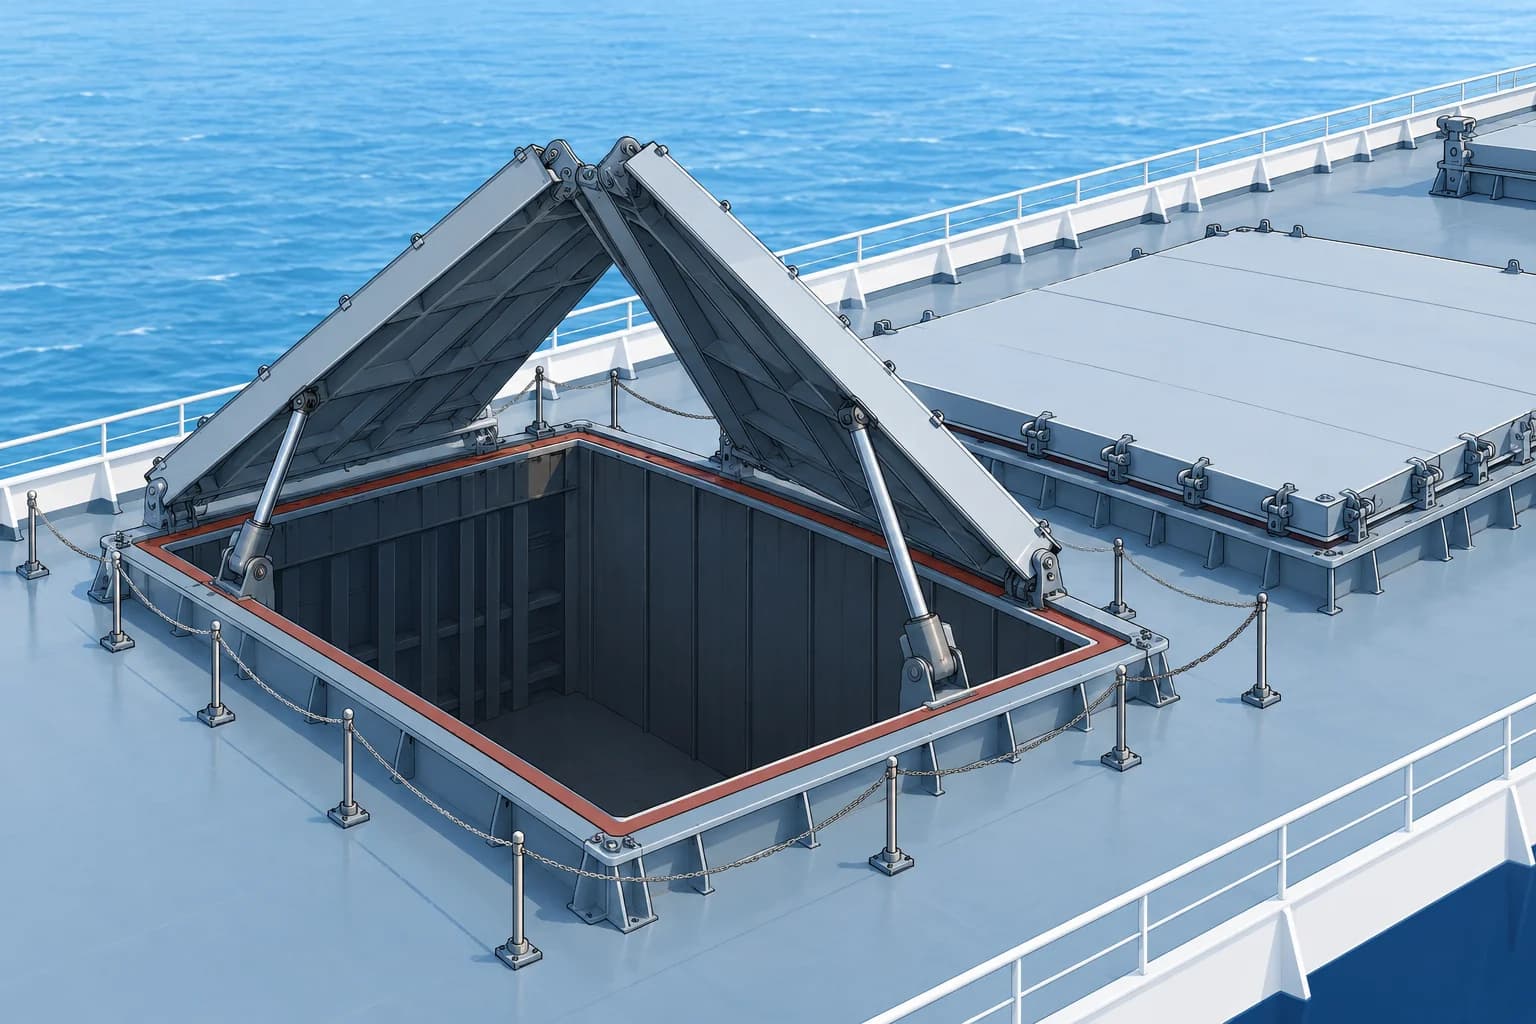
Types
Folding covers are hinged panels that fold up at the hatch end, moved by hydraulic cylinders or, on older ships, by wire from a winch. Side-rolling covers are lifted on jacks and roll sideways on wheels along rails. Pontoon covers are lifted off by a crane and stacked. Stacking covers move panel by panel into a stack at the hatch end using the ship’s mechanism.
Keeping water out
The hatch coaming is the raised steel frame round the opening. Rubber seals, or gaskets, on the cover edges press down onto a steel compression bar. Cleats, by hand or hydraulic, hold the covers down and squeeze the seals. Water that gets past drains away through drain channels with non-return valves. Report cut, hard or permanently flattened seals, bent compression bars and blocked drains.
Hydraulic power
Hatch hydraulics run at high pressure. A pinhole jet can inject oil through your skin. Get urgent medical help after suspected injection, even if the wound looks small. Keep clear of leaks. Stop the machinery, report the defect and have the system isolated before inspection or repair.
Crush points and open holds
Moving panels, hinges, wheels and rails can crush a hand or a body. Clear the area. Keep a full view of the panels, or use a lookout who can see them and stay in clear contact. Once covers are open, fit the securing pins or hooks that stop them moving. An open hold is a fall from height: keep barriers in place and never walk on the coaming top.
Opening hatch covers
- Get permission, identify the cover type and follow the maker’s opening sequence. — Different cover types need different drives, restraints and release sequences.
- Clear people and loose gear. Fit any required check wire (restraining wire) or other restraint before releasing securing devices as instructed. — Unrestrained panels may move early; a panel driven against an unreleased cleat can jump or break.
- Prepare the drive as instructed; on hydraulic systems, check for leaks from a safe position before moving panels. — A burst hose can drop a panel and inject oil into skin.
- Warn everyone nearby. Keep a full view or use a lookout in clear contact. Stop if the view or contact is lost. — You must be able to stop the moment someone strays in.
- When fully open, fit the securing pins or hooks. — They stop an open panel moving if hydraulic pressure is lost or the ship rolls.
- Put barriers round the open hold and switch off and secure the controls. — This prevents falls into the hold and stops anyone moving the covers by mistake.
Remember
- Common types are folding, side-rolling, pontoon and stacking covers.
- Seals press on the compression bar; cleats hold covers down; drains carry water away.
- A hydraulic pinhole jet can inject oil into skin: get medical help at once.
- Clear the area, keep a full view or use a lookout, and fit securing pins once covers are open.
- An open hold is a fall from height: barriers on, never walk along the coaming top.
Common mistakes
Wrong: Run a finger along the hydraulic hose to find where the mist is coming from.
Right: Keep clear. Stop and report the leak; have the system isolated before inspection. Suspected injection needs urgent medical care.
Wrong: With folding covers open, the hydraulic pressure is enough to hold them up.
Right: Fit the securing pins or hooks. Pressure can be lost and panels can fall.
Worked case
A side-rolling hatch cover is ready to open. The ship has a list, a sideways lean, to port, so the rails across the ship slope to port. No restraining wire is fitted, and a crew member proposes releasing the locking pins before the wire is attached.
Show the answer
Stop the opening sequence. On sloping tracks, the panel may roll as soon as its pins are released. Keep people clear and have the required restraining wire fitted before releasing the pins, following the maker’s sequence. After opening, secure the panel and guard the open hold.
Practice question
What do the rubber seals on a hatch cover press against?
- The securing cleat
- The compression bar
- The coaming drain
- The running wheel
Show the answer
Answer: B. The seals on the cover edges press onto a steel compression bar on the coaming. Cleats hold the cover down to keep them pressed.
4 · Watertight doors
Watertight doors: closing, local controls, alarms and drills
Watertight doors keep flooding in one compartment. Keep them closed at sea unless allowed, and never try to pass a moving sliding door.
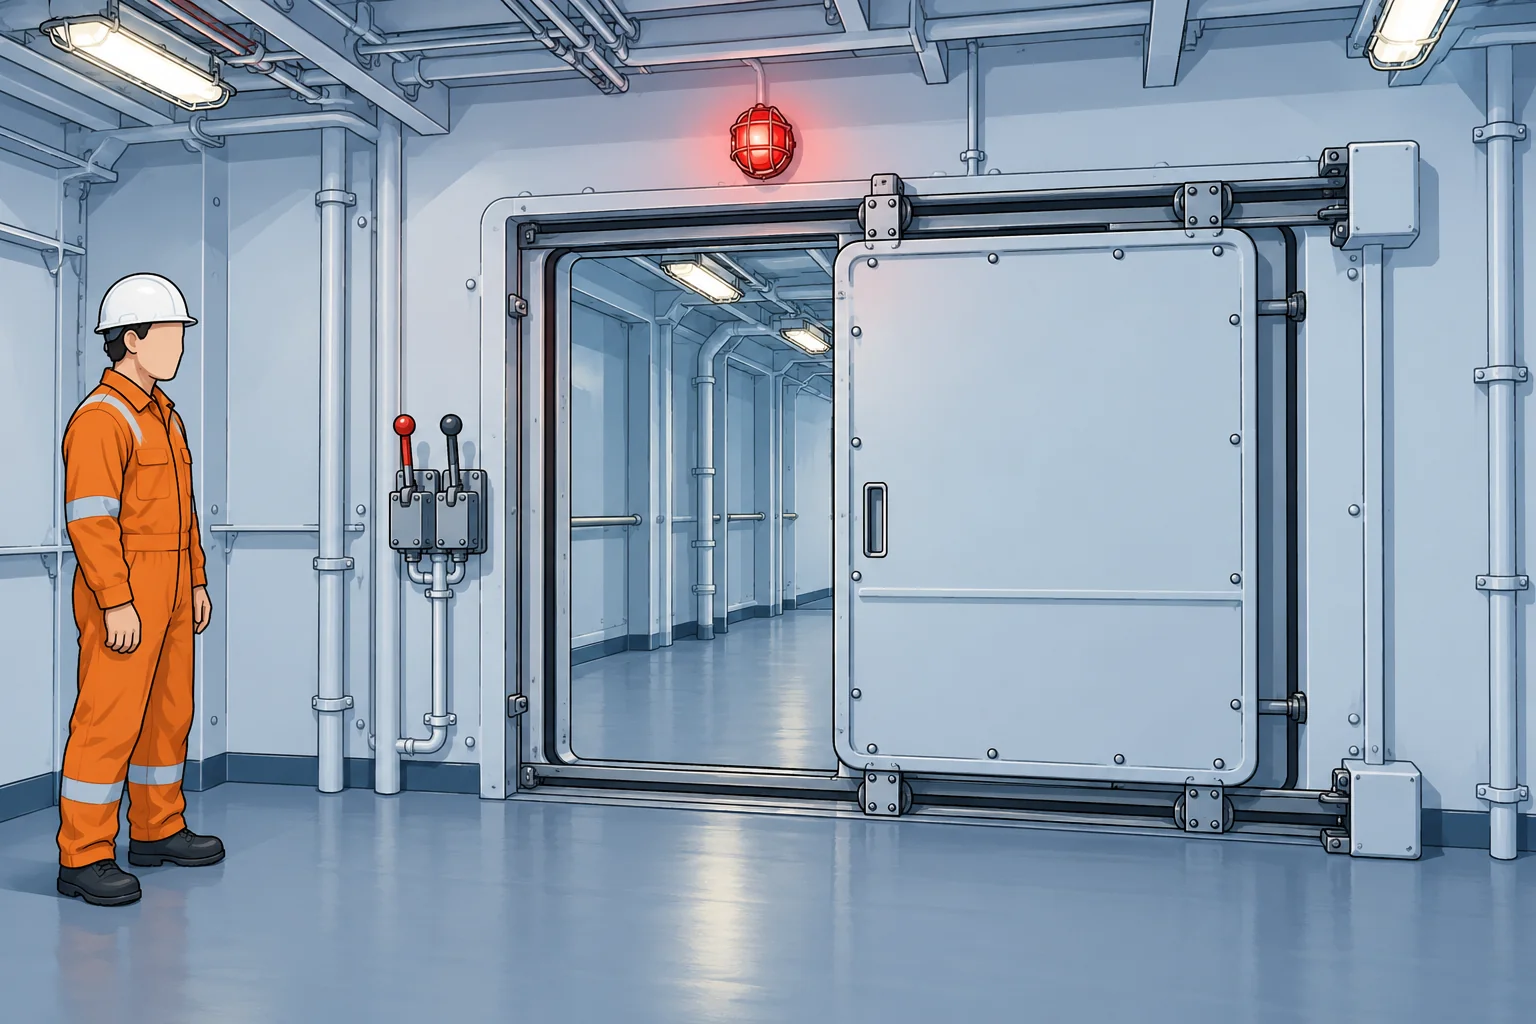
Why they matter
Watertight bulkheads divide the hull into compartments, so flooding stays in one place. A door in such a bulkhead is only as good as its closing: an open door lets a flooded compartment fill the next. SOLAS keeps watertight doors closed at sea unless the ship’s approved procedures allow one open for passage or work. Then it is closed again as soon as you are through or the work ends.
Types
A hinged watertight door is closed by dogs, levers round the frame that press it onto its seal; close them all, not just a few. Sliding doors move sideways in a frame and are worked by hand or by power. Passenger ships use power-operated sliding doors, and many cargo ships have them in engine rooms and tunnels.
Power sliding doors
On passenger ships (SOLAS II-1/13), all power-operated sliding doors close together from a bridge console within 60 seconds. Each door closes at an even rate in 20 to 40 seconds. When closed remotely, an audible alarm sounds 5 to 10 seconds before the door moves and continues until it is shut. Each door has local controls on both sides, and a hand mechanism closes it within 90 seconds. The bridge shows whether each door is open or closed.
Passing through
In bridge doors-closed mode, the door closes again when you release the control. Use the posted instructions and local controls to open the door fully. Keep it fully open throughout passage, transferring from the near-side OPEN control to the far-side control as trained. Release only when everyone and anything carried are clear. Get another trained person to help carry a toolbox or other load. Never enter a closing door, try to beat its alarm or block it open.
Drills and defects
On passenger ships, watertight door drills are held weekly, and doors in main bulkheads in use at sea are operated daily. Report a door that is slow, noisy or will not close, a damaged seal, or a failed alarm or indicator.
Key figures
- All doors from bridge
- Closed together within 60 s, ship upright (passenger ships)
- Each power door
- Closes at an even rate in 20–40 s
- Alarm on remote closing
- 5–10 s before movement, until fully closed
- Hand closing
- Within 90 s, from either side and from above the bulkhead deck
- Passenger ships
- Drills weekly; doors in use at sea operated daily
Remember
- Watertight doors keep flooding in one compartment; keep them closed at sea unless allowed.
- Hinged doors: close every dog. Sliding doors: hand or power operated.
- From the bridge, all power doors close within 60 s; each takes 20–40 s.
- An alarm sounds 5–10 s before a remotely closed door moves; local controls are on both sides.
- Open fully; keep the opening controls operated throughout passage; release only when everyone and anything carried are clear.
Common mistakes
Wrong: Wedge a sliding watertight door open while you carry tools back and forth.
Right: Never block it. Open fully and keep the opening controls operated throughout passage. Get trained help with loads; release only when everyone is clear.
Wrong: On a hinged watertight door, two dogs are enough for a short trip.
Right: Close every dog. A partly dogged door leaks under pressure and may burst open.
Wrong: When the alarm sounds you have time to slip through before the door shuts.
Right: Never try to beat a closing door. Step back, wait for it to close and open it again by the local control.
Worked case
You are carrying a toolbox through a power-operated sliding door on a passenger ship at sea. Halfway through, you accidentally release the local control and the door starts closing.
Show the answer
Use the local OPEN control at once to reopen the door fully and keep it open while you get clear. Do not try to outrun it or drag the toolbox through. Get another trained person to help with the toolbox. Keep the opening controls operated, transferring between sides as trained, until everyone is clear, then release.
Practice question
What is the general SOLAS rule for watertight doors at sea?
- Open by day and closed only at night
- Closed unless procedures allow opening
- Open unless heavy weather is forecast
- Closed only during a flooding alarm
Show the answer
Answer: B. Watertight doors stay closed during navigation unless the ship’s approved procedures allow one to be opened, and it is closed again straight after use.
5 · Gangways
Gangways, accommodation ladders and pilot ladder winch reels
Safe access needs the right angle, approved fall protection, a lifebuoy and good light. Check it each time. Pilot ladder rigging is in Ropes: deck safety.

What they are
A gangway is a portable bridge from ship to shore. An accommodation ladder hangs along the ship’s side from a platform at deck level, with a lower platform near the water, and is raised and lowered by a winch. SOLAS II-1/3-9 covers both. IMO guidance on building, maintaining and inspecting them was revised in 2025 as MSC.1/Circ.1331/Rev.1. Read both end plates for permitted angles, maximum load and any limit on people.
Rigging rules
Use gangways at 30° or less and accommodation ladders at 55° or less from horizontal unless designed and marked for more. Rig a safety net unless the ship’s approved arrangement has rigid top rails at least 1 m high and side nets down to the base, including accommodation-ladder platforms. Keep a lifebuoy with a self-igniting light and buoyant lifeline nearby. Light the access at night. Never secure to guardrails unless designed for it. Wear a lifejacket and secured harness while rigging.
Watching and checking
Tide and cargo work change the angle and position: check it and adjust. The foot must run freely on its wheels or rollers. Check it each time it is rigged for bends, cracks and corrosion, especially aluminium with steel fittings. Examine the ladder, gangway and winch thoroughly yearly. Every five years, statically load test the ladder and gangway, and operationally test the winch with the ladder unloaded. Support wires are renewed when worn, and at least every five years. Every check is recorded.
Winch reels
An accommodation ladder winch raises and lowers the ladder; check its brake and controls before use. A pilot ladder winch reel stores the pilot ladder on a drum. It is not a securing point. A combination arrangement uses an accommodation ladder with a pilot ladder when the climb exceeds 9 m. Mechanical pilot hoists are already prohibited. Revised SOLAS V/23, effective 1 January 2028, adds pilot-transfer requirements, including standards for winch reels.
Key figures
- Maximum angle
- Gangway 30°; accommodation ladder 55° (unless designed and marked)
- At the access
- Approved fall protection; lifebuoy with light and line; lighting
- Examination and tests
- Yearly examination; 5-yearly static and winch operational tests
- Support wires
- Renewed when needed, at least every 5 years
- Combination arrangement
- Pilot climb over 9 m: accommodation ladder + pilot ladder
- Revised SOLAS V/23
- Pilot-transfer requirements effective 1 January 2028
Remember
- Gangway no steeper than 30°, accommodation ladder no steeper than 55°, unless marked for more.
- Use the approved fall protection; keep a lifebuoy with light and line ready, and provide good lighting.
- Check it each time it is rigged and adjust for tide and draught; record inspections.
- Ladders/gangways: yearly examination, five-yearly static load test; renew support wires at least every five years.
- A pilot ladder winch reel stores the ladder; it is not the securing point.
Common mistakes
Wrong: At low water the gangway has steepened to about 40°, but it is still usable with care.
Right: A gangway must not be used beyond 30° unless designed and marked for it. Reposition it or rig the accommodation ladder.
Wrong: The pilot ladder can hang directly from its winch reel because the reel has a brake.
Right: The reel only stows the ladder. The ladder is secured to strong points on deck, as covered in Ropes: deck safety.
Worked case
In a port with a large tidal range you are on gangway watch at night. Over three hours the ship has risen, the gangway is steep, its foot wheels are jammed against a bollard, and the safety net has slackened.
Show the answer
Tell the officer at once and keep people off until it is fixed. The angle may now be over the gangway’s marked limit, and a jammed foot can twist or drop the gangway. With help, reposition or re-rig it, free the foot, and tighten the net so it would catch a fall between ship and quay. Check the lifebuoy with light and line is in place and the lighting still covers the access.
Practice question
An ordinary gangway is at 35° and an accommodation ladder at 50°. Neither is designed or marked for a higher angle. Which is within its angle limit?
- Both are within their angle limits
- Only the accommodation ladder is
- Only the gangway is within its limit
- Neither is within its angle limit
Show the answer
Answer: B. The gangway exceeds 30°; the accommodation ladder remains below 55°. Other safety checks still apply.
6 · Lock-out
Isolating machinery: lock-out, tag-out and try-start
Before work, isolate every energy source and fit your own lock and tag. Control stored energy, have isolation verified and check for starting with the controls.
Why isolate
Deck machines can start without warning: a control on the bridge or in a deck house, an automatic restart when power returns, or another crew member who does not know you are inside. Before any maintenance or clearing a jam, the machine is made safe by isolation: cutting it off from every energy source and keeping it cut off.
Every energy source
Electrical: the breaker or isolator. Hydraulic: pump and valves isolated, then pressure safely released, including from accumulators, pressure stores in some circuits. Pneumatic: compressed air isolated and vented. Gravity: a crane jib, hatch panel or load lowered to rest or mechanically blocked before pressure release. Lock supplies before releasing stored pressure. Springs must be released or restrained as instructed, and rotating parts must stop.
Lock-out, tag-out
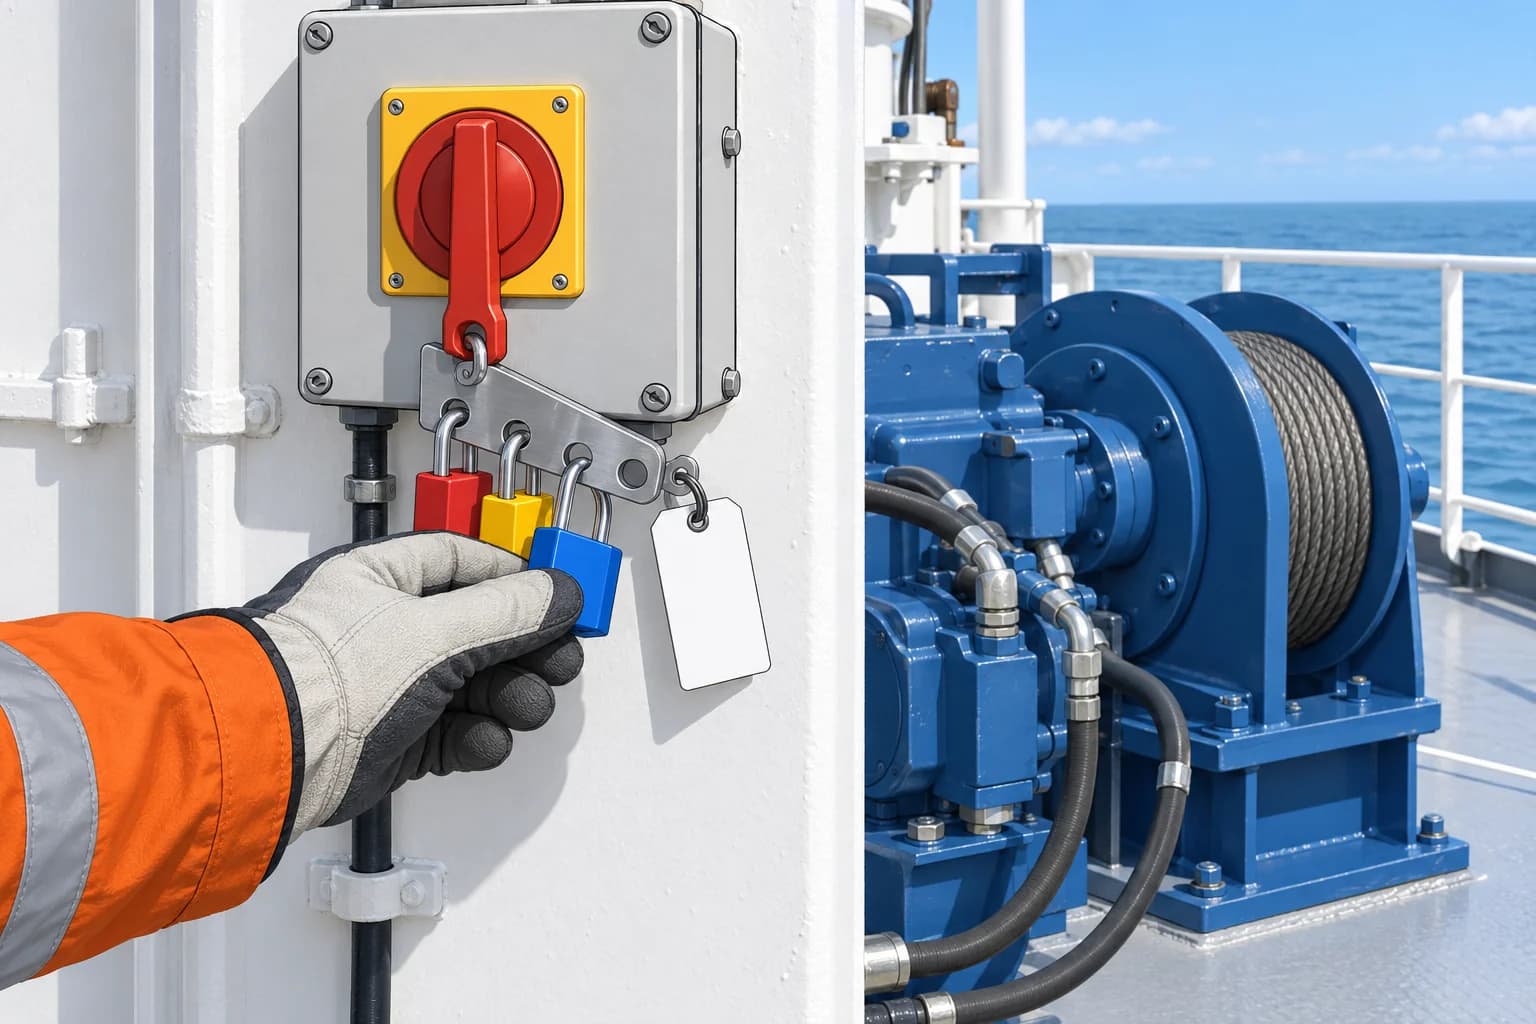
Lock-out/tag-out (LOTO) means locking each isolation point and adding a tag with your name, date and reason. Each worker fits their own personal lock and keeps the key. For shared work, use a multi-lock hasp, a fitting for several locks. A competent person verifies safe isolation and stored energy. Then try-start: with everyone clear, try the relevant controls to check they cannot start the machine. Return them to off. This does not prove stored energy is safe.
Permits and handing back
Many jobs also need a permit to work that lists the isolations; Ropes: deck safety covers permits. A lock is removed only by the person who fitted it. Before handing back, check tools are out, guards are back and people are clear. Tell the officer, who restores the machine and test runs it.
Isolating a deck machine for work
- Agree the job and isolation points with the officer; get the permit if one is needed. — Isolation must cover every source, and the ship must know the machine is out of use.
- Stop normally. Lower raised parts to a safe rest if this can be done without entering a danger zone. — Gravity is energy too; a raised part can fall when pressure bleeds off.
- Isolate every electrical, hydraulic and air supply. Fit your own locks and tags at each isolation point and keep the keys. — Locked supplies prevent anyone restoring energy while you make stored energy safe.
- With supplies locked, have raised parts mechanically supported and springs restrained as the maker instructs before safely releasing stored pressure. Wait for moving parts to stop. — Stored energy must be removed or safely restrained as well as the supplies being locked.
- Have a competent person verify safe isolation and stored energy. Try-start with everyone clear, then return controls to off. — Try-start checks the controls; stored pressure, gravity and spring energy need separate verification.
- After the work, clear tools and people, refit guards, remove only your own lock, report. — A clean handback stops surprises when the officer restores power.
Remember
- Isolate every energy source: electrical, hydraulic, pneumatic, gravity, springs.
- Each worker fits their own lock and tag and keeps the key.
- Try-start checks the controls; separately verify isolation and safe stored energy.
- With supplies locked, block raised parts and restrain springs before releasing stored pressure; verify safety before work.
- Only the person who fitted a lock removes it; hand back through the officer.
Common mistakes
Wrong: The electrician switched the breaker off, so the winch is safe to work on.
Right: Fit your own locks and tags at every isolation point. Control stored energy, have a competent person verify safety, then try-start with everyone clear.
Wrong: Your colleague went ashore with his lock still on, so cut it off and finish the job.
Right: Only the owner removes a lock. If he cannot, the officer follows the ship’s formal procedure after checking the machine is safe.
Worked case
A hatch cover panel has stopped half open with a jammed wheel. You and the bosun are asked to free it. The hydraulic pump has been switched off at the deck panel, but the panel is still raised and the system pressure gauge shows pressure.
Show the answer
Do not reach under it. With the officer, isolate all electrical and hydraulic supplies and fit personal locks and tags. Have the panel mechanically supported and stored pressure safely released as the maker instructs. Have a competent person verify safe isolation and stored energy, then try-start with everyone clear and return controls to off. Work only after these checks. Hand back through the officer.
Practice question
What does a try-start check?
- That the tested controls cannot start the machine
- That stored hydraulic pressure is fully released
- That raised parts are safely supported for work
- That springs are fully released or restrained
Show the answer
Answer: A. It checks for a response to the tested controls. It does not prove isolation or stored pressure, raised parts or springs are safe. A competent person verifies these separately before work.