Emergencies at sea · Level R1 · 5 parts · about 15 min
Safety equipment and the crew safety briefing
5 short parts: Lifejackets · Harness & tether · Raft & beacons · Fire & bilge kit · Kit & briefing. Each part explains the idea, then gives the points to remember, the common mistakes, a worked case and a practice question; the Academy unit adds all 26 check questions.
1 · Lifejackets
Lifejackets: choose, fit and service
A lifejacket only saves you if it is the right level, fits snugly with its straps done up, has been serviced and is actually being worn.
Levels of buoyancy
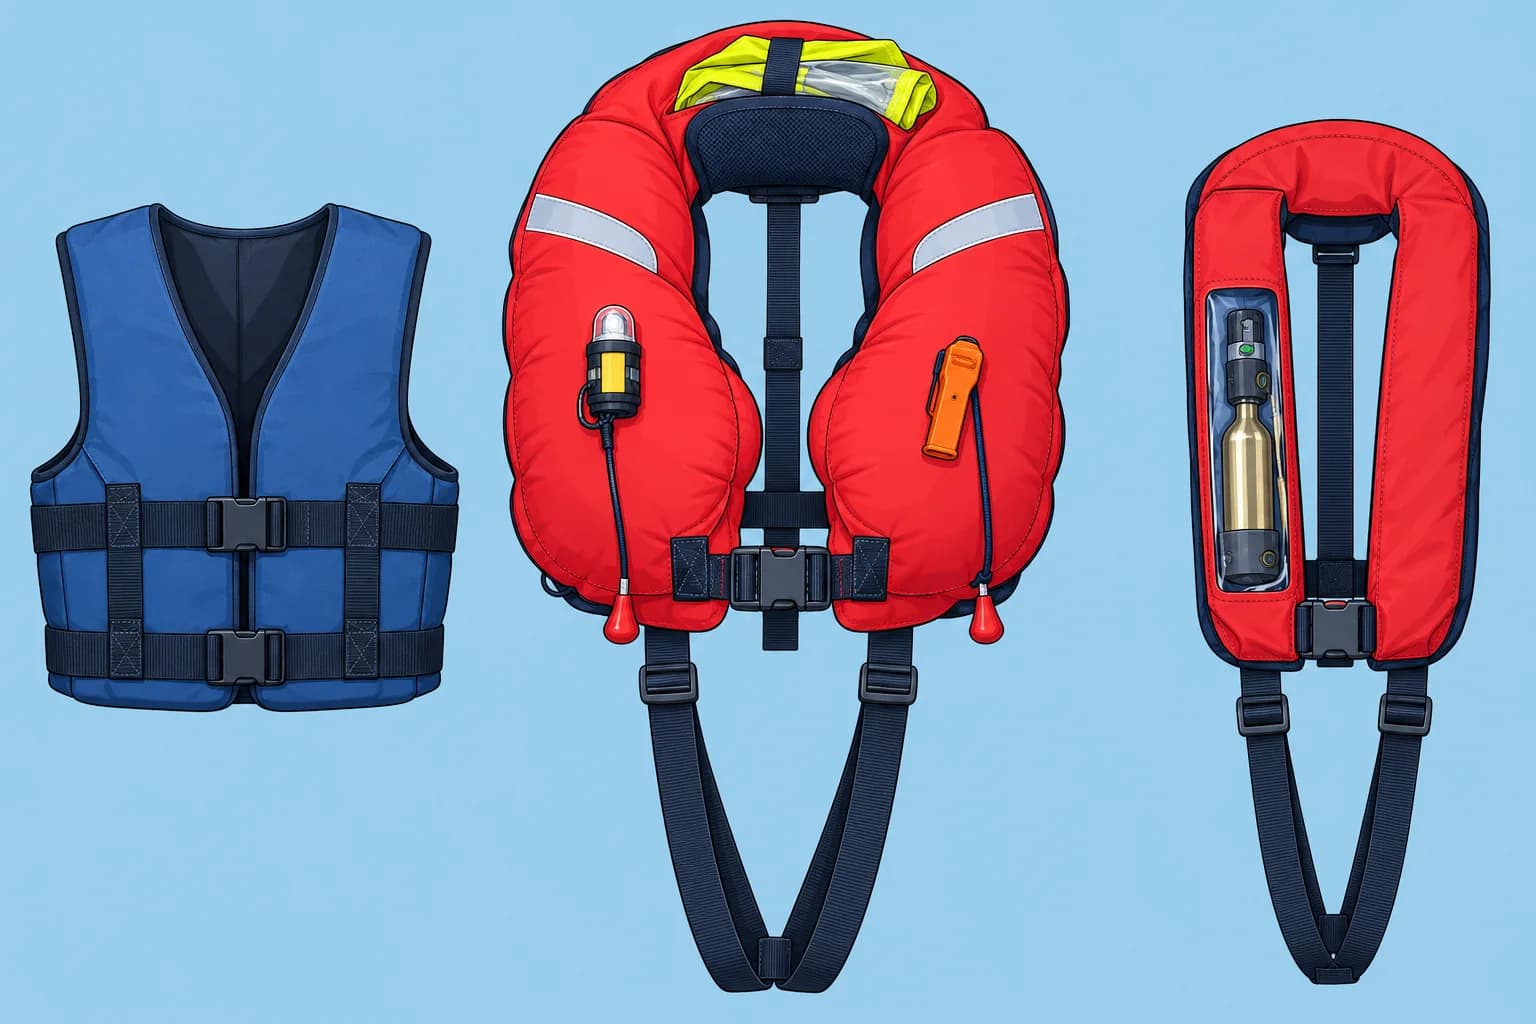
The EN ISO 12402 series rates buoyancy in newtons (N). Level 50 is a buoyancy aid for competent swimmers near help; it is not designed to turn you face-up. Level 100 is for sheltered water; it may not turn an unconscious wearer face-up. Level 150 is the usual sea-going choice, but waterproof clothing can prevent self-righting. Level 275 provides extra buoyancy for severe conditions or heavy protective clothing. No level guarantees face-up flotation in every situation.
Gas inflation
Most yacht lifejackets are gas-inflated: a carbon dioxide (CO₂) cylinder fills the bladder, the inflatable chamber. A manual one inflates when you pull the toggle. An automatic one also fires when immersed. A water-sensitive firing head uses a tablet or bobbin and can fire in heavy spray or a damp locker. A hydrostatic head fires when submerged, at about 10 cm depending on the model; spray will not trigger it. Inflatable lifejackets also have an oral inflation tube for inflation by mouth.
Fit and straps
An inflated lifejacket pulls hard upwards. Without crotch or thigh straps it can ride up over your face, or you can slip out of it. Wear the straps every time and tighten the waist belt until you can only just slide a flat hand under it. Look for a sprayhood, which keeps waves off your mouth, a light, a whistle and retro-reflective patches. Children need a child lifejacket for their weight.
Checks and service
Before each use, check the cover, straps, cylinder security and armed indicators as your maker instructs. At the specified interval, check expiry dates, inspect the bladder and follow the maker’s inflation and leak-test instructions. Arrange servicing at the maker’s interval. Carry the correct rearming kit for each model. An inflated jacket still supports you after firing; an intact bladder can be inflated by mouth. Before reuse, replace the spent cylinder and used activation components as instructed, then check and repack it.
Why wear it
Cold shock makes you gasp and breathe fast on entering cold water; see Medical: cold water. Put your lifejacket on before you need it: at night, in rough weather, alone on deck, in the tender, and whenever the skipper says so.
Key figures
- Level 50
- Swimmers near help; not designed to turn you face-up
- Level 100
- Sheltered water; may not turn an unconscious wearer face-up
- Level 150
- General offshore use; the usual yacht lifejacket
- Level 275
- Offshore extremes, heavy clothing or loads
- Waist belt
- Only a flat hand fits under it
Remember
- Level 150 is the usual lifejacket at sea; Level 50 is a buoyancy aid, not a lifejacket.
- Crotch or thigh straps stop the lifejacket riding up over your face.
- Hydrostatic heads ignore spray; water-sensitive heads can fire in spray or damp.
- Check readiness before each use; service as instructed and carry the model’s rearming kit.
- Wear it before you need it: cold shock leaves no time to put one on.
Common mistakes
Wrong: A buoyancy aid is good enough offshore.
Right: A Level 50 buoyancy aid is not designed to turn you face-up. Use at least Level 150 at sea.
Wrong: The crotch strap is optional if the belt is tight.
Right: An inflated bladder lifts hard. Without the strap the lifejacket rides up and can push your face down.
Wrong: A lifejacket that has never fired needs no checks.
Right: Cylinders work loose and firing heads expire. Check them and service at the maker’s interval.
Worked case
A guest arrives with an automatic lifejacket. Its cylinder turns by hand, the firing head’s indicator is red, and there is no crotch strap. You are leaving for a night passage. What do you do?
Show the answer
Do not rely on it. A loose cylinder may not inflate it, and a red indicator usually means the head has fired or is not armed. Lend a serviced Level 150 lifejacket from the boat’s stock, fit it with crotch straps done up and the belt snug, and show the guest the manual toggle and oral tube.
Practice question
Which EN ISO 12402 level is the usual lifejacket for a yacht at sea?
- Level 50
- Level 100
- Level 150
- Level 30
Show the answer
Answer: C. Level 150 is the usual sea-going choice. Waterproof clothing can affect face-up flotation; Level 275 provides extra buoyancy for demanding conditions.
2 · Harness & tether
Harness, jackstays and tethers: staying on board
A lifejacket helps you float; a harness and tether keep you on the boat. Clip on before coming on deck and to points that keep you inboard.
Why clip on
Recovering someone from the water is slow and hard, especially at night or short-handed. The best man-overboard plan is not to go over. A safety harness worn with, or built into, your lifejacket attaches you to the boat with a tether, a short safety line. Use it at night, in rough weather, when alone on deck, when working at the mast or bow, and whenever the skipper says so.
Tethers
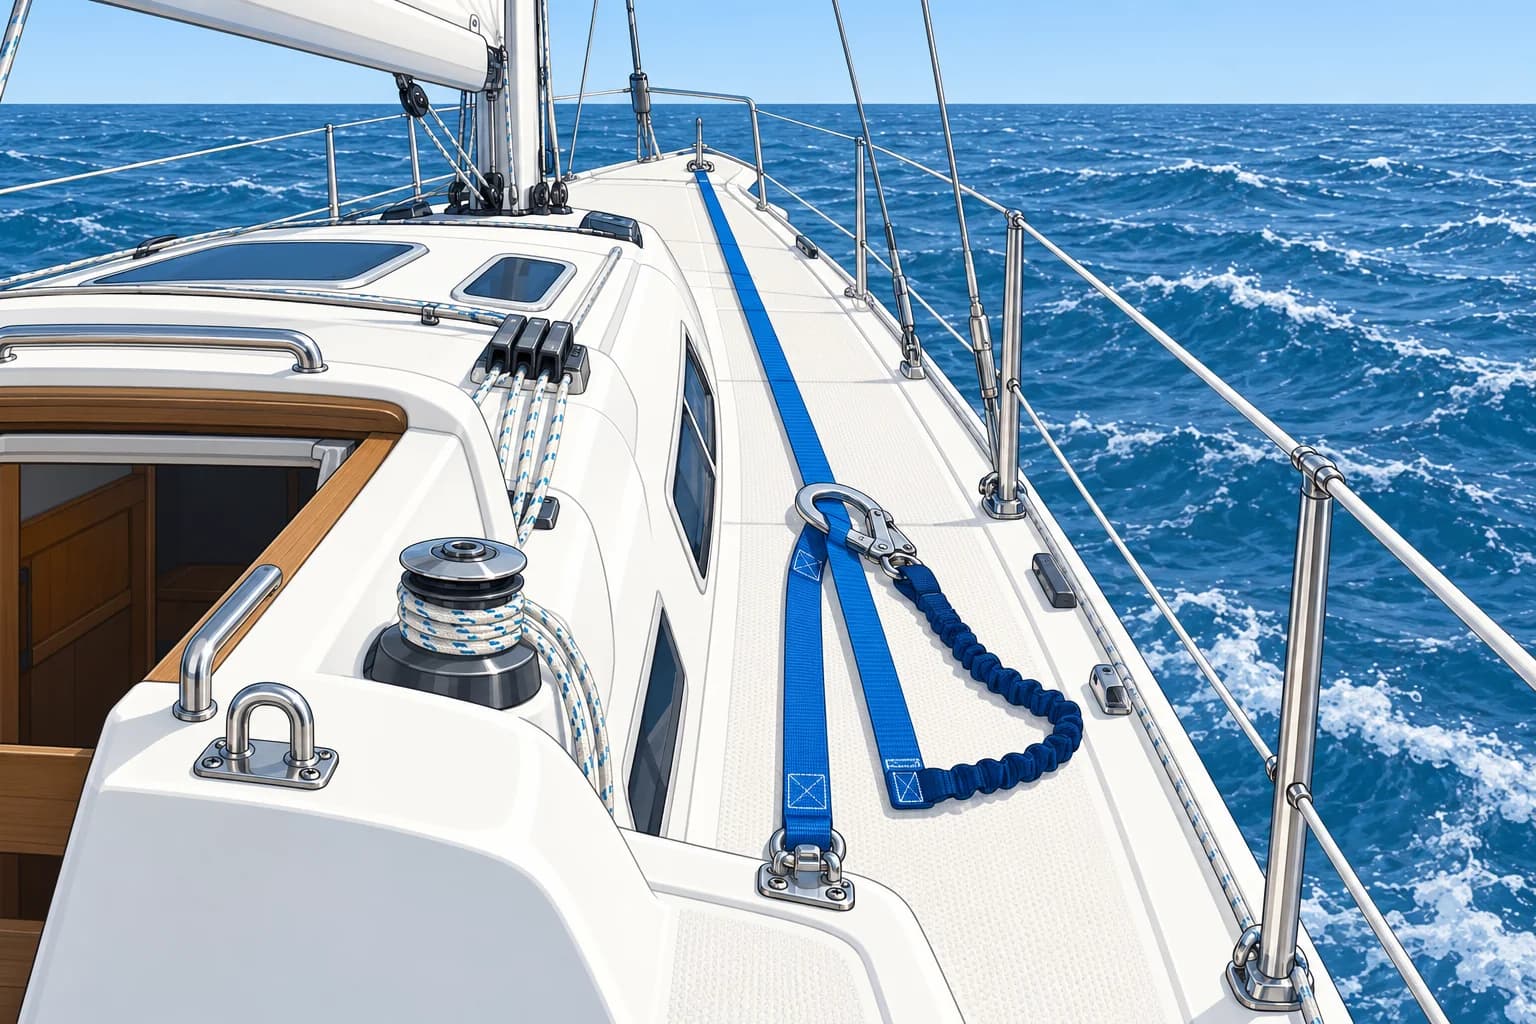
Harnesses and tethers are made to ISO 12401. Use a tether at most 2 m long with self-closing, self-locking hooks; check each gate is locked and correctly seated. A multi-hook tether lets you clip short and stay attached when changing points. An overload flag in the stitching shows the tether has taken a shock load: replace it. Some tethers have a chest-end quick-release; follow its instructions.
Jackstays
Jackstays are strong lines, usually flat webbing, running from bow to stern along each side deck. You clip on and walk forward without unclipping. Webbing does not roll under your feet like rope. Rig them so that a clipped-on person cannot reach the water, ideally along the middle of the deck. Check them for sun damage and chafe, wear from rubbing, each season, and take them in when not used.
Strong points
Clip to jackstays or dedicated clipping points, never guardwires (lifelines), sharp-edged cleats or anything that could break or let the hook slide off. Fit a clipping point by the companionway, the opening and steps between cabin and deck. Clip on before coming on deck; unclip only after going below. Near the helm, a short tether stops you falling across the cockpit.
Remember
- A harness keeps you on the boat; a lifejacket only helps you float once you are in.
- Clip on before coming on deck; unclip only after going below.
- Tethers to ISO 12401, at most 2 m, with self-closing, self-locking hooks; replace after an overload.
- Rig jackstays so a clipped-on person cannot reach the water.
- Never clip to guardwires: they are not designed for a falling body.
Common mistakes
Wrong: Clipping to the guardwire is fine for a moment.
Right: Guardwires can fail under a shock load and let you go over the side. Clip to a jackstay or strong point.
Wrong: A long tether gives freedom to work safely.
Right: A long tether lets you reach the water and be dragged. Clip short and keep inboard.
Wrong: You clip on once you reach the side deck.
Right: Clip on from inside the companionway. Many falls happen in the first step on deck.
Worked case
At night in a rising wind a crew member must go forward to free a snagged jib sheet, the rope controlling the forward sail. The jackstays run along the outer edge of the side decks and the crew has a 2 m single-hook tether. How do you make the trip safer?
Show the answer
Keep the crew in the cockpit until you can provide a route that prevents a fall overboard. Replace the single-hook tether with a suitable short or multi-hook tether and use sound inboard clipping points. Check the whole route keeps them out of the water. Stay clipped on when changing points. Clip on before coming on deck. If you cannot make the route safe, defer the job.
Practice question
What is the main purpose of a harness and tether?
- To keep you afloat once you are in the water
- To keep you attached and on board the boat
- To lift you back aboard after a fall overboard
- To mark your position if you fall into the sea
Show the answer
Answer: B. The aim is to stay on board. A lifejacket helps you float; it does not keep you on the boat.
3 · Raft & beacons
Liferaft and beacons at a glance
A liferaft is your last refuge and a beacon tells rescuers where you are. Know where they are stowed, how they work and when they were serviced.

Liferaft
A liferaft is an inflatable survival craft packed in a canister or valise, a soft carrying bag. Its painter is the line connecting it to the boat and its inflation system. Yacht rafts use ISO 9650 (offshore and inshore types); ship rafts use SOLAS, the International Convention for the Safety of Life at Sea. Check capacity covers everyone aboard and servicing follows the maker. Check the painter connection against the maker’s installation diagram.
Stowage
Keep the raft accessible and its escape path clear. Secure the canister or valise as the maker specifies. A hydrostatic release unit (HRU) frees a float-free raft if the boat sinks. For an HRU installation, connect the painter through the specified weak link, designed to break so the sinking boat cannot drag the inflated raft under. Use the approved strong point; do not bypass the weak link. Check the HRU expiry or service date. See Emergencies: abandon ship for launching and boarding.
Beacons
An EPIRB (emergency position-indicating radio beacon) belongs to the boat; a PLB (personal locator beacon) belongs to a person. Both send 406 MHz satellite distress alerts: EPIRBs for at least 48 hours, PLBs usually 24 hours. Register them with your national authority. An AIS-MOB beacon uses the automatic identification system to send a local person-overboard position to compatible AIS equipment within radio range; check your boat displays it and gives a warning.
Flares and signals
Flares (pyrotechnics) and other visual signals show rescuers where you are when they are close. Store them dry and in date, and dispose of old ones through approved schemes, never by firing them. Their types and use are in COLREG: distress signals, and in depth in Emergencies: helicopter and flares.
Key figures
- EPIRB
- 406 MHz satellite alert, registered to the boat, 48 h or more
- PLB
- 406 MHz satellite alert for one person, usually 24 h, manual
- AIS-MOB
- Local position signal to compatible AIS equipment in range
- Liferaft standards
- ISO 9650 for yachts; SOLAS for ships
Remember
- Know the liferaft’s capacity, service date and stowage; keep it accessible.
- Check the painter connection against the maker’s installation diagram, including the specified weak link where fitted.
- EPIRB = the boat’s beacon; PLB = a person’s beacon; both 406 MHz via satellite.
- AIS-MOB sends a position to compatible AIS equipment in range; check your boat displays it and gives a warning.
- Register 406 MHz beacons; keep flares dry and in date.
Common mistakes
Wrong: A valise liferaft can live at the bottom of the cockpit locker under the fenders.
Right: It must come out in seconds. Stow it where nothing can be piled on top.
Wrong: Every distress beacon switches itself on in water.
Right: PLBs usually need manual activation. EPIRBs may be manual or automatic; check your model.
Worked case
At handover, the raft is in date but buried beneath heavy gear. The EPIRB battery is in date, but its registration names the previous owner. The charterer says the dates are all that matter. Is the boat ready?
Show the answer
No. Make the raft accessible and keep its escape path clear. Check its capacity and service date, and the painter connection against the maker’s installation diagram, including the weak link where fitted. Verify the EPIRB registration and update the owner and emergency contacts before sailing. Check its battery expiry and, if fitted, its HRU expiry. Valid dates alone do not make the equipment ready.
Practice question
Which information should you check on the liferaft’s label?
- Its capacity and next required service date
- The yacht’s permitted engine operating speed
- The number of spare lifejackets in the cabin
- The maximum range of the boat’s VHF radio
Show the answer
Answer: A. Capacity must cover everyone aboard, and servicing must follow the maker. A raft with too few places is not ready, even if its service date is valid.
4 · Fire & bilge kit
Fire extinguishers, bilge pumps and bungs
Keep suitable extinguishers, pumps and bungs accessible and maintained so you can respond quickly to a small fire or leak.
Extinguishers
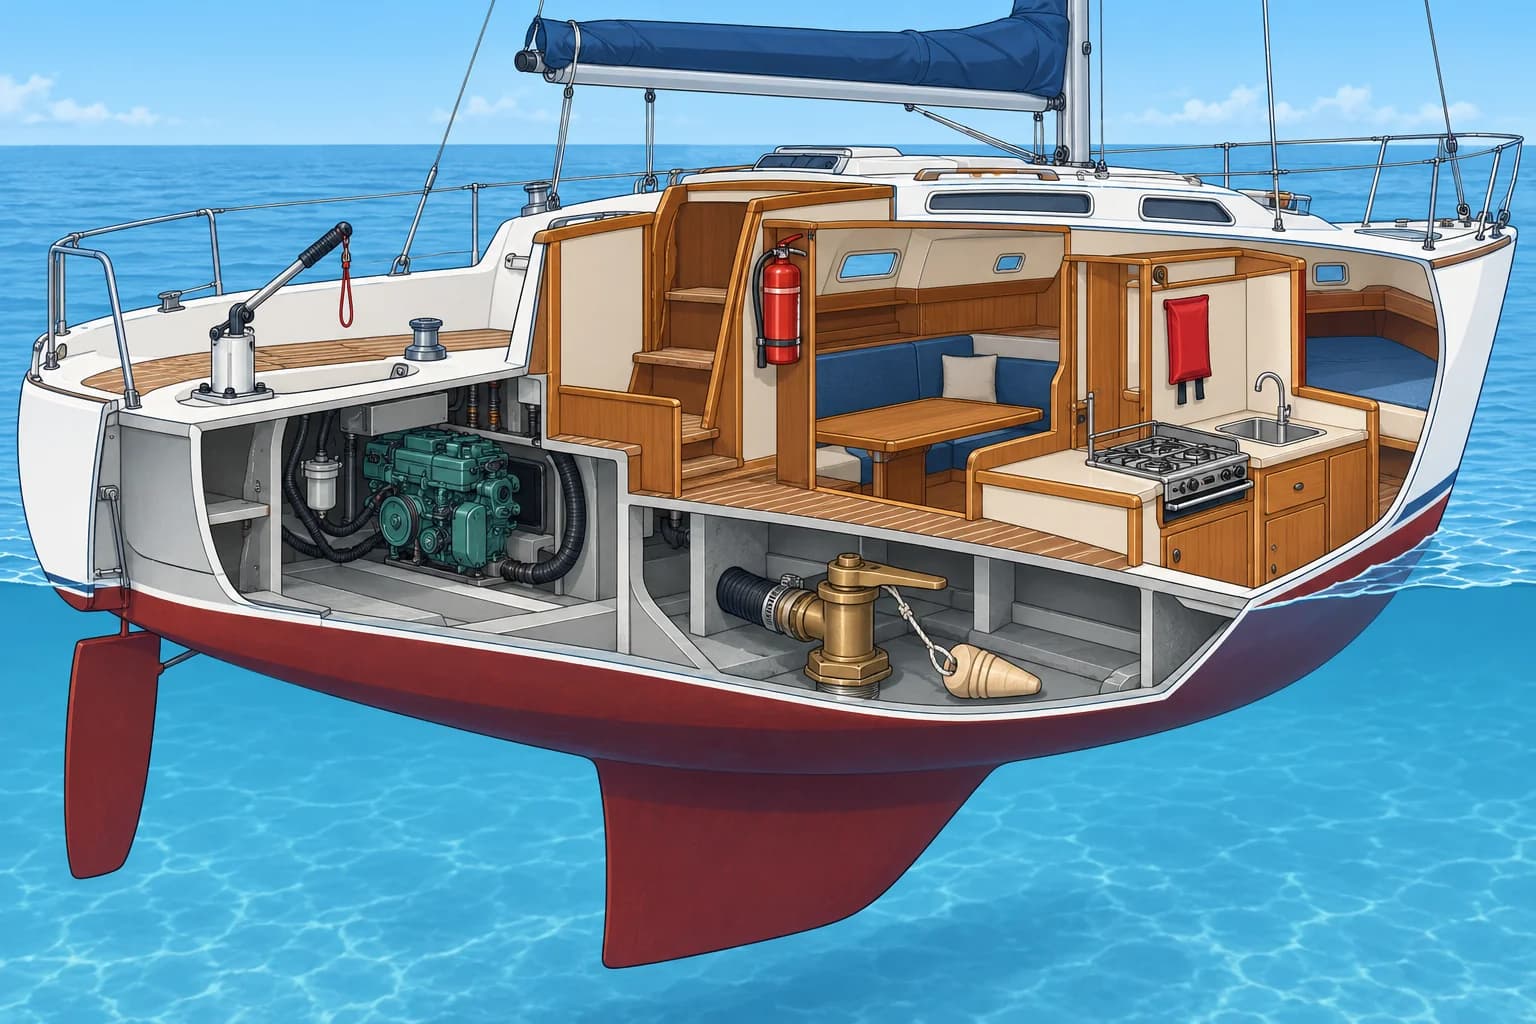
Small craft may carry dry powder, foam and carbon dioxide (CO₂) extinguishers, plus a fire blanket. Secure portable extinguishers near exits, where you can reach them without passing a fire. Keep portable engine-space extinguishers outside that space. Put the blanket near the exit from the galley, the boat’s kitchen, away from the hob. Choose numbers, ratings and locations for the boat and applicable rules. See Emergencies: fire for selection and use.
Keep them working
Check access, mounting, damage, pin, seal and the pressure gauge where fitted. CO₂ units normally have no gauge: check their charge by weight as the maker instructs. Follow the maker’s maintenance, service and replacement instructions; invert a powder unit only if instructed. Fit smoke and carbon monoxide (CO) alarms; CO is a poisonous gas from engines, heaters and cookers. Fit a gas alarm if you carry bottled gas.
Bilge pumps
The bilge is the lowest inside part of the hull. An electric bilge pump with a float switch removes small amounts of water automatically as the water rises. Have at least one manual pump that can be worked from the cockpit with hatches shut, its handle tied on, and a strainer that you can clear of debris. Carry two strong buckets with securing lines.
Bungs and seacocks
A through-hull fitting carries water through the hull. A seacock is a valve used to close an inlet or outlet. Tie a tapered softwood bung of the right size next to each fitting, ready if the fitting or hose fails. Open and close each seacock during seasonal checks to confirm it moves freely. Check hose clips follow the fitting maker’s instructions.
Remember
- Small-craft equipment includes dry powder, foam and CO₂ extinguishers, plus a fire blanket.
- Mount portable extinguishers where you can reach them without passing a fire.
- Check condition, pin, seal and any gauge; follow the maker’s checks and service dates; invert powder only if instructed.
- A manual pump worked from the cockpit, plus two strong buckets.
- Tie a softwood bung next to each through-hull; check seacocks open and close freely.
Common mistakes
Wrong: One big extinguisher in the saloon covers the whole boat.
Right: You must reach one without passing the fire. Spread several around the boat.
Wrong: The electric bilge pump will cope with any leak.
Right: An electric pump depends on its power supply and a clear intake. Keep a working manual pump and buckets as backups.
Wrong: Seacocks are best left alone: turning them may break them.
Right: A seized seacock cannot be shut in an emergency. Check each one opens and closes freely, and service it as instructed.
Worked case
Taking over a used boat, you find a portable powder extinguisher in the engine compartment, nothing by the cooker, no bungs and a manual bilge pump in a locker below. What must you put right before sailing?
Show the answer
Before sailing, mount portable extinguishers securely near exits, with the portable engine-space extinguisher outside that space. Keep them reachable without passing a fire. Fit a fire blanket near the galley exit, away from the hob. Tie suitable softwood bungs beside the through-hulls. Provide a manual pump operable from the cockpit with hatches shut, so pumping does not open the boat to the sea.
Practice question
Where should you mount a portable extinguisher intended for an engine-space fire?
- Inside the engine compartment, next to the engine
- Outside the space, reachable without opening it wide
- In the forepeak, as far from the engine as possible
- In the cockpit locker under the warps and fenders
Show the answer
Answer: B. Mount it securely outside the engine space, near an exit, so you can reach it without passing a fire. Selection and use belong to Emergencies: fire.
5 · Kit & briefing
Kit for the trip, and showing it to the crew
Choose safety kit for your boat, crew, passage risks and applicable rules. Show every crew member where it is and how to call for help.
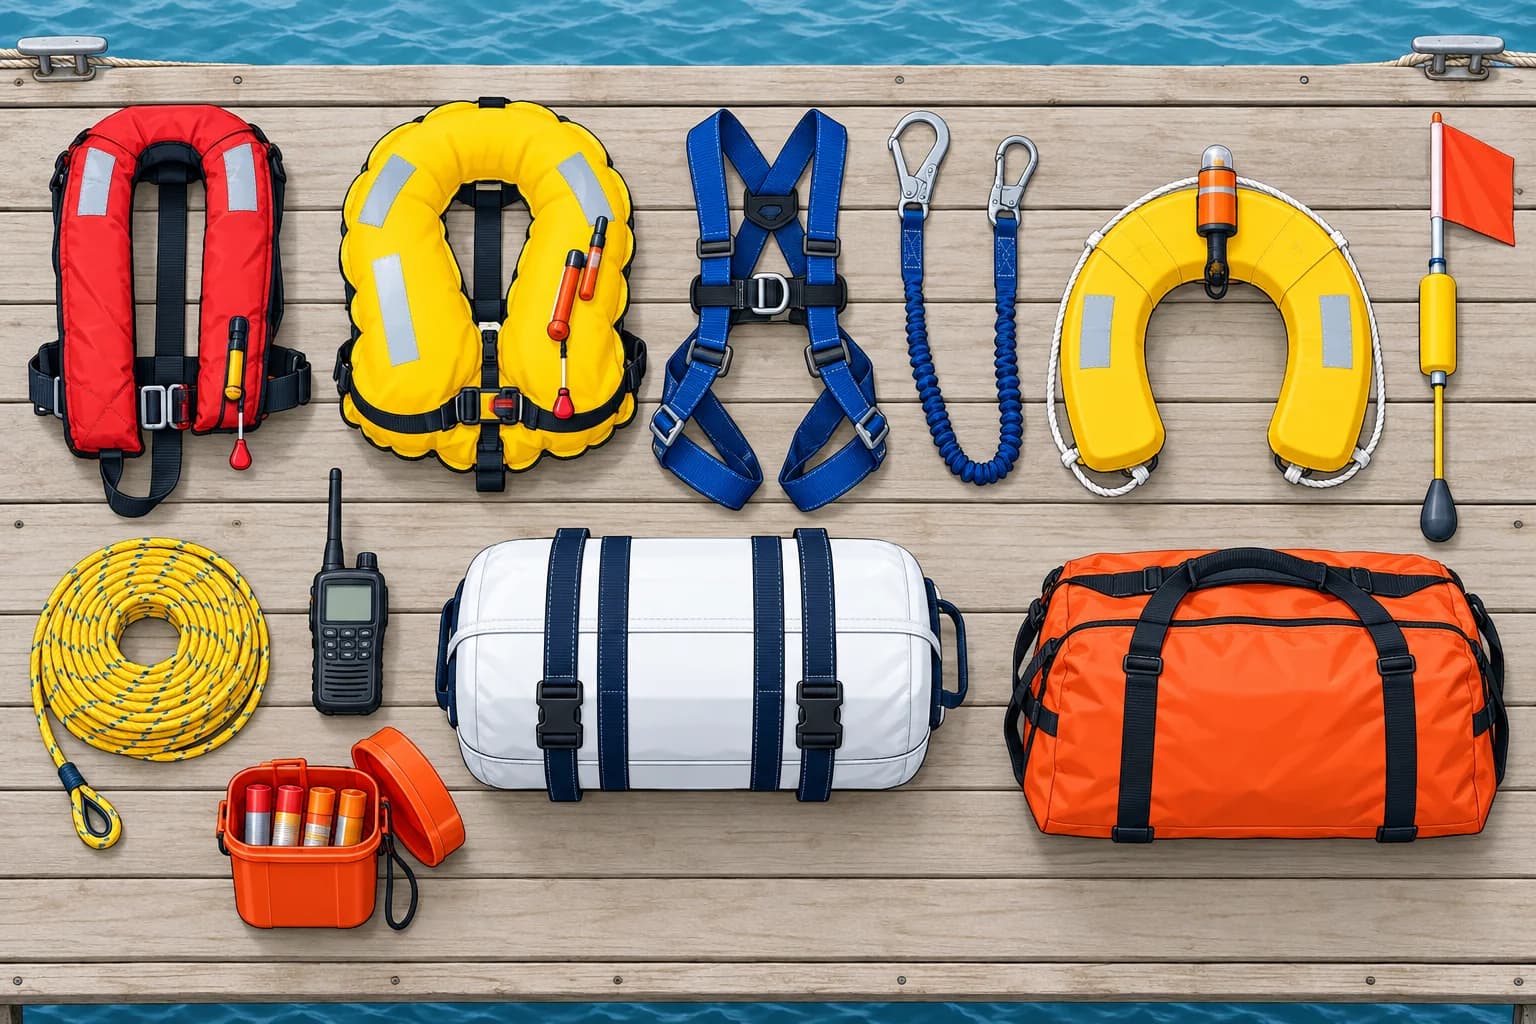
Rules are national
Your flag state, the country of registration, sets national carriage requirements. Local rules may also apply. Requirements vary with the boat and its use; many countries use distance from the coast or a place of shelter. Check the current rules for your boat and passage. For races, check whether the organiser applies the World Sailing Offshore Special Regulations (OSR).
Scale it to the trip
Always carry lifejackets, a way to call for help, an anchor, a bailer or pump, a torch, a horn and person-recovery equipment. Carry suitable first-aid and fire equipment. Use harnesses whenever conditions require them. Coastal trips typically need a marine VHF radio for voice calls and digital selective calling (DSC) for button-operated distress alerts. Offshore, typically add a liferaft, EPIRB, grab bag of emergency supplies and spare steering. These examples are not a legal checklist; offshore kit may suit inshore risks too.
Ready and marked
Kit must work when you need it. Mark lifebuoys, lifejackets and grab bags with the boat’s name. Keep a safety equipment plan, a simple drawing of where each item is, displayed in the cabin. Write the next service date of each item in your log or a checklist. Check the lifebuoy and danbuoy, a tall floating person-overboard marker, can be released in one movement.
Showing the crew
Before you leave, every person aboard must know where the lifejackets, liferaft, extinguishers, fire blanket, flares, first-aid kit, bungs and pumps are, and how to use the radio to call for help. The full briefing and drills are in Emergencies: drills. A crew that has been shown the kit can save the skipper, not only the other way round.
Remember
- Carriage rules are set by the flag state; many scale kit by distance offshore.
- Build capability for inshore, coastal and offshore risks; carry first aid, suitable fire kit and recovery equipment on every trip.
- Offshore typically adds liferaft, EPIRB, grab bag; use harnesses whenever conditions require, even near shore.
- Mark kit with the boat’s name and keep a safety equipment plan displayed in the cabin.
- Show every crew member where the kit is and how to call for help.
Common mistakes
Wrong: If the kit meets another country’s list, it is legal anywhere.
Right: Your flag state’s rules apply to your boat. Check them, and any local rules where you sail.
Wrong: Only the skipper needs to know where the safety kit is.
Right: The skipper may be the casualty. Every person aboard must know the kit and how to call for help.
Worked case
You plan an overnight crossing with six people, reaching 30 nautical miles from the nearest safe haven. Your current kit serves short daytime coastal trips. How do you decide what must change?
Show the answer
Review what is aboard against flag-state and local requirements for the boat, people and maximum distance from shelter. Assess darkness and delayed rescue. Check raft capacity, beacon readiness, harnesses and recovery aids. Review first-aid and fire equipment suited to the boat; add or upgrade what is missing. Update service records and the equipment plan displayed in the cabin, then show the crew.
Practice question
Your boat meets its flag-state equipment rules. Before visiting another country, what else should you check?
- Applicable local equipment requirements
- Only the departure marina’s equipment list
- World Sailing’s rules for every leisure boat
- Only the insurer’s latest survey report
Show the answer
Answer: A. The country of registration sets national carriage rules; local rules may also apply. World Sailing’s OSR apply to races that adopt them.