
Navigation · Level R4 · 4 parts · about 14 min
More fixes: running fix, doubling the angle and dipping lights
4 short parts: Running fix · Bow angles · Dipping lights · Sextant angles. Each part explains the idea, then gives the points to remember, the common mistakes, a worked case and a practice question; the Academy unit adds all 24 check questions.
1 · Running fix
The running fix: one object, two times
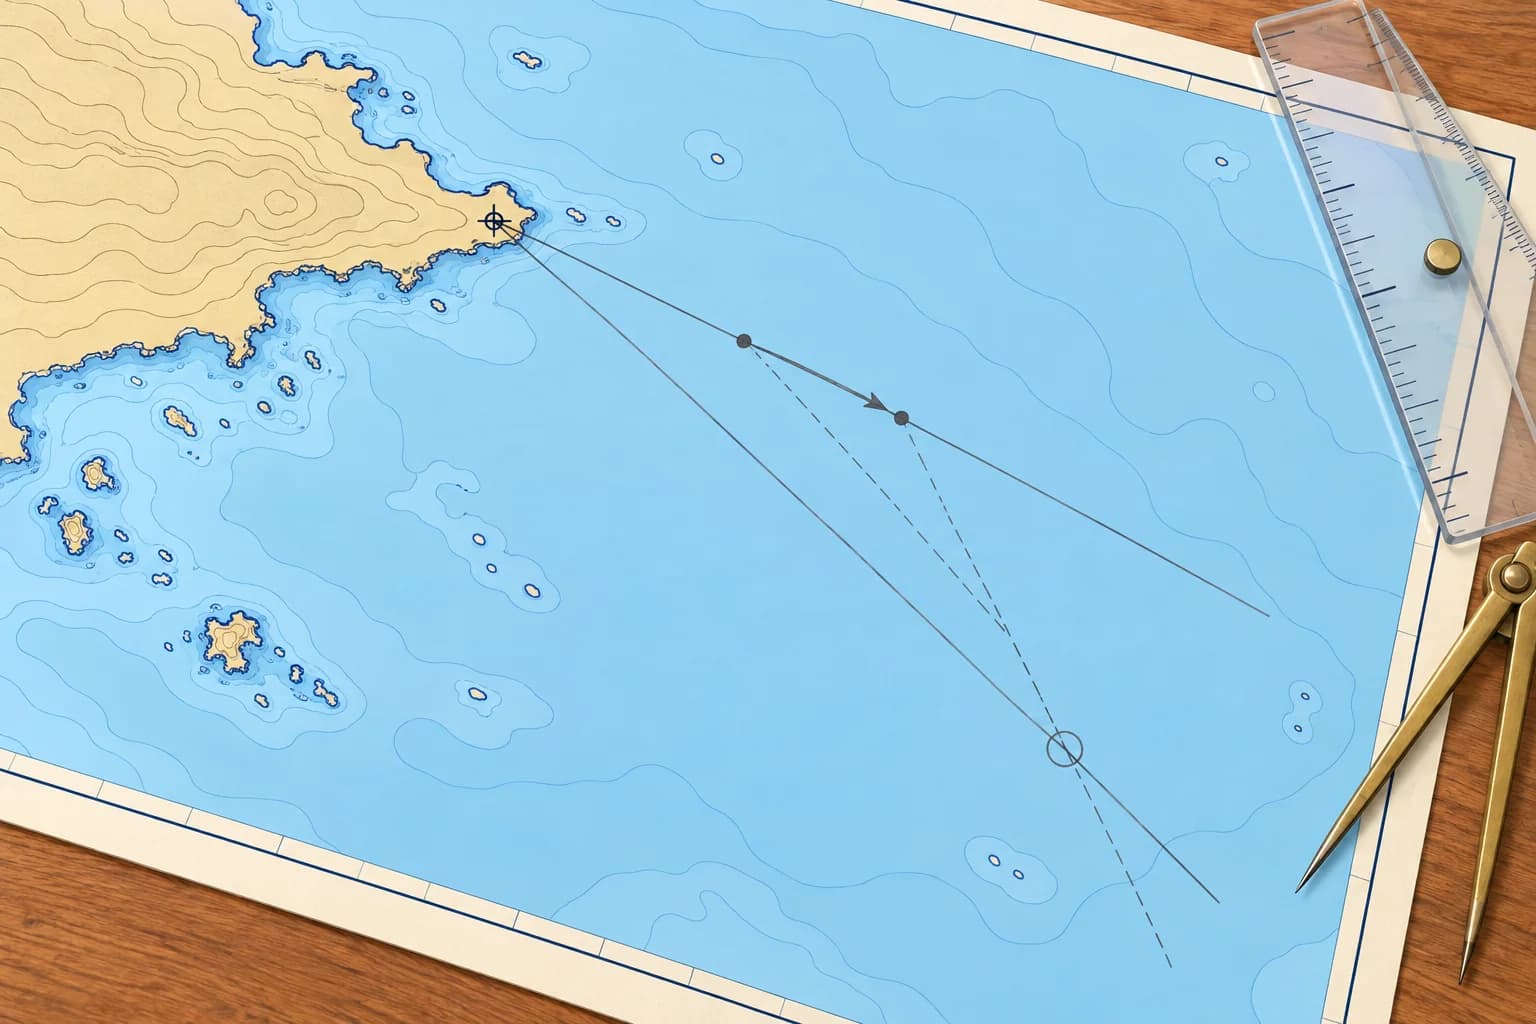
With only one object in sight, take a bearing, run on, take another, and move the first position line along your ground track for the time between.
When you need it
A fix needs two position lines at the same moment (Position fixing unit). With only one charted object in sight, such as a single headland by day or one light at night, you can still fix by taking two bearings at different times. Spanish courses call this a situación por demoras no simultáneas. The first line is moved forward to the time of the second; it is then a transferred position line.
Transferring the line
Take the first bearing and note the time and log reading. Hold a steady heading until the bearing has changed by at least about 30°, ideally 60–90°. Take the second bearing. From any point on the first line, lay off the distance and direction the boat moved over the ground in the interval. Through that end point draw a line parallel to the first, and mark it as transferred, usually with double arrowheads. Where it crosses the second bearing is your running fix.
Allow for the stream
The line must move with the boat over the ground, not just through the water. Transfer it by the water track and log distance plus the tidal stream for the same time, exactly as you build an EP (Dead reckoning unit). Example: water track 090°T, 5.0 M by log in the hour, stream 180°T at 1.0 kn. Move the line 5.0 M east, then 1.0 M south: in all about 5.1 M along 101°T.
How good it is
A running fix depends on the observations, their angle of cut and the run between them. Errors in leeway, the log, steering and the predicted stream shift the transferred line. Keep the interval short, but allow enough bearing change. A well-cut running fix often improves an EP, but uncertain movement or poor observations can make it worse. A good simultaneous fix avoids the extra uncertainty of the run. Cross-check with a sounding or another independent line.
Other lines too
Any position line can be transferred in the same way. A radar range is moved by shifting the circle's centre along the same ground vector. A depth contour can be transferred too, if you trace it. Sun lines in celestial navigation, taken hours apart, are crossed by the same rule.
Key figures
- Transfer by
- Ground track and distance over the interval
- Bearing change
- At least about 30°; better 60–90°
- Example transfer
- 5.0 M at 090°T + 1.0 M at 180°T ≈ 5.1 M at 101°T
- Range circles
- Move the centre by the same ground vector
- Spanish term
- Situación por demoras no simultáneas
Remember
- A running fix crosses a transferred position line with a later one.
- Move the first line by the boat's movement over the ground, stream included.
- Wait for the bearing to change by at least about 30° before the second line.
- It carries every error of the run: check it with a sounding.
Common mistakes
Wrong: Transfer the first line by the log distance along the heading only.
Right: Transfer it by the water track plus the tidal stream: the boat's real movement over the ground.
Wrong: Take the second bearing before the bearing has changed enough.
Right: Wait until the bearing has changed enough for a good angle of cut, at least about 30°.
Wrong: Draw the transferred line through the object again.
Right: Draw it parallel to the first line, through the end of the ground vector, not through the object.
Worked case
At 2100 a light bears 040°T. You hold a water track of 090°T at 5.0 kn; the stream sets 180°T at 1.0 kn. At 2200 the same light bears 320°T. How do you plot your 2200 position? The stream estimate is uncertain. Is this enough for close clearance?
Show the answer
Draw the 2100 line 040°T through the light. From any point on it, lay off 5.0 M along 090°T, then 1.0 M along 180°T. Through the end point draw a line parallel to 040°T and mark it transferred. Draw the 2200 bearing 320°T through the light. Where the two lines cross is your 2200 running fix; check it with the depth. No. Stream uncertainty shifts the transferred line; keep a wider clearance until independently checked.
Practice question
What is a transferred position line?
- A bearing redrawn through a second charted object
- An earlier position line moved by the boat's run
- A bearing corrected from magnetic to true north
- A position line taken from the plotter's track
Show the answer
Answer: B. It is the earlier line moved, parallel to itself, by the boat's movement over the ground until the second observation.
2 · Bow angles
Bow angles: doubling the angle and the four-point bearing
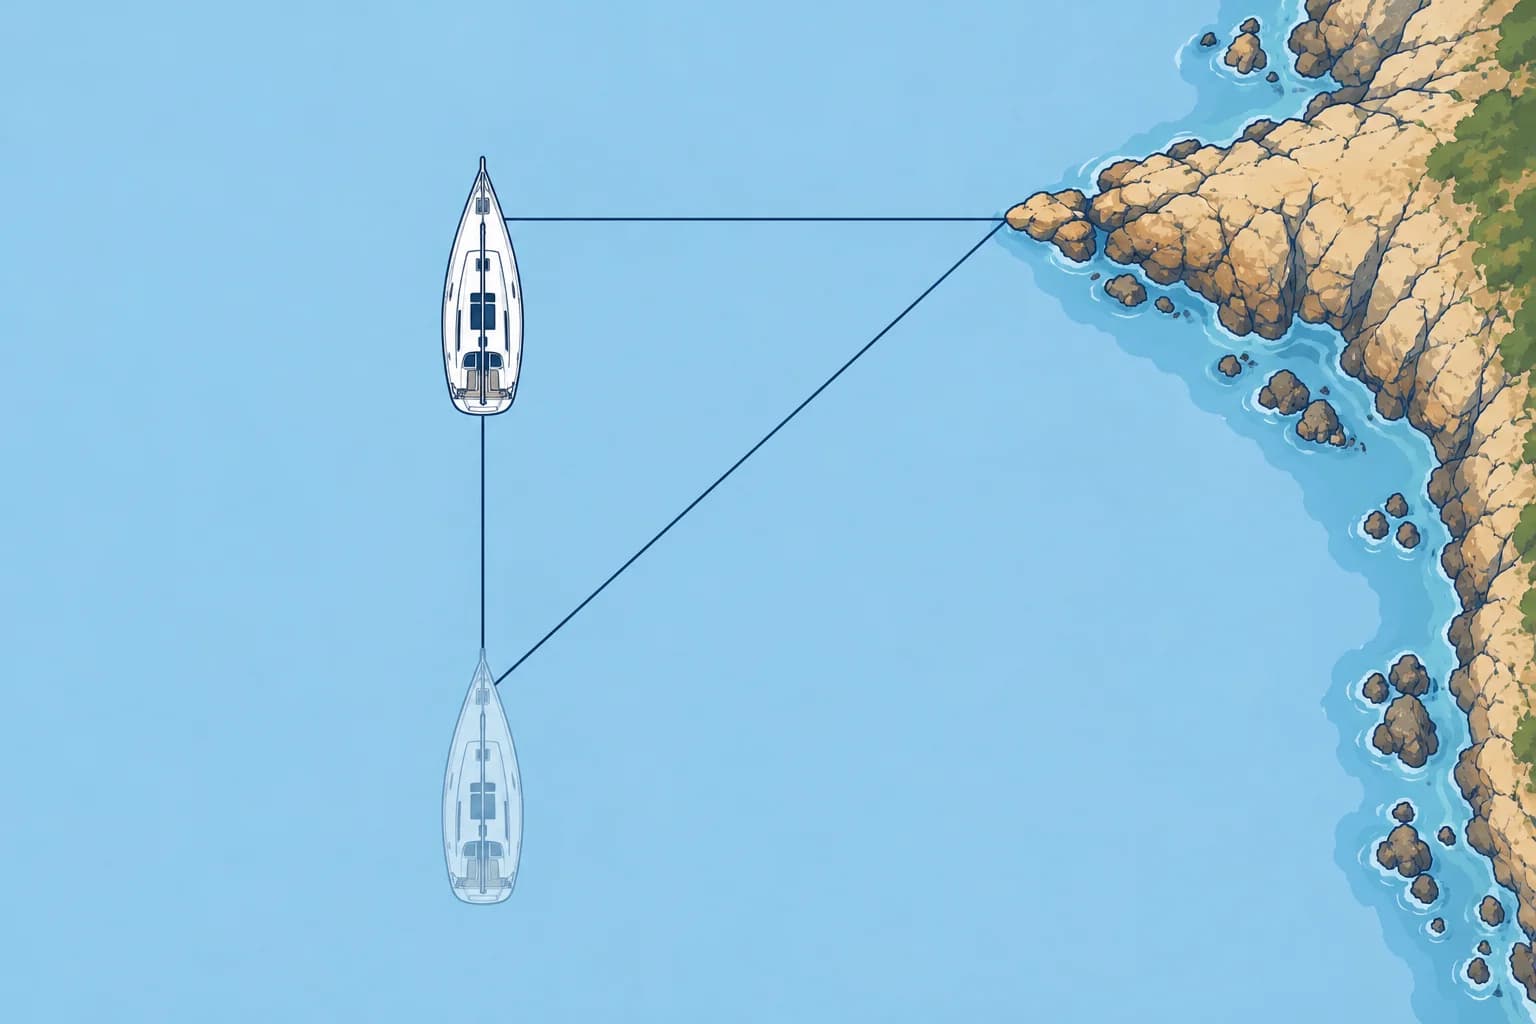
On a straight ground track aligned with your heading, doubling a mark’s bow angle makes its range at the second bearing equal your run.
Relative bearings
A relative bearing is measured from the bow: 30° on the starboard bow is 30° to the right of the heading. Spanish courses call it a marcación. Read it from a sighting ring marked in degrees from the bow, or take a compass bearing and subtract the heading. Use a straight, steady ground track aligned with your heading, with no cross-set or leeway; measure distance over the ground.
Doubling the angle
Note the time and log when an object bears, say, 30° on the bow. Hold your course until the angle has doubled to 60°. The triangle formed has two equal sides, so your distance from the object at the second bearing equals the distance run between the two. Example: 30 minutes at 5.0 kn over the ground is 2.5 M, so you are 2.5 M off at the second bearing. Spanish: ángulo doble.
The four-point bearing
The best-known pair is 45° on the bow, four old compass points, and then 90°, abeam. The distance abeam equals the distance run between them. Example: 45° at 1100, abeam at 1124, at 6.0 kn over the ground: 0.4 h × 6.0 = 2.4 M, so you passed 2.4 M off. It is simple and accurate, but it tells you only afterwards how close you passed.
Predicting the passing distance
Two other pairs warn you in advance. From 26.5° to 45° on the bow, the distance run approximately equals the distance at which you will pass abeam if you hold your course. From 22.5° to 45°, the passing distance will be about 0.7 × the distance run. If that predicted distance is too small for the danger off the point, alter course early.
Where it fails
The geometry assumes the boat moves straight along its heading over the ground. A cross-stream or leeway moves you off that line, and the answer can be wrong on the dangerous side. Use these methods where there is little cross-set, use the speed over the ground when a stream runs along your track, and plot a full running fix when there is a cross-stream.
Key figures
- Doubling the angle
- Distance off at the second bearing = distance run
- Four-point (45° → 90°)
- Distance abeam = distance run
- 26.5° → 45°
- Distance run ≈ distance you will pass abeam
- 22.5° → 45°
- Passing distance ≈ 0.7 × distance run
- Relative bearing
- Compass bearing − compass heading
- Spanish terms
- Marcación (relative bearing), ángulo doble
Remember
- Doubling the bow angle: distance off at the second bearing = distance run.
- Four-point bearing, 45° then abeam: distance abeam = distance run.
- 26.5° → 45° and 22.5° → 45° predict how close you will pass, before you get there.
- All bow-angle methods fail in a cross-stream or with leeway: use a running fix.
Common mistakes
Wrong: Use the log distance when a strong stream runs along your track.
Right: Use the distance over the ground. A fair or foul stream changes how far you really ran.
Wrong: Use doubling the angle in a strong cross-stream.
Right: A cross-set moves you off your heading line. Plot a running fix with the stream instead.
Wrong: Rely on the four-point bearing to keep clear of a danger off a headland.
Right: It gives the distance only once you are abeam. Use the 26.5°–45° pair to estimate your passing distance in advance.
Worked case
A headland bears 22.5° on your port bow at 0940 and 45° at 1000. You make 6.0 kn over the ground with no cross-stream or leeway. Rocks extend 1.5 M off the headland. Will you pass safely if you hold your course?
Show the answer
In 20 minutes you ran 2.0 M. From 22.5° to 45°, the passing distance is about 0.7 × 2.0 = 1.4 M. That is inside the 1.5 M of rocks. Alter course to starboard, away from the headland, now, and check again with a fresh bearing or a fix.
Practice question
On a straight ground track aligned with your heading, a light bears 30° on the bow, then 60° after you run 3.0 M over the ground. How far off is it at the second bearing?
- 3.0 M
- 1.5 M
- 4.5 M
- 6.0 M
Show the answer
Answer: A. Doubling the angle forms an isosceles triangle: distance off at the second bearing equals the distance run.
3 · Dipping lights
Lights rising and dipping: distance off by the horizon
A strong light first shows over the horizon at a distance set by its elevation and your height of eye. Its bearing at that moment gives a fix.
Rising and dipping
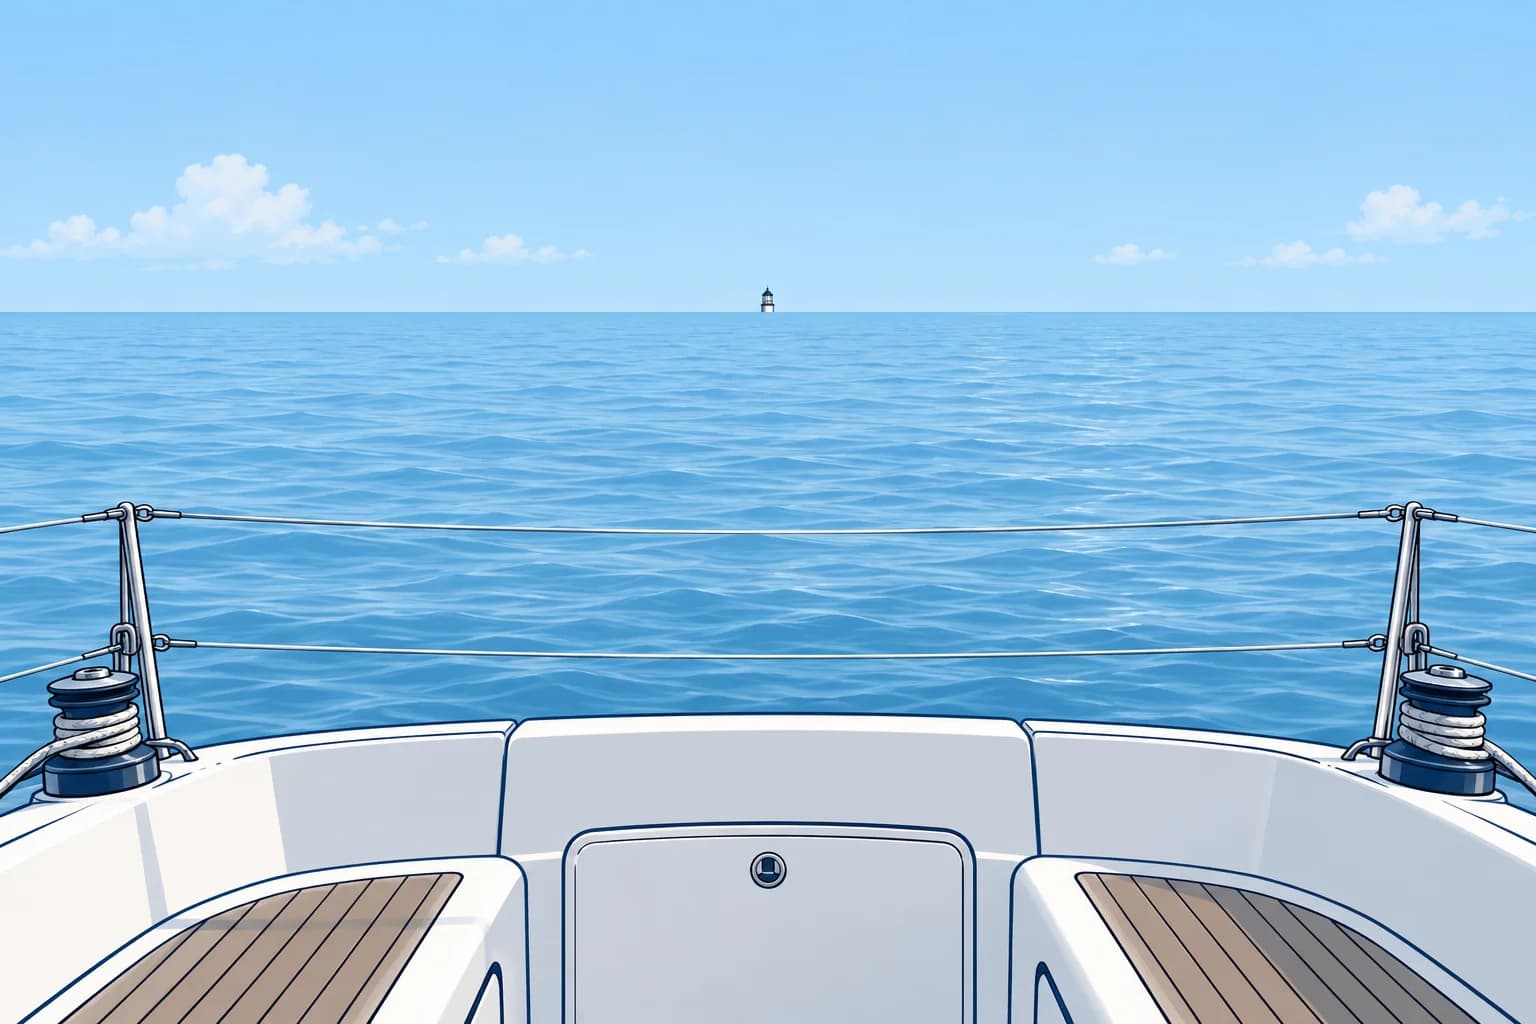
Far off, you may first see the loom of a light, its glow in the sky. As you close it, the light itself appears on the horizon: it is rising. Going away, it disappears below the horizon: it is dipping. At that moment your distance from it is its geographical range for your height of eye. Spanish courses call this a faro en el horizonte.
The formula
Distance to the horizon in miles ≈ 2.08 × √h, with h in metres; the constant includes average refraction. Add the light’s term and yours: D = 2.08 × (√H + √h). H is the light’s height above the current water level and h is your height of eye above that water, both in metres. Other tables use constants near 2.1 or 2.12.
Worked example
A light is 49 m above the current water level and your eye is 2.5 m above the water. D = 2.08 × (√49 + √2.5) = 2.08 × (7.0 + 1.58) = 2.08 × 8.58 ≈ 17.8 M. When it rises, take its bearing. The bearing line and a 17.8 M arc round the light give your fix. Check it is truly on the horizon: lower your eye and it should disappear, raise it and it reappears.
Check it can dip
The light must reach the horizon: its luminous range, the distance visible in current conditions, must exceed its geographical range. Nominal range is luminous range in 10 M meteorological visibility. MHWS means mean high water springs. Check the stated elevation datum, the reference level for charted heights. For the formula, H must be height above the current sea surface: add the distance the tide is below that datum, or subtract the distance above it.
Tables and care
Almanacs and Spanish exam books print a table of distances of lights rising or dipping, entered with the light's elevation and your height of eye: no arithmetic at night. Unusual refraction, especially over cold water or in hot calm weather, can move the true horizon distance noticeably. Treat the result as approximate and cross-check it with a sounding or a second line.
Key figures
- Geographical range
- D (M) = 2.08 × (√H + √h), H and h in metres
- Example
- H 49 m, h 2.5 m → about 17.8 M
- Horizon from 2.5 m
- 2.08 × √2.5 ≈ 3.3 M
- Nominal range
- Luminous range in a meteorological visibility of 10 M
- Height H
- Height above current water; adjust charted elevation for tide
- Spanish terms
- Faro en el horizonte, alcance geográfico
Remember
- A light rising or dipping is at its geographical range for your height of eye.
- D ≈ 2.08 × (√H + √h) with heights in metres gives miles.
- It only works if the light's luminous range is greater than its geographical range.
- Combine the distance with the light's bearing for a fix, and cross-check it.
Common mistakes
Wrong: Use the nominal range printed on the chart as your distance off.
Right: Nominal range is about the light's power. The rising distance comes from the elevation and your height of eye.
Wrong: Leave out your own height of eye.
Right: Add both terms: the light's horizon and yours. From 2.5 m your own term alone is about 3.3 M.
Wrong: Take the first glow in the sky as the light rising.
Right: That is the loom. Wait until the light itself is on the horizon, and check by raising and lowering your eye.
Worked case
A light is 64 m above the water, with nominal range 12 M. Your eye is 3 m high and meteorological visibility is 10 M. It first appears at night. Can you use its first appearance and bearing for a horizon fix?
Show the answer
No. Geographical range is 2.08 × (√64 + √3) ≈ 20.2 M, but luminous range is only 12 M in 10 M visibility. The light becomes visible inside the geographical horizon, so first appearance does not give 20.2 M. Seek another position line.
Practice question
A light is 49 m above the current water level and your eye is 2.5 m high. Its luminous range exceeds its geographical range. At about what distance does it rise?
- About 14.6 M
- About 21.4 M
- About 10.2 M
- About 17.8 M
Show the answer
Answer: D. 2.08 × (7.0 + 1.58) = 2.08 × 8.58 ≈ 17.8 M.
4 · Sextant angles
Horizontal and vertical sextant angles, and danger angles
On a known side of the line joining two marks, their angle puts you on a circle arc through both. Two angles from three marks can fix you without compass error.
A circle of position
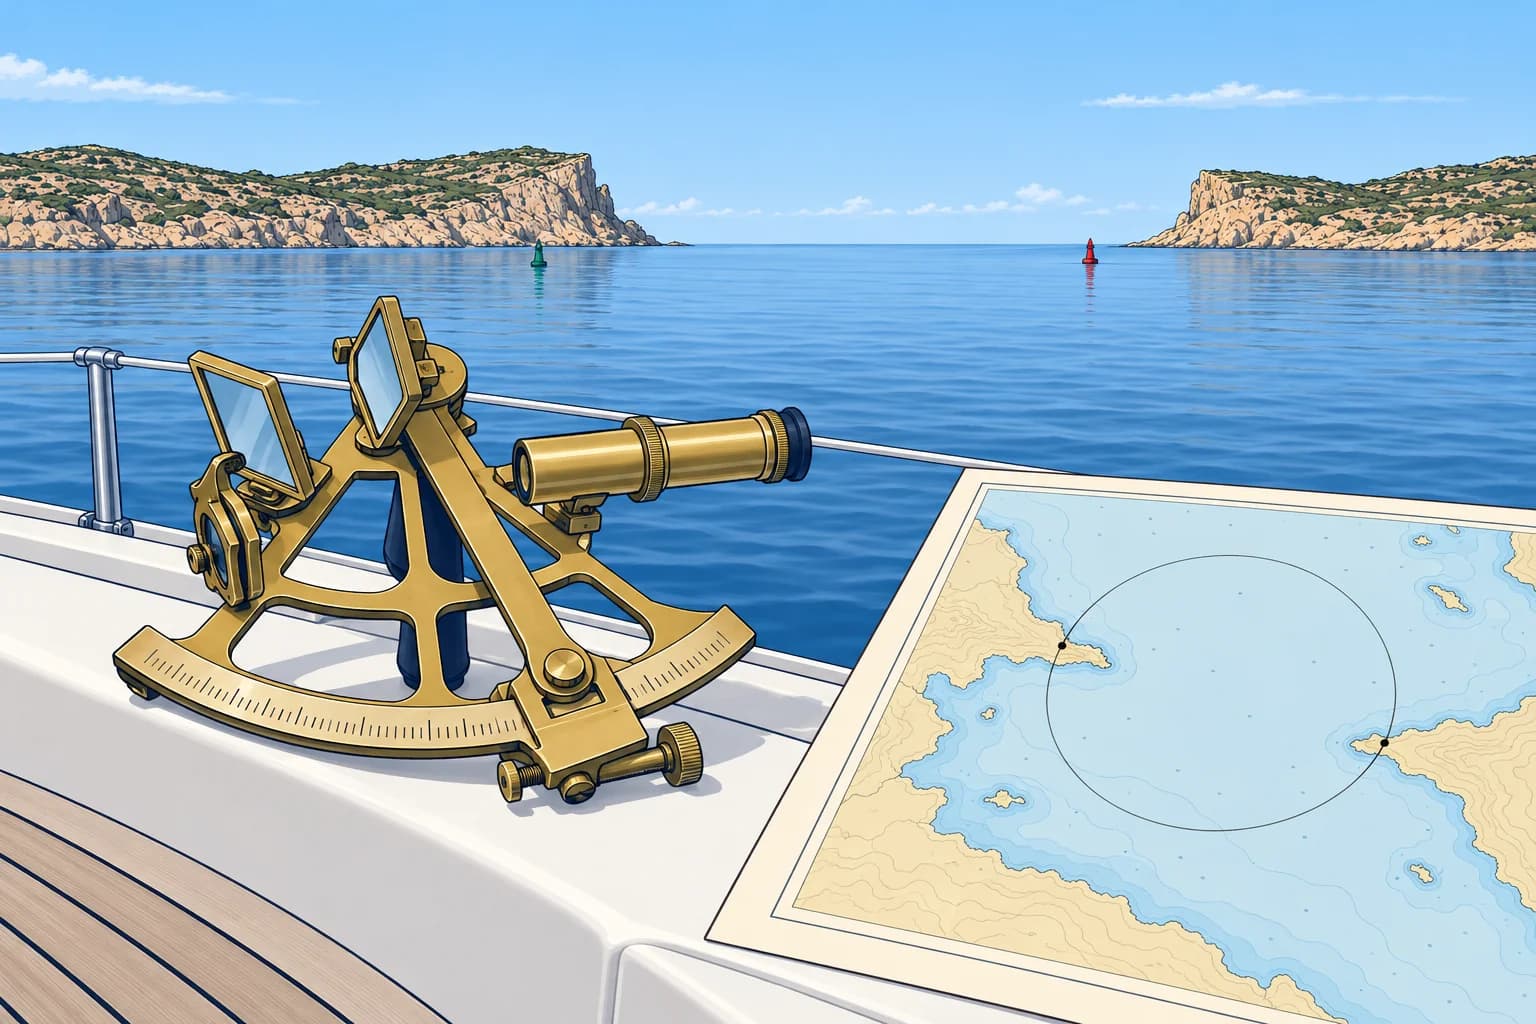
Hold a sextant horizontally and measure the angle between two charted objects, such as a beacon and a headland edge: a horizontal sextant angle. On your known side of the line joining the marks, equal measured angles define a circle arc through both marks. That arc is your position line. The opposite arc gives 180° minus that angle. No compass is needed, so variation and deviation do not matter.
Drawing the circle
Join the two marks on the chart. Below 90°, draw lines from the ends at 90° − angle to this base line, on your side; their intersection is the centre. Above 90°, use angle − 90° on the far side. At 90°, the base line is the diameter: its midpoint is the centre. Draw the circle through both marks and use only the arc on your side of the base line.
Three objects, two angles
Measure the angles between the left and middle objects and between the middle and right ones, at the same moment. The two circles cross at the middle object and at your position. Navigators used a station pointer, a three-armed protractor: set the two angles and slide it until each arm runs through its object. Tracing paper works too. Avoid objects that lie on one circle with you: the fix then becomes indeterminate.
The danger angle
A horizontal danger angle marks a limiting arc through two charted marks, clear of a hazard. Stay on the same side of their base line as the chosen arc. On that side, angles are larger inside the circle and smaller outside it. If danger is inside, keep below the limiting angle; if safe water is inside, keep above it. Allow a margin for observation error and check frequently near danger.
Vertical sextant angle
A vertical sextant angle between an object’s top and waterline gives distance off: d (M) ≈ 1.856 × H ÷ angle, H in metres above current water, angle in minutes of arc. A 60 m cliff above water at 30′ is about 3.7 M off. Check the chart’s height datum (reference level). If it uses mean high water springs (MHWS), add the tide’s shortfall below that level to get H. Use this only when the object’s foot is within your horizon.
Key figures
- Circle centre
- Below 90°: 90° − angle; at 90°: midpoint of base line
- Angle over 90°
- Centre on the far side, at angle − 90°
- Danger inside the circle
- On the chosen side of the base line, keep below the danger angle
- Vertical sextant angle
- d (M) ≈ 1.856 × H (m) ÷ angle (minutes)
- Example
- 60 m at 30′ → about 3.7 M
- No compass needed
- No variation or deviation in sextant angles
Remember
- On a known side of the marks’ base line, a horizontal angle puts you on an arc of a circle through both.
- Two angles from three marks give a fix with no compass error.
- Stay on the chosen side of the marks’ base line when using a danger angle to keep clear.
- A vertical sextant angle of a charted height gives your distance off.
Common mistakes
Wrong: Draw the circle centre at the measured angle from the base line.
Right: Below 90°, use 90° minus the angle on your side; above 90°, use angle minus 90° on the far side. At 90°, use the base line’s midpoint.
Wrong: Pick three marks that lie on a circle through your position.
Right: Then both circles coincide and give no fix. Choose marks well spread, with the middle one nearest you.
Wrong: Use a charted height for a vertical angle without any tide correction.
Right: Check the chart’s height datum. If it is mean high water springs (MHWS), add the tide’s shortfall below it to get height above water; subtract any excess above it.
Worked case
Two beacons stand on a straight shore. A reef lies offshore between them. You draw a circle through both beacons that passes just outside the reef, on the seaward side, and measure 38° on it. Sailing along the coast, what must your horizontal sextant angle stay?
Show the answer
Stay on the seaward side of the beacons’ base line. On that side, the angle inside the circle is larger than 38°. Keep below 38° with a margin: if it grows towards 38°, turn away from shore. Check frequently enough for your speed and clearance.
Practice question
What position line does a horizontal sextant angle between two charted marks give you?
- A straight line joining both charted marks
- An arc centred on the nearer charted mark
- A bearing line from the more distant mark
- An arc of a circle through both the marks
Show the answer
Answer: D. On your known side of the line joining the marks, equal measured angles define an arc of a circle through both. The opposite arc gives 180° minus that angle.