Navigation · Level R3 · 5 parts · about 15 min
Position fixing: cross bearings, transits and bearing with distance
5 short parts: Position lines · Three-point fix · Transits · Bearing and range · Which fix to trust. Each part explains the idea, then gives the points to remember, the common mistakes, a worked case and a practice question; the Academy unit adds all 27 check questions.
1 · Position lines
Position lines: the building blocks of a fix
A position line is any line you know you are on. Cross two or more taken at the same time and you have a fix.
What it is
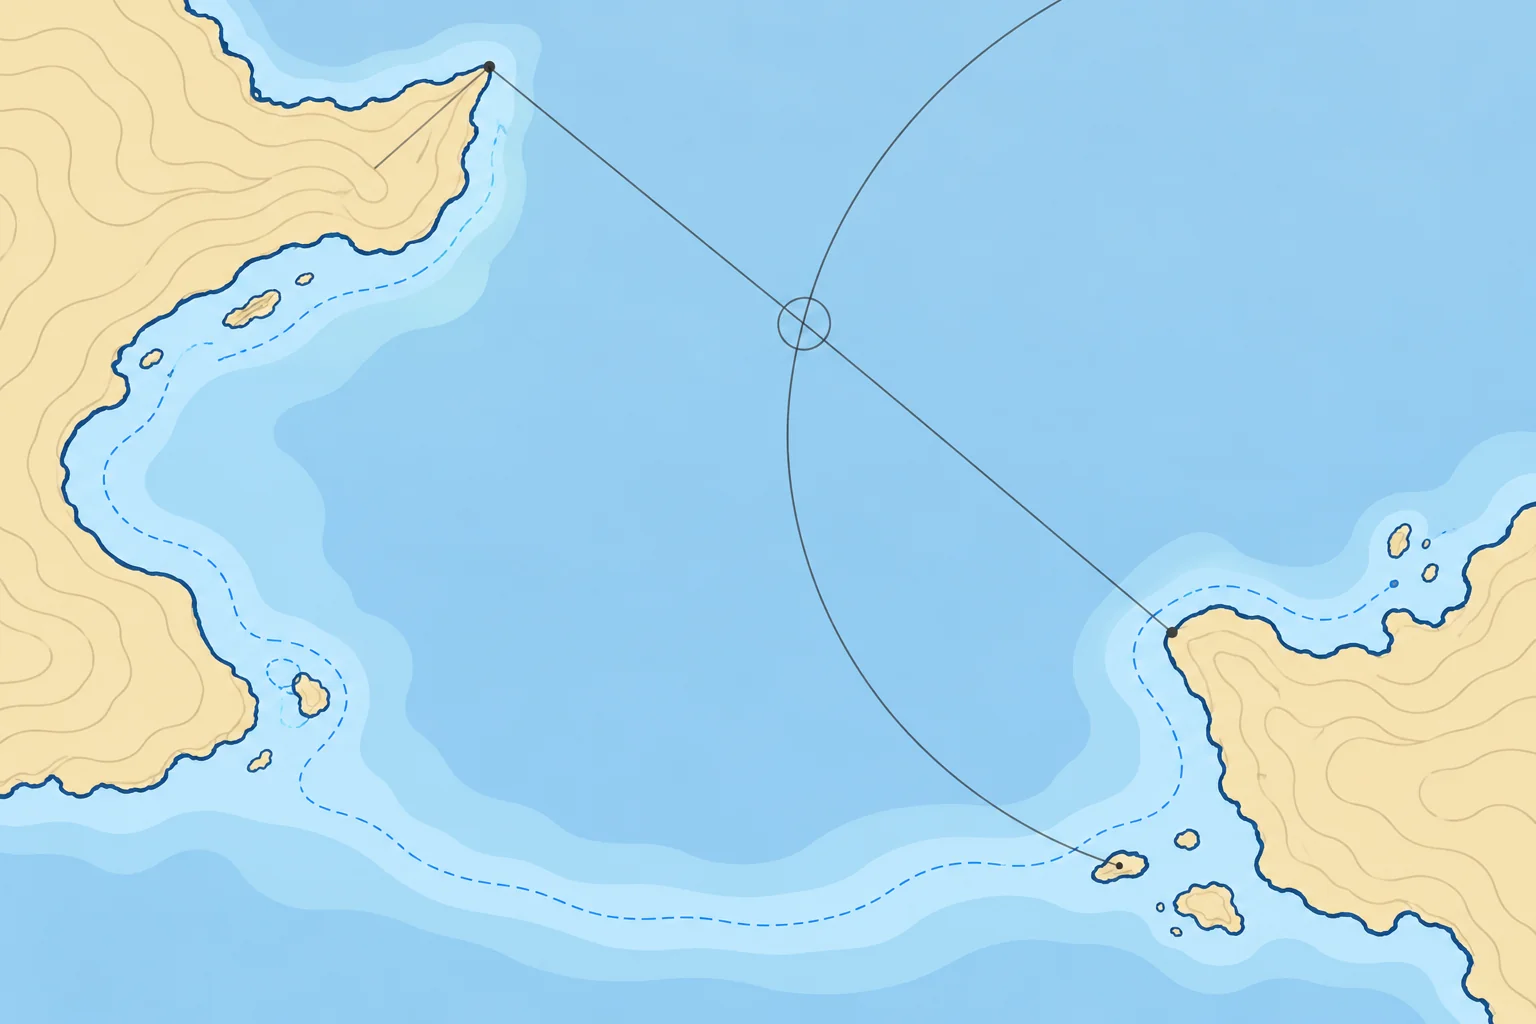
A position line (PL, also called a line of position) is a line on the chart somewhere along which you know you were at a given time. On its own it does not say where along the line. The point where two or more position lines taken at the same time cross is a fix: a position found from observations of the outside world, not from estimates.
Four common kinds
A compass bearing of a charted object gives a straight line through it. A transit, two charted objects seen in line, gives the most accurate straight line. A range (your distance from an object, usually by radar) gives a circle around it. A depth contour, a charted line joining points of equal depth, gives a line you can match with the echo sounder. Spanish courses call contours veriles or isobatas.
The angle of cut
Two lines crossing at a shallow angle leave a long, thin area of doubt: a small error in either line moves the crossing a long way. Aim for two lines crossing at about 90°, or three at about 60° to each other. Avoid lines that cross at less than about 30°.
Marking a fix
Draw a small circle round the crossing point and write the time beside it, for example ⊙ 14:20, and write the fix in the log. Schools differ on the other symbols: RYA courses mark an estimated position with a triangle, while Bowditch marks a DR position with a semicircle and an estimated position with a square. Use one set consistently on board.
Key figures
- Bearing
- Straight line through the object
- Transit
- Straight line through both objects; the most accurate
- Range
- Circle centred on the object
- Angle of cut
- Two lines about 90°; three about 60°
- Fix symbol
- Small circle round the crossing, with the time
Remember
- A position line says you are somewhere on it; crossing lines give a fix.
- Bearings and transits give straight lines; a range gives a circle.
- Cross lines near 90° (two) or 60° (three); avoid shallow cuts.
- Mark a fix with a small circle and the time.
Common mistakes
Wrong: Any two bearings make a good fix.
Right: Lines crossing at a shallow angle magnify every error. Choose objects so the lines cross near 90°.
Wrong: A depth sounding fixes your position.
Right: A depth gives a position line only where the contours are clear, and you still need a second line.
Worked case
You can see two charted objects: a headland 10° on the port bow and a beacon 15° on the starboard bow. Is a two-bearing fix from them reliable?
Show the answer
No. Both are nearly ahead, so the bearings differ by only about 25° and the lines cross at a shallow angle. A 2° error in either moves the fix a long way along your track. Look for an object nearer the beam (the boat’s side), or take a radar range of one of these objects, so the lines cross closer to 90°.
Practice question
What does a radar range of a charted headland give you?
- A straight line through the headland
- An exact position on the chart
- A circle centred on the headland
- A line parallel to the coastline
Show the answer
Answer: C. You are somewhere at that distance from the headland: on a circle round it.
2 · Three-point fix
The three-point fix and the cocked hat
Three bearings provide a useful check. Their triangle can reveal inconsistency, but cannot prove accuracy.
Choosing objects
Pick three charted objects you can identify for certain: a steep headland edge, a beacon, a tower, a pier end. Avoid buoys, which can drag or be out of position, and gently sloping points whose edge is hard to judge. Nearer objects reduce angular errors: at 6 nautical miles (M), a 1° error shifts the line about 0.1 M, or one cable. Choose objects about 60° or 120° apart.
Taking them
Plan the order first. Take the bearings quickly, one after the other. Start with the objects nearest ahead or astern, whose bearings change slowly, and finish with the one nearest the beam, whose bearing changes fastest. Note each bearing and the time of the last. Then convert to true and plot.
The cocked hat
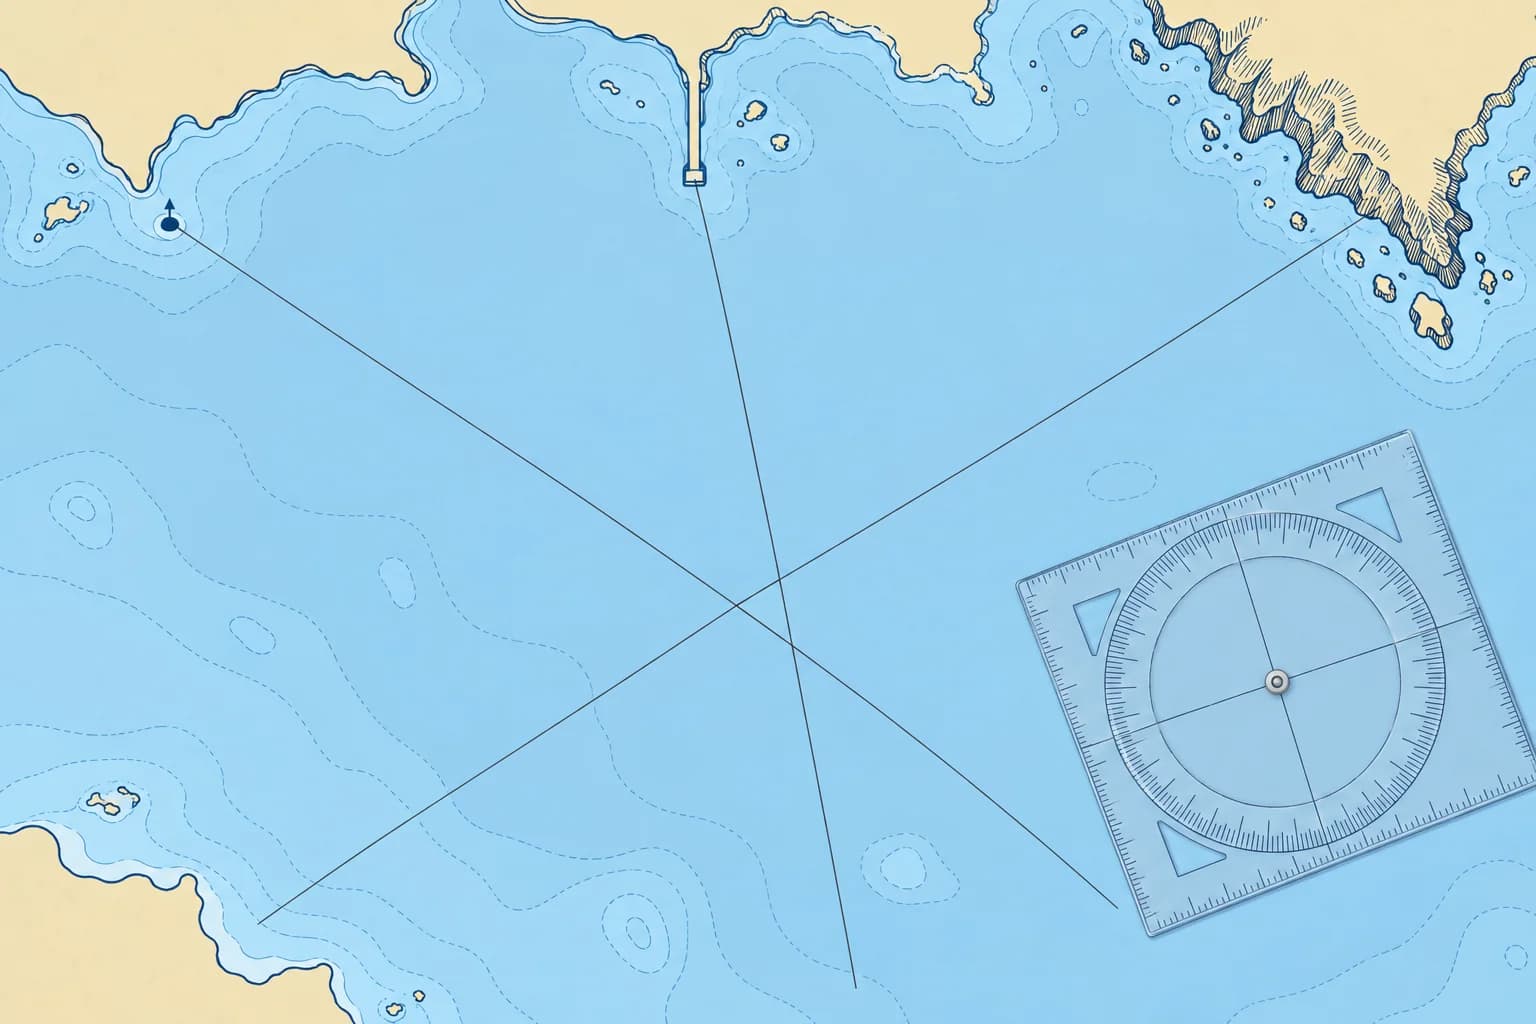
Three lines rarely meet at one point. They form a small triangle called a cocked hat. Its size shows disagreement between the plotted lines, not the full position error. A large one means a mistake: a wrongly identified object, a misread figure, variation applied the wrong way, or bearings taken too far apart in time.
Using it safely
Use the corner nearest danger as a cautious working position, not a boundary: you may be outside the triangle. Allow extra clearance. If the triangle is large, do not average it: check the objects and your arithmetic, then take a new set. A tiny cocked hat can still hide an error common to all three lines, such as unknown compass deviation, so check independently with the depth too.
Two bearings only
A two-bearing fix has no check: two lines always cross somewhere, even when one is wrong. Use it only at a good angle, and confirm it with a sounding or a third line as soon as you can.
Key figures
- Spread
- Three objects about 60° or 120° apart
- Order
- Ahead or astern first, nearest the beam last
- Error with distance
- 1° ≈ 1 cable at 6 M, 2 cables at 12 M
- Cocked hat
- Nearest-danger corner: working reference; you may lie outside
Remember
- Use three certain, charted, fixed objects about 60° or 120° apart.
- Take bearings quickly: ahead or astern first, nearest the beam last.
- Use the nearest-danger corner as a working assumption, not a boundary; you may be outside the cocked hat.
- A large cocked hat means a mistake: check and re-take, never average.
- A two-bearing fix has no built-in check.
Common mistakes
Wrong: Take the beam bearing first, while the object is easy to see.
Right: Take it last: it changes fastest, so it should be the closest to the time you record.
Wrong: Put the fix in the middle of the cocked hat.
Right: Use the nearest-danger corner as a working assumption, not a boundary: you may be outside. Keep extra clearance and re-take the bearings if the triangle is large.
Wrong: Buoys make ideal fix objects.
Right: Buoys can drag or be out of position. Prefer fixed, charted marks.
Worked case
Crossing a bay, you take bearings of a pier end 30° off the bow, a beacon abeam and a headland 30° off the stern. Plotted, they form a triangle almost 1 M across, 2 M from a reef.
Show the answer
Too big to trust. Check each object’s identity, your figures and the variation sign, then take a new set quickly: pier and headland first, the beacon abeam last. The corner nearest the reef is a working assumption, not a boundary: you may lie outside the triangle. Keep extra clearance. Compare a sounding, corrected for sounder offset and tide, with the chart to help confirm the new fix.
Practice question
In which order do you take three bearings for a fix?
- Beam first, ahead and astern after
- Nearest object first, furthest last
- Ahead or astern first, beam last
- Highest object first, lowest last
Show the answer
Answer: C. Bearings ahead or astern change slowly. The beam bearing changes fastest, so take it last, closest to the recorded time.
3 · Transits
Transits: the most accurate position line
When two charted objects line up, you are on the line through them. No compass is involved, so a transit is the most accurate position line you can get.

What a transit is
A transit is two charted objects seen exactly in line, one behind the other: a beacon and a headland, two edges of land, a pair of leading marks. You are on the straight line drawn through them and extended towards you. Spanish charts and courses call it an enfilación.
Why it is so good
A transit needs no compass, so there is no compass error, variation or deviation to apply. It is also sensitive: the further apart the two objects are, compared with your distance from the nearer one, the sooner you see them open when you move off the line. That makes transits useful for fixing your position and checking the compass.
Fixing with a transit
Cross the transit with a compass bearing taken at the moment the objects come in line, choosing an object whose bearing line crosses the transit near 90°. Plot the transit as a line through both objects, then the bearing from its object: where they cross is your fix. Pick useful transits from the chart before you need them.
Checking the compass
Measure the true bearing towards the aligned marks on the chart; convert it to magnetic. Sight them with the compass’s bearing attachment and record the boat’s heading. Compare magnetic minus compass for deviation, the boat’s compass error on that heading. True minus compass gives total compass error, or corrección total. Reduce either difference to within ±180°: positive is east, negative west. Following the line over the ground does not prove your bow points along it.
Natural transits
Edges of land, a headland and a distant island, or a beacon and a hilltop all work, as long as both are charted and you are sure what they are. A transit using a buoy is less reliable, because the buoy can shift.
Key figures
- Compass error
- None: a transit needs no compass
- Uses
- Position fixing and compass checks
- Sensitive transit
- Objects far apart; the nearer one close to you
- Spanish terms
- Enfilación; corrección total from an enfilación
Remember
- A transit is two charted objects in line: you are on the line through them.
- It needs no compass, so it is the most accurate position line.
- Cross the transit near 90° with a bearing taken as the objects line up.
- Compare the transit’s magnetic bearing with its compass bearing; deviation applies to the boat’s heading during the check.
Common mistakes
Wrong: Apply variation and deviation to a transit before plotting it.
Right: Draw it straight through the two charted objects. No compass is involved.
Wrong: Any two objects in line make a transit.
Right: Both must be charted and positively identified. A buoy can be out of position.
Worked case
Your bow points towards two charted beacons in line along 180°T. Your steering compass reads 186°C, and variation is 2°W.
Show the answer
The transit’s magnetic direction: 180°T with 2°W variation is 182°M. The compass reads 186°C, 4° more than magnetic, so deviation on this heading is 4°W. Total compass error is 6°W: 2°W variation plus 4°W deviation. This result does not establish deviation on other headings.
Practice question
Why is a transit more accurate than a compass bearing?
- It is always closer to the boat
- It is corrected for deviation
- It gives a circle of position
- It needs no compass at all
Show the answer
Answer: D. With no compass involved, there is no compass error to apply or get wrong.
4 · Bearing and range
Bearing and range, and bearing with a depth contour
One object can fix you if you know both its bearing and your distance from it. A clear depth contour can serve as the second line.
One object, two lines
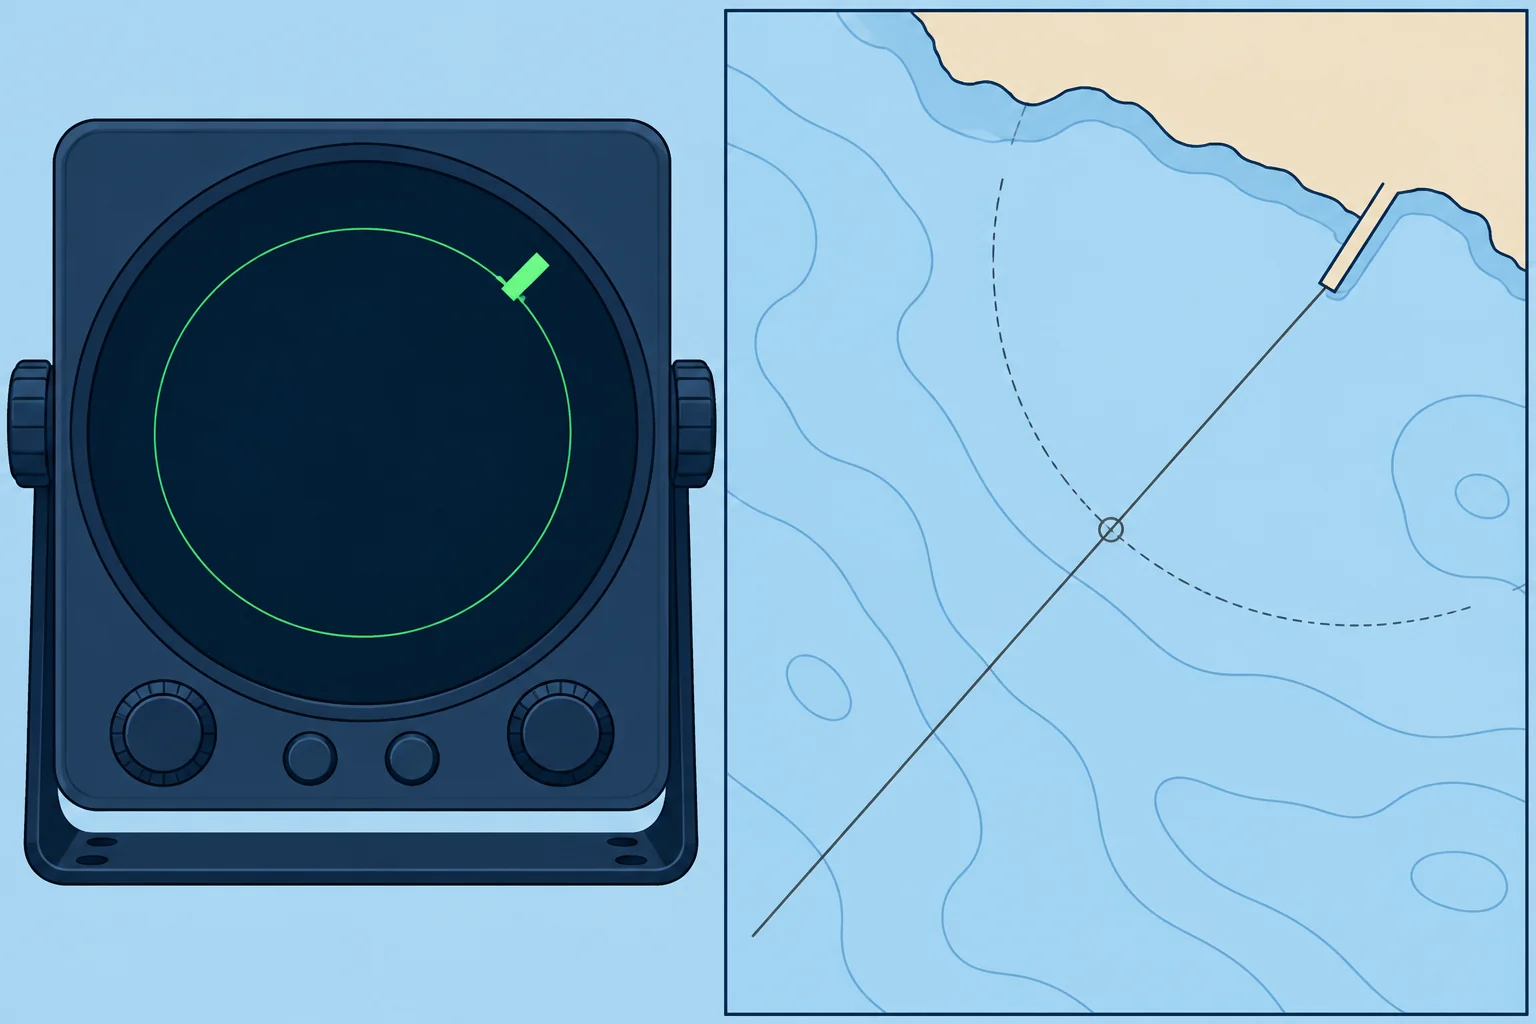
A bearing gives a straight line through an object; a range, your distance from it, gives a circle around it. They cross at right angles. Choose the crossing on the reciprocal bearing (the opposite direction) from the object: if it bears 030°T from you, you bear 210°T from it. Spanish courses call this a fix by demora y distancia.
Ranges by radar
Radar generally measures range more accurately than bearing because its beam spreads echoes sideways. Combine a compass bearing and radar range to the same identifiable point. Multiple radar ranges can give an excellent fix when their circles cross at good angles. Measure to a steep, clearly charted feature such as a cliff or a pier head, not a low beach whose edge moves with the tide.
Other ranges
A plotter gives the range and bearing to a waypoint on a charted object. That is quick, but it comes from the same global navigation satellite system (GNSS) receiver, so it cannot independently check that receiver’s position.
Bearing and depth contour
Where the seabed slopes clearly, a depth contour can be the second line. If your echo sounder shows depth below the transducer (the sounder’s underwater sensor), add its depth below the waterline, then subtract the height of tide (how far the water is above chart datum). That gives the charted depth. Where the bearing crosses that contour, you are. The Tides unit shows how to find the height of tide.
When contours fail
A flat or irregular seabed gives no usable contour, and a bearing may cross the same contour several times. Use contours only where they are steep and distinct, and check the result with the next sounding.
Key figures
- Bearing and range
- Lines cross at 90° on one object
- Radar
- Ranges accurate; bearings less precise
- Charted depth
- Reading below transducer + transducer depth − height of tide
- Spanish terms
- Demora y distancia; situación por veriles
Remember
- A bearing and a range of one object cross at right angles: a strong fix.
- Radar ranges are accurate; radar bearings are less precise.
- Reduce a sounding to charted depth before matching it to a contour.
- Use depth contours only where the seabed slopes clearly.
Common mistakes
Wrong: Radar bearings are as good as radar ranges.
Right: The radar beam spreads an echo sideways. Trust ranges more than bearings.
Wrong: Compare the sounder reading straight with the charted depth.
Right: Allow for the transducer depth and subtract the height of tide first.
Wrong: A GNSS range to a waypoint checks the GNSS.
Right: It comes from the same receiver. Check with an independent line: a compass bearing, a radar range or the depth.
Worked case
A pier bears 030°T, already corrected, at a radar range of 2.4 M. The sounder reads 15.2 m below a transducer 0.4 m deep; tide height is 2.6 m. The chart at your plotted fix shows 6 m. Do you accept it?
Show the answer
No. The reduced sounding is 15.2 + 0.4 − 2.6 = 13.0 m, which conflicts with 6 m on the chart. Check the pier’s identity, measurements, plotting and sounder reference before accepting the fix or closing danger.
Practice question
Which radar measurement is usually more accurate?
- The radar bearing
- Both measurements
- The radar range
- The gain setting
Show the answer
Answer: C. Radar measures distance precisely, but its beam width spreads echoes sideways and blurs bearings.
5 · Which fix to trust
Which fix to trust: reliability and cross-checks
Every fix has errors. Rank your methods, know what goes wrong with each, and check any position with a second, independent method.

A rough ranking
With certain marks, good crossing angles and sound observations, a rough order is: a sensitive transit crossed near 90° by an independent line; radar ranges, or a bearing and range of a close, steep object; a three-point compass fix checked for common errors; a two-bearing fix; a bearing with a depth contour. Geometry and observation quality matter more than the method’s name. GNSS usually gives a precise position, but still needs an independent check.
Where errors come from
Misidentification is the biggest: the wrong headland or tower gives a confident, wrong fix. Then come compass errors, such as variation applied the wrong way or unknown deviation; bearings taken too slowly while the boat moves; old or poor chart surveys; and plotting slips. Distance from the object magnifies every angular error.
Independent checks
Check a fix with something it does not depend on. Reduce the sounding to chart datum before comparing it with charted depths. Compare a GNSS position with a compass bearing or a radar range. Compare the fix with your estimated position (EP), worked out from heading, distance, leeway and tidal stream. A large difference means something is wrong: find out what before you act on either.
How often
Choose an interval short enough to detect an error and act before you could reach danger. Base it on speed, position uncertainty and distance to hazards. Strong streams and poor visibility can increase uncertainty. Near danger, monitor continuously and obtain frequent independent fixes. Fix before altering course near danger.
Paper and electronics
In open water, plotting the GNSS position on the paper chart every hour may give a useful recent starting point if the electronics fail. Shorten that interval when conditions require it. The Electronic navigation unit covers GNSS errors and interference.
Key figures
- Especially strong
- Sensitive transit crossed near 90° by an independent line
- Least reliable
- Bearing and depth contour over a gentle slope
- Biggest error
- A misidentified object
- Cross-checks
- Depth, a second method, the EP
Remember
- With certain marks and good observations, transits and ranges rank highly; geometry matters more than the method’s name.
- Misidentifying an object is the most dangerous error.
- Check independently; reduce soundings to chart datum before comparing them with the chart.
- Fix more often near danger and before altering course.
Common mistakes
Wrong: A GNSS position needs no checking.
Right: Check it independently with a reduced sounding, a compass bearing or a radar range.
Wrong: If the fix and the EP disagree, trust the fix.
Right: Find the cause first: the fix may use a misidentified object, or the EP a wrong stream.
Worked case
Approaching an unfamiliar coast in haze, your GNSS position puts you 2 M off, in about 40 m of water. The sounder reads 12 m. You can just see a headland you think is the one on the chart.
Show the answer
Reduce speed or stop if safe. Avoid closing the coast; do not choose a new heading from the suspect GNSS fix. Retrace a known-clear approach track only if safe. Reduce the sounding for sounder offset and tide. Positively identify the headland before using its bearing and radar range. Compare with your EP and another independent check. Resolve the discrepancy before continuing.
Practice question
Which fix is usually the most reliable?
- Two compass bearings crossing at about 30°
- A bearing and contour over a gentle slope
- A single bearing of a clearly visible buoy
- A transit crossed by a bearing at about 90°
Show the answer
Answer: D. With certain marks and sound observations, the transit has no compass error and the stated 90° crossing gives strong geometry. A beam bearing alone does not specify that angle.